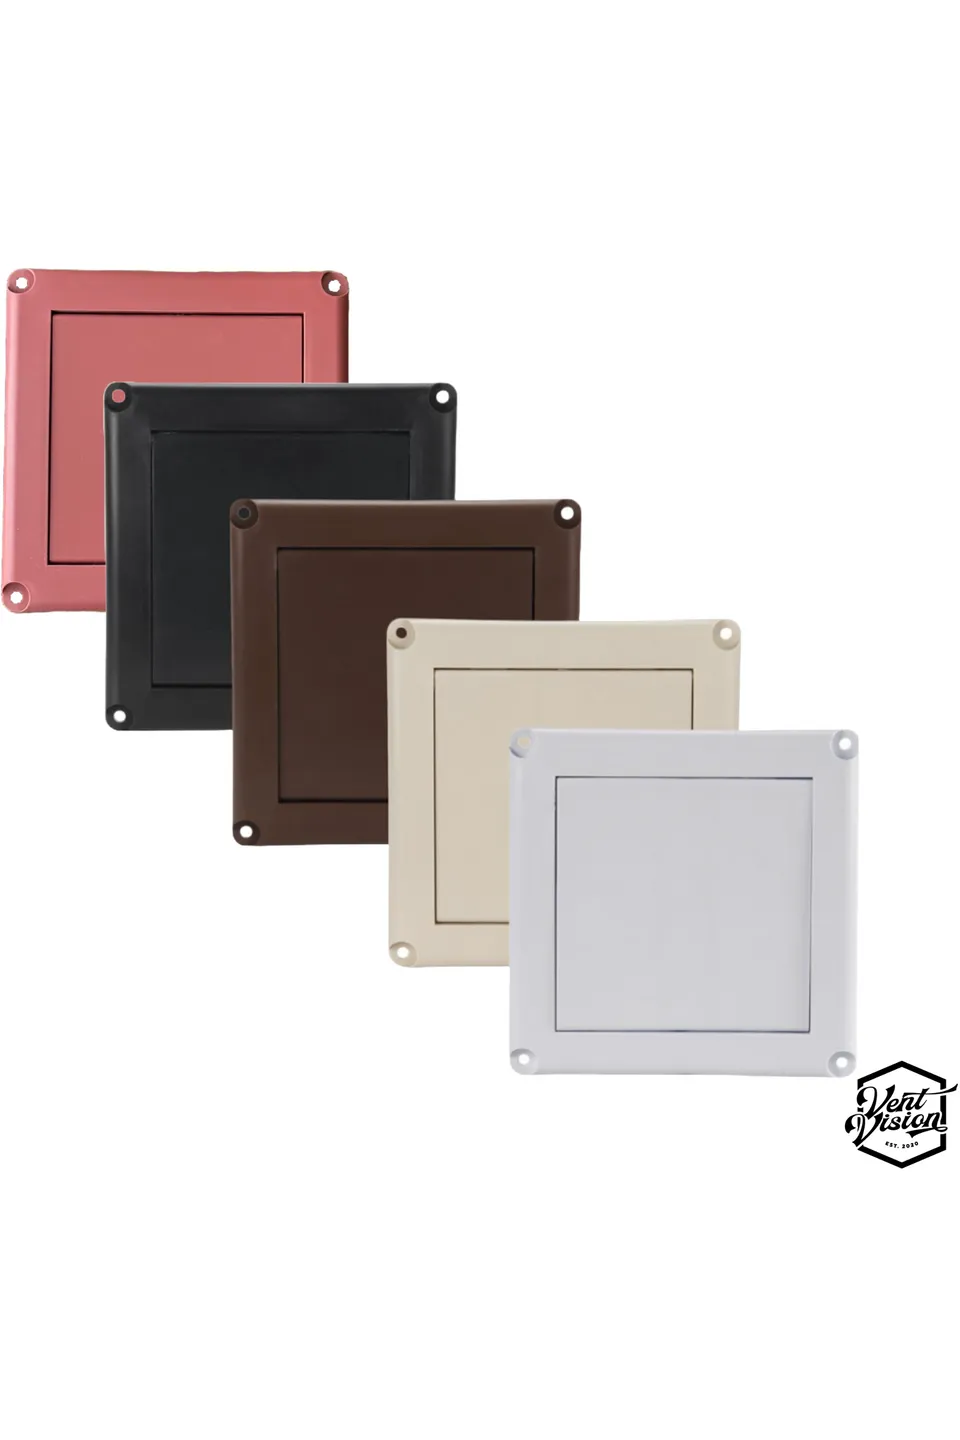

A dryer may seem like a simple appliance: put in wet clothes, choose a cycle, and wait for them to come out dry. Behind that familiar process, however, is a ventilation system that has to move warm, moisture-filled air away from the appliance and outside the building. At the end of that system is a small component that often receives very little attention.
That component is a vent flap.
A vent flap can look almost too simple to matter. It may be nothing more than a lightweight piece of metal or plastic that moves back and forth. Yet its position at the outdoor end of a ventilation opening gives it an important role. It needs to allow exhaust air to escape while helping limit unwanted entry when the system is not operating.
For a dryer, this simple movement can make a difference. A flap that is damaged, obstructed, or unable to move freely may interfere with the exhaust path. On the other hand, a properly selected and maintained flap can help keep the outside environment where it belongs.
Understanding how vent flaps work makes it easier to spot problems, choose replacement parts, and avoid common mistakes. You do not need to be an HVAC expert to understand the basics. Think of a vent flap as a small door that responds to airflow rather than a person.
What Are Vent Flaps?
Vent flaps are movable covers or panels fitted over certain ventilation openings. They are designed to respond to air movement.
When air is pushed outward through the opening, the flap moves away from the vent so the air can escape. When the airflow stops, the flap generally returns toward its closed position.
The idea is quite similar to a lightweight swinging door. Push against one side and it opens; stop pushing and it moves back. The difference is that a ventilation flap responds to pressure from moving air rather than someone opening it by hand.
These components are used in various ventilation applications, but their design and purpose can differ depending on the system.
A flap used on a dryer exhaust should be appropriate for dryer exhaust. A component designed for another type of ventilation should not automatically be assumed to work properly on a dryer.
That distinction is important because dryer exhaust contains warm, humid air and may carry small amounts of lint.
Why Does a Dryer Need an Outdoor Flap?
A dryer needs a path to discharge the air produced during operation. That air contains moisture removed from clothing, so sending it outside is an important part of normal dryer operation.
But when the dryer is turned off, there is no reason for the exterior opening to remain completely exposed.
An open duct could provide a convenient route for insects, dirt, leaves, rain, and outdoor air. A suitable flap helps reduce that exposure.
Imagine leaving a window open in your house all day and night. Fresh air can enter, but so can rain, insects, dust, and cold or hot outdoor air. Closing the window when you do not need it provides a simple barrier.
A vent flap serves a somewhat similar purpose at the end of the exhaust opening.
How Does a Vent Flap Operate?
The mechanism is usually straightforward.
When the dryer begins operating, air travels through the exhaust duct toward the exterior. As that air reaches the termination, it pushes against the flap. The flap moves outward, creating a path for the exhaust to leave.
When the dryer stops, the airflow decreases or disappears. The flap then moves back toward its resting position.
For this to happen consistently, the flap must be able to move without excessive friction or obstruction.
Dust, lint, corrosion, nesting material, or physical damage can interfere with movement. A flap that has become stiff may not open enough during a drying cycle. One that has been bent may fail to close afterward.
The mechanism may be simple, but it still needs to function correctly.
Why Free Movement Matters
A flap should not require significant force to open.
If the flap is unusually heavy, warped, stuck, or obstructed, the dryer may have difficulty pushing exhaust air through the termination. That does not necessarily mean the flap is the only problem, but it is an area worth examining.
Think of blowing through a straw. A clean, open straw allows air to pass easily. Pinch the straw slightly, and you have to blow harder to move the same amount of air.
The same basic idea applies to ventilation. Any unnecessary restriction can affect how easily air travels.
A flap designed for the application should therefore move freely while still providing the intended protection when the system is inactive.
The Difference Between a Flap and a Fixed Cover
Not every vent termination has a moving part.
A fixed cover remains in place regardless of whether air is moving. A flap, by contrast, changes position in response to airflow.
For applications that require a moving closure, the ability to open and close is part of the component's function.
The choice between designs depends on the type of ventilation system.
For dryer exhaust, the applicable installation requirements and the appliance manufacturer's instructions should guide the choice. The International Residential Code includes requirements for dryer exhaust duct terminations, including provisions for a backdraft damper and restrictions on screens at the termination.
This is one reason homeowners should avoid choosing a vent component simply because it looks similar to the original.
Understanding Dryer Vent Cover Flaps
The phrase dryer vent cover flaps describes the movable sections found on certain exterior dryer exhaust covers.
Some designs use one larger flap, while others use multiple smaller panels. Their appearance can vary, but the basic concept remains similar: exhaust air pushes the moving section open, and the section returns toward its closed position after airflow stops.
The number of flaps does not automatically determine how good a product is.
Instead, look at whether the termination is designed for dryer exhaust, whether the moving parts operate smoothly, whether the opening provides a suitable path for exhaust, and whether the product fits the duct and installation requirements.
A simple component that performs reliably can be more useful than a complicated design with unnecessary features.
What Happens When a Flap Gets Stuck?
A stuck flap can create different problems depending on whether it is stuck open or closed.
If it stays closed while the dryer is running, exhaust air may have difficulty leaving the duct.
If it stays open after the dryer stops, the exterior opening may remain exposed.
Neither condition should simply be ignored.
The cause may be something minor, such as a leaf caught in the mechanism. It could also be a damaged hinge, accumulated lint, corrosion, or an underlying problem with the duct.
Do not force a flap repeatedly if it feels stuck. Forcing it can bend the component or damage the surrounding termination.
Instead, inspect the area carefully and determine why it is not moving.
Why Lint Deserves Special Attention
Lint is one of the most important things to consider when dealing with dryer exhaust.
The dryer collects a substantial amount of lint through its lint filter, but the exhaust system can still carry some particles. If material collects around the exterior termination, it can interfere with the movement of the flap.
A buildup around the outlet may also be a sign that the exhaust system deserves closer inspection.
One important point is that adding a fine screen is not a good solution for dryer exhaust. Screens can collect lint and create additional resistance. The International Residential Code specifically prohibits screens at dryer duct terminations.
The goal should be to keep the exhaust path open while using a suitable termination to provide the necessary exterior protection.
Can Weather Damage a Vent Flap?
Outdoor components have a difficult job because they have to deal with changing conditions year after year.
Sunlight can cause certain plastics to become brittle. Rain and moisture can contribute to corrosion in susceptible metals. Freezing temperatures can affect materials and moving parts. Wind can repeatedly move a loose flap.
Over time, these conditions can cause wear.
A flap that worked perfectly when it was installed may eventually become noisy, loose, cracked, or stiff.
This is one reason periodic visual inspections are useful. You do not have to become an expert inspector. Simply look for obvious signs of damage or abnormal movement.
Signs Your Vent Flap May Need Attention
There are several clues that a vent flap may not be functioning as intended.
The Flap Does Not Move During Dryer Operation
If the dryer is running and the exterior flap remains completely still, check whether the system is exhausting properly. A blockage or restriction elsewhere in the duct could also be responsible.
The Flap Is Permanently Open
A flap that never closes may have a damaged mechanism or an obstruction preventing it from returning to position.
The Flap Rattles Excessively
A small amount of movement caused by wind may be normal, but persistent rattling could indicate a loose component or worn connection.
The Flap Looks Cracked or Bent
Physical damage can prevent proper movement. A warped panel may also leave gaps around the opening.
Lint Builds Up Around the Outlet
Heavy lint accumulation should not be dismissed as a cosmetic issue. It can indicate that the exhaust path needs attention.
How to Inspect a Vent Flap Safely
A basic visual inspection is relatively simple.
Start by looking at the exterior termination. Check whether the flap appears intact and whether anything is blocking its movement.
Run the dryer under normal conditions and observe the flap from a safe position. You should be able to see whether exhaust air is causing the flap to respond.
After the cycle or test ends, check whether the flap returns toward its closed position.
Avoid reaching inside the duct while the dryer is operating. Do not put your hands near moving parts, and do not attempt to repair electrical or mechanical components that you are not qualified to handle.
If the flap behaves strangely, treat the observation as a clue rather than immediately assuming that replacing it will solve the problem.
A Bad Flap May Not Be the Real Problem
This is an important point.
Suppose clothing suddenly takes much longer to dry. You inspect the outside vent and notice that the flap barely moves. It may be tempting to replace the flap immediately.
But the weak airflow could have another cause.
The duct might contain lint buildup. A section could be crushed. There could be too many bends. The duct could be excessively long, or the termination could be unsuitable.
Replacing the exterior component without checking the rest of the system may leave the actual problem untouched.
It is similar to noticing that a car's headlights are dim and immediately replacing the bulbs without checking whether the battery or electrical system has a problem. Sometimes the visible symptom is not the root cause.
Choosing a Replacement Flap
If the existing termination is damaged, replacement may be appropriate.
Begin by identifying the duct size and the type of termination currently installed. Then check the specifications of the replacement product.
The new component should be designed for the intended application. It should also be compatible with the duct configuration and installation location.
Consider the material as well. A product exposed to harsh outdoor conditions needs to be capable of handling those conditions.
Pay attention to the moving mechanism. A flap that is difficult to move by hand when the system is inactive may not be the best choice.
Do not choose solely based on appearance. A stylish cover that restricts exhaust can be a poor tradeoff.
Single-Flap and Multi-Flap Designs
Exterior dryer terminations can have different flap arrangements.
A single flap has one moving panel. This design can be straightforward and easy to understand.
A multi-flap design uses several panels that move in response to airflow.
Neither option is automatically superior in every situation.
The important factors are compatibility, airflow, construction quality, proper movement, weather protection, and compliance with applicable requirements.
The product's intended purpose should always take priority over the number of moving pieces.
Should You Clean the Flap?
Yes, keeping the exterior termination reasonably free of visible debris is sensible.
Leaves, dirt, insects, and other materials can interfere with movement.
Before cleaning, make sure the dryer is turned off. Remove obvious debris from the outside without damaging the flap or surrounding material.
If lint has accumulated heavily around the opening, do not assume that wiping the outside is enough.
A dryer exhaust duct may also need inspection or cleaning, particularly if the dryer is taking longer than normal to dry clothing.
Cleaning the flap is useful maintenance, but it is not a substitute for maintaining the complete exhaust path.
When Is Professional Help a Better Choice?
A homeowner may be comfortable inspecting an exterior flap, but some situations call for professional attention.
Consider getting help if the duct is difficult to access, the flap repeatedly becomes blocked, the dryer has developed a major change in performance, or there is evidence of substantial lint accumulation.
Professional inspection can be especially useful when the duct runs a long distance through walls, ceilings, or other inaccessible areas.
The exterior flap is only the final part of the system. A technician can look beyond the visible opening and assess whether the duct itself has a restriction or installation problem.
What Vent Vision Recommends
Vent Vision understands that reliable ventilation depends on more than one component. Small exterior parts deserve attention because they interact with the larger duct system.
For homeowners and professionals, choosing appropriate equipment and understanding what each part is supposed to accomplish can make inspection and maintenance much more straightforward.
The most useful approach is to look at the complete system instead of treating a damaged flap as an isolated problem.
Common Mistakes to Avoid
One mistake is ignoring a flap that has stopped moving.
Another is using an inappropriate screen to keep insects out of a dryer termination. As mentioned earlier, screens can trap lint and restrict exhaust.
Some people also paint over moving parts or apply materials that interfere with the flap's movement. The mechanism needs room to operate.
Another mistake is selecting a replacement based only on outside dimensions. The duct connection and actual airflow opening matter too.
Finally, do not assume that a flap problem automatically means the entire dryer needs replacing. The appliance may be functioning normally while the exhaust system needs maintenance.
Simple Maintenance Habits Can Make a Difference
Good dryer maintenance starts with the basics.
Clean the lint filter according to the appliance manufacturer's recommendations. Keep the area around the dryer clear. Watch for changes in drying time and pay attention to unusual odors or excessive heat.
Periodically inspect the exterior termination.
If you notice that the flap no longer moves as it once did, investigate before the issue becomes more serious.
These small habits are much like checking the tires and oil in a car. They take little time compared with dealing with a larger problem that could have been detected earlier.
Final Thoughts
Vent flaps may be small, but they serve a useful purpose at the end of many ventilation systems. For dryer exhaust, a suitable moving termination provides a path for warm, moisture-filled air to escape while helping protect the duct from the outdoor environment when the dryer is off.
The flap needs to move freely, remain in good condition, and work with a properly designed exhaust system. Dirt, lint, weather, corrosion, and physical damage can all affect its performance.
If the flap becomes stuck, remains open, fails to respond during dryer operation, or develops visible damage, investigate the problem instead of ignoring it. Remember that the flap may be only one part of a larger exhaust issue.
Choosing the correct replacement also matters. Look beyond appearance and consider the intended application, duct size, airflow, material, and installation requirements.
A little attention to this small component can help you catch ventilation problems earlier and keep the dryer exhaust system working as it should. The best results come from treating the vent, duct, termination, and dryer as parts of one connected system rather than as separate pieces.

























Sign in to leave a comment.