
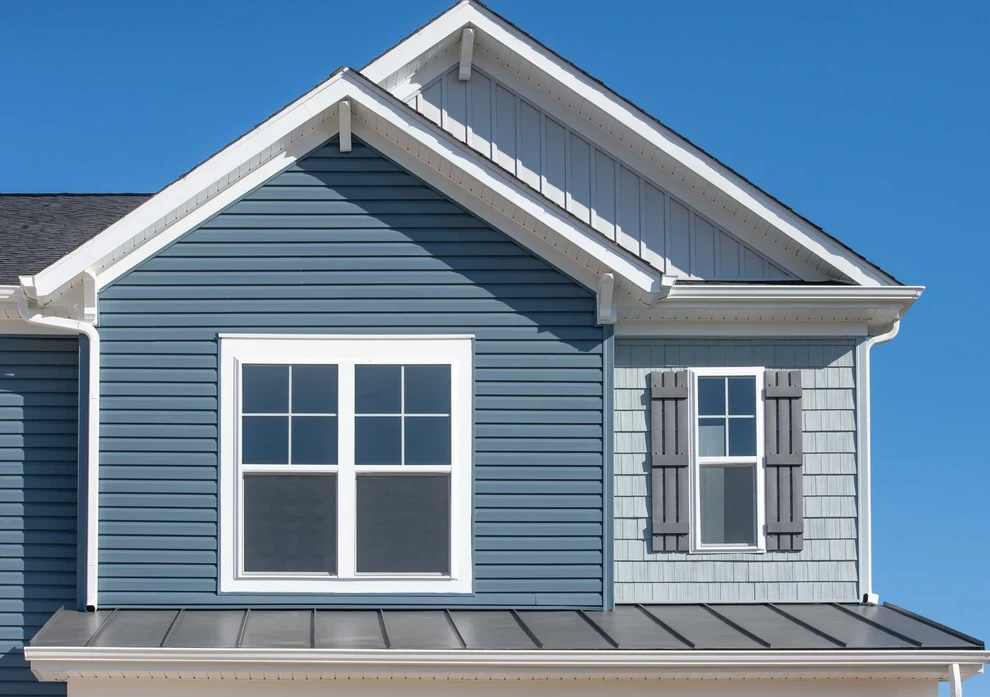
Replacing your home’s siding is one of the most effective ways to boost curb appeal, increase energy efficiency, and protect your home from weather damage. Whether your siding is cracked, faded, or simply outdated, a professional siding replacement Calgary can completely transform the look and performance of your exterior.
But if you’ve never gone through this kind of project before, it’s natural to wonder what exactly happens during the process. Understanding the steps can help you prepare your home, avoid surprises, and ensure a smooth, stress-free experience.
Here’s a complete guide on what to expect during the siding replacement process — from the initial inspection to the final walkthrough.
1. Initial Consultation and Inspection
Every siding replacement project starts with an inspection and consultation. A siding professional will visit your home to assess the current condition of your exterior, identify problem areas, and discuss your goals.
They’ll check for:
- Warping, cracks, or rot
- Signs of water damage or mold
- Gaps or insulation issues
- Structural integrity of walls and framing
During this stage, you’ll also review material options such as vinyl, fiber cement (like James Hardie), wood, or engineered siding. The expert will provide recommendations based on your home’s design, climate, and budget.
You’ll receive a detailed estimate and project timeline, outlining everything from materials to labor costs.
2. Choosing Your Siding Material and Style
Next, it’s time to select your siding material and design. Homeowners often choose siding based on a mix of performance, appearance, and maintenance needs.
Here are a few popular choices:
- Vinyl siding: Low-cost, low-maintenance, and available in many colors.
- Fiber cement siding: Extremely durable, fire-resistant, and mimics real wood.
- Wood siding: Natural look and timeless charm, though it requires more upkeep.
- Engineered wood siding: Offers the beauty of wood with greater durability and less maintenance.
You’ll also decide on the color, texture, and trim details, ensuring your new siding matches your home’s overall style and enhances its curb appeal.
3. Preparing Your Home and Work Area
Before installation begins, the siding team will prepare your property. This includes:
- Moving outdoor furniture, potted plants, and décor away from the walls.
- Covering landscaping or delicate areas near the siding.
- Ensuring electrical fixtures and exterior lighting are protected.
Inside your home, it’s a good idea to remove items from walls since vibrations during installation may cause them to fall.
The goal of this step is to protect your property and ensure the crew has clear, safe access to your home’s exterior.
4. Removing the Old Siding
Once everything is prepped, contractors begin removing the existing siding. This part can be noisy and messy, but it’s essential for proper installation.
As old siding is taken down, professionals will inspect what’s underneath — including the sheathing, insulation, and framing — for any hidden damage or rot.
If issues like water damage or mold are found, they’ll repair them before continuing. This ensures your new siding sits on a solid, healthy foundation and performs effectively for years to come.
5. Installing the House Wrap or Insulation
Before new siding goes up, most contractors install a house wrap or insulation barrier.
This layer acts as a moisture and air seal, improving your home’s energy efficiency while preventing mold and rot. In colder climates, additional insulation may also be added to reduce heat loss and keep your home comfortable year-round.
This step is critical for maximizing the performance of your new siding — especially if you’re upgrading to premium materials like fiber cement.
6. Siding Installation
Now comes the main event — installing your new siding. The installers begin attaching panels or planks from the bottom up, ensuring each piece is aligned and securely fastened.
Corners, trim, and joints are carefully sealed to create a watertight finish. Depending on your home size and the material chosen, this process can take anywhere from a few days to a week or more.
Throughout the installation, the crew will:
- Cut and fit siding precisely to your home’s dimensions
- Ensure color and pattern consistency
- Seal gaps and joints for maximum weather resistance
This stage is where your home’s exterior starts to take on its new look — and you’ll immediately notice the difference in texture and color.
7. Finishing Touches and Cleanup
After all panels are installed, the team will focus on finishing details, including trim, soffits, fascia, and caulking. These touches not only complete the look but also add extra protection against water infiltration.
Once the installation is done, the crew will:
- Remove debris and old siding materials
- Clean the work area thoroughly
- Conduct a final inspection to ensure everything meets quality standards
A good siding company will walk you around your property to review the finished work and answer any questions.
8. Final Inspection and Maintenance Tips
Before closing out the project, your siding contractor will perform a final quality check and verify that the siding is properly installed, sealed, and aligned.
You’ll also receive maintenance recommendations such as:
- How to clean and care for your new siding
- When to schedule inspections
- What to watch for in case of future damage
Following these simple maintenance steps will help you get the most out of your investment and keep your siding looking new for decades.
Final Thoughts
Siding replacement is a big project, but it’s also one of the most rewarding upgrades you can make to your home. It improves curb appeal, boosts energy efficiency, and protects your property from the elements for years to come.
By understanding the process and working with experienced professionals, you can ensure your siding replacement goes smoothly — from the first consultation to the final walkthrough.


Sign in to leave a comment.