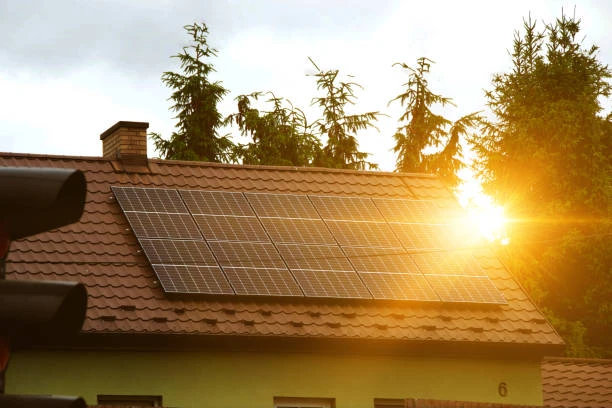
Installing solar panels at home is a smart way to reduce electricity bills, enhance energy independence, and promote environmental sustainability. Follow this comprehensive guide to navigate the entire process, from planning and selecting components to installation and maintenance.
Assess Your Energy NeedsCalculate Energy Consumption: Review your electricity bills to determine your average daily and monthly energy consumption in kilowatt-hours (kWh). This information helps you gauge how many solar panels you need.
Set Goals: Decide whether you want the solar panel system to cover all or part of your energy needs. This will influence the size and number of panels required.
Evaluate Your RoofRoof Condition: Inspect your roof to ensure it is structurally sound and can support the weight of the solar panels. The roof should have a lifespan that matches or exceeds the solar panels' expected lifespan.
Sunlight Exposure: Determine the best location for the panels. Ideally, your roof should face south in the northern hemisphere or north in the southern hemisphere. Ensure there are no obstructions, such as trees or buildings, that could cast shadows.
Choose the Right Solar Panels and ComponentsTypes of Panels: Select between monocrystalline (high efficiency, more expensive), polycrystalline (moderate efficiency, less expensive), and thin-film panels (less efficient, more flexible).
Inverters: Choose an inverter to convert the DC electricity generated by the panels into AC electricity for your home. Options include string inverters, micro-inverters, and power optimizers.
Mounting Systems: Pick a mounting system compatible with your roof type to securely attach the panels.
Obtain Necessary Permits and ApprovalsLocal Regulations: Consult your local building authority to understand the required permits and zoning laws. Ensure compliance with all local regulations.
Utility Company Approval: If you plan to connect to the grid, obtain approval from your utility company and learn about net metering policies.
Install the Mounting SystemMark Installation Points: Plan and mark the points on your roof where the mounting brackets will be installed. Ensure accurate spacing and alignment.
Secure Mounting Brackets: Attach the mounting brackets securely to the roof, ensuring they are firmly anchored and level.
Install Solar PanelsAttach Panels: Secure the solar panels to the mounting brackets. Make sure each panel is properly aligned and securely fastened.
Electrical Connections: Connect the panels in series or parallel, depending on your system design. Use appropriate connectors and ensure all connections are tight and secure.
Install Inverter and Other Electrical ComponentsMount Inverter: Install the inverter close to your main electrical panel, ideally in a cool, shaded location to prevent overheating.
Wiring: Run electrical wiring from the solar panels to the inverter. Use conduit to protect the wires and ensure safety.
Grounding: Properly ground the system to prevent electrical faults and ensure safety.
Connect to Your Home's Electrical SystemBreaker Panel Connection: Connect the inverter output to your home’s breaker panel. You may need to install a new breaker dedicated to the solar system.
Utility Grid Connection: If your system is grid-tied, follow your utility company’s guidelines for connecting the system to the grid.
Inspection and TestingLocal Authority Inspection: Schedule an inspection with your local building authority to verify the system meets all regulations and safety standards.
System Testing: Test the system to ensure it is operating correctly. Verify the inverter output and check for any issues.
Activate and Monitor the SystemTurn On the System: Once approved, turn on the system and start generating electricity.
Monitor Performance: Use monitoring software or tools provided by your inverter manufacturer to track the system’s performance and energy production.
Maintenance and UpkeepRegular Inspections: Periodically inspect the panels and system components to ensure they are clean and free from damage.
Cleaning: Clean the panels as needed to remove dust, dirt, and debris that can reduce efficiency.
Professional Maintenance: Schedule regular professional inspections and maintenance to ensure optimal performance and address any potential issues.
Tips for a Successful Installation
Professional Help: Consider hiring a professional installer for complex tasks or if you’re unfamiliar with electrical work. This ensures safety and compliance with regulations.
Warranty and Support: Choose equipment with good warranties and reliable customer support to protect your investment and provide assistance if needed.
By following these steps, you can successfully install a solar panel system for your home, enjoy significant energy savings, and contribute to a more sustainable future.


Sign in to leave a comment.