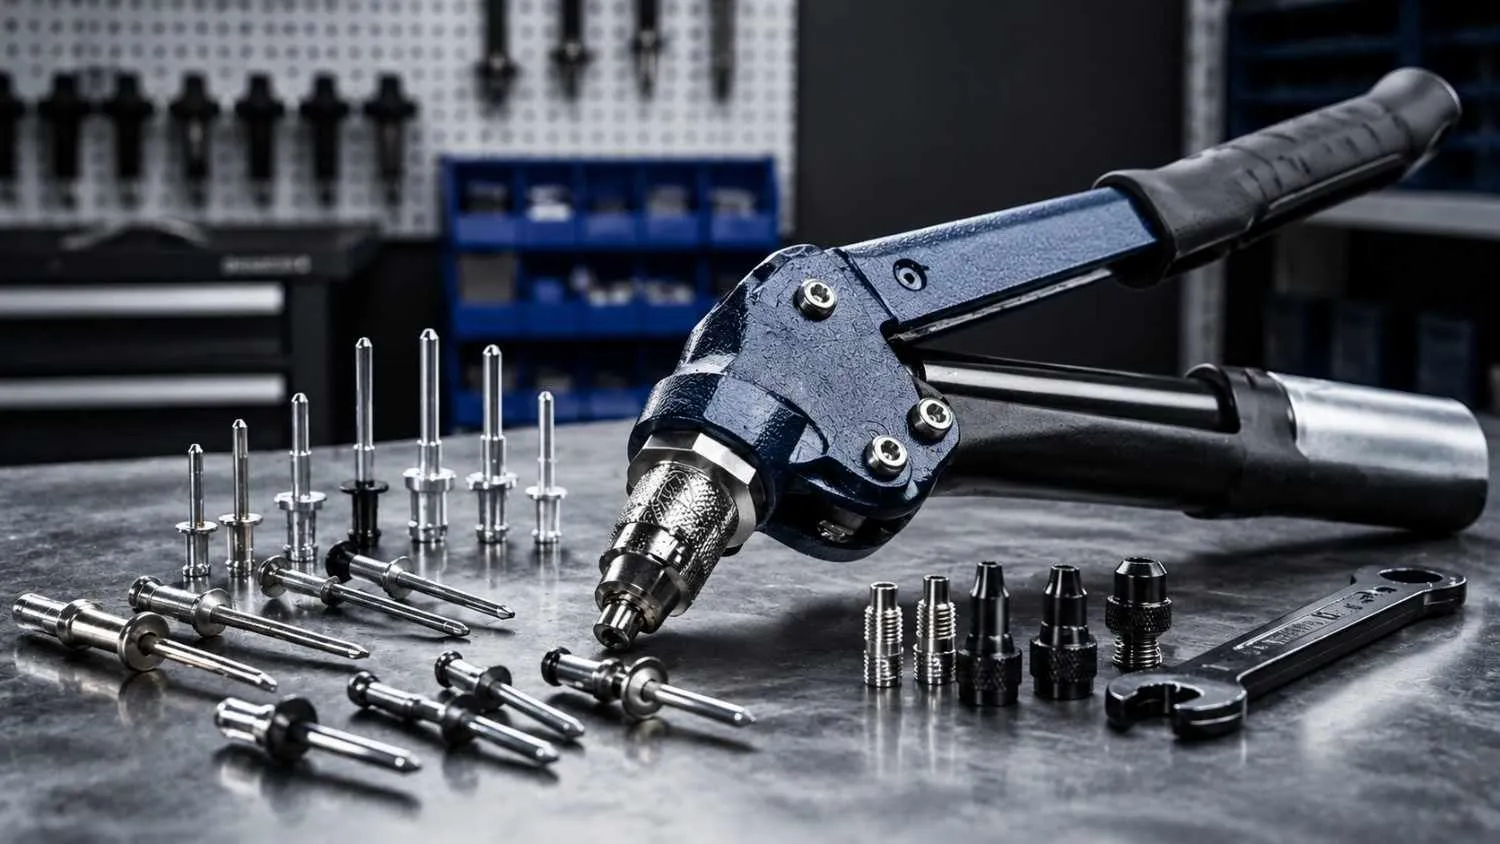


A rivet tool fails for predictable reasons — worn mandrels, misaligned jaws, insufficient pulling force, or blocked nosepieces. Most issues stem from lack of maintenance or incorrect rivet sizing. Identifying the exact fault early prevents downtime and extends tool life. This guide walks through the seven most common problems technicians encounter and gives you clear, actionable fixes for each.
Why Rivet Tool Problems Happen
Riveting is a high-cycle operation. In industrial environments, a single tool can perform hundreds of pulls per shift. That level of mechanical stress makes wear inevitable — but preventable failure is a different matter entirely. The majority of field complaints trace back to three root causes: poor maintenance habits, incompatible consumables, and operator technique errors.
Understanding the cause before applying a fix saves time and protects the tool from further damage.
Problem 1: The Rivet Is Not Being Set Properly
What it looks like
The mandrel pulls through but the rivet body does not expand fully. You get a loose fastener, visible gaps, or a rivet that spins freely in the hole.
How to fix it
- Check that you are using the correct rivet diameter for the nosepiece size.
- Confirm the grip range matches the material thickness being fastened.
- Inspect the nosepiece for wear — a rounded or cracked tip reduces clamping force.
- Replace the nosepiece if there is visible deformation.
Problem 2: Mandrel Breaks Before the Rivet Sets
What it looks like
The stem snaps prematurely, before the rivet head is fully seated. This often leaves the mandrel embedded in the rivet body.
How to fix it
- Switch to rivets from a verified supplier — inconsistent mandrel tensile strength is a common cause.
- Check that the pulling force of the tool matches the rivet's required breakload specification.
- Avoid using rivets past their shelf life; corrosion weakens the mandrel notch.
Problem 3: Mandrel Stem Gets Stuck in the Tool
What it looks like
After setting a rivet, the broken mandrel stem does not eject into the collection chamber. The tool jams on the next cycle.
How to fix it
- Clear the nosepiece channel using the ejection pin or a thin rod — never use excessive force.
- Empty the mandrel collection container regularly; an overfull chamber creates backpressure.
- Lubricate the jaw mechanism lightly with machine oil every 200–300 cycles.
- Inspect the jaw chuck for debris buildup and clean with a dry brush.
Problem 4: Tool Requires Excessive Force to Operate
What it looks like
The handles are stiff, require multiple strokes, or cause operator fatigue faster than usual. On pneumatic models, the trigger response feels sluggish.
How to fix it
- For manual tools: lubricate the pivot points and return spring with light machine oil.
- Check the spring tension — a fatigued return spring is a frequent cause of stiff handles.
- For pneumatic rivet tools: verify the air supply pressure meets the tool's rated PSI (typically 90–100 PSI).
- Drain moisture from the air compressor tank — water contamination thickens internal components.
Problem 5: Rivet Head Cracks or Deforms on the Surface
What it looks like
The visible rivet head on the front face shows cracking, flattening, or an uneven flange. This weakens the joint and can compromise structural integrity.
How to fix it
- Ensure the nosepiece is seated flush against the workpiece before pulling — angled contact deforms the head.
- Confirm the rivet material matches the base material. For example, using steel rivets on aluminium sheet causes galvanic stress concentrations.
- Reduce pulling speed on high-torque pneumatic tools when working with softer materials like aluminium or copper.
Problem 6: Jaws Are Worn or Slipping
What it looks like
The tool grips the mandrel initially but loses traction mid-pull. You hear a slipping or grinding sound, and the rivet fails to set.
How to fix it
- Remove the jaw assembly and inspect the teeth under good lighting — worn or chipped teeth cannot grip reliably.
- Replace the jaw set as a complete unit, not individual pieces, to ensure even load distribution.
- Clean jaw grooves with a brass brush to remove metal filings and oxidation.
- This is one of the most common reasons technicians seek rivet tool repair — jaw replacement is low cost and high impact.
Problem 7: Air Leaks in Pneumatic Rivet Tools
What it looks like
You hear a persistent hiss from the tool body or trigger area. The tool loses pulling power between cycles and air consumption increases noticeably.
How to fix it
- Identify the leak source by applying soapy water around the air inlet, trigger valve, and cylinder body.
- Replace the O-rings at the identified points — O-ring kits specific to most tool models are widely available.
- Do not over-tighten the air fitting during reassembly; thread damage creates new leak points.
- If the cylinder piston seal is damaged, a full service kit is recommended over partial repair.
Preventive Maintenance: Keeping Your Rivet Tool in Peak Condition
Reactive repair always costs more than scheduled maintenance. Here is a simple routine that industrial users can follow:
| Frequency | Maintenance Task
|
|---|---|
| Daily | Empty mandrel collection container, wipe nosepiece clean |
| Weekly | Lubricate pivot points and jaw mechanism, inspect nosepiece for wear |
| Monthly | Disassemble jaw chuck, clean all components, check return spring tension |
| Quarterly | Full inspection of O-rings (pneumatic), replace worn jaws, test pulling force |
Consistent maintenance reduces unplanned downtime significantly. In high-volume assembly lines, a single tool failure can stall an entire process — making this routine worth every minute.
When to Replace Versus Repair
Not every fault justifies a repair. Use this rule of thumb: if the cost of replacement parts exceeds 60% of the tool's purchase price, evaluate a full replacement instead. Jaws, nosepieces, and O-rings are always worth replacing. A cracked tool body or a damaged cylinder bore typically signals end-of-life.
Sourcing genuine replacement parts from a reliable supplier ensures fit and performance. Cheefatt stocks a range of riveter accessories including nosepieces, jaw sets, and service components suited for both manual and pneumatic tools — making it a practical first stop for technicians managing tool upkeep in the field.
Frequently Asked Questions
Q: Why does my rivet tool keep jamming after every few pulls?
A: The most likely cause is an overfull mandrel collection chamber or debris buildup in the jaw chuck. Empty the chamber regularly and clean the jaw assembly with a dry brush. Periodic lubrication of the jaw mechanism every 200–300 cycles also prevents jamming significantly.
Q: How do I know when to replace the jaws on my rivet tool?
A: Replace the jaws when you notice slipping during the pull stroke, hear grinding sounds, or see visible wear on the jaw teeth under inspection. Worn jaws cannot grip the mandrel reliably and will cause incomplete rivet setting, leading to weak and unreliable fastened joints.
Q: What PSI is recommended for a pneumatic rivet tool?
A: Most pneumatic rivet tools operate optimally at 90–100 PSI. Always check the manufacturer's rated pressure specification for your specific model. Running below the rated PSI reduces pulling force, while exceeding it accelerates internal seal wear and can cause premature component failure.
Q: Can I use any rivet with my existing rivet tool?
A: No. Rivet diameter, grip range, and mandrel breakload must match the tool's specifications and the nosepiece size installed. Using incompatible rivets causes setting failures, mandrel jamming, and accelerated jaw wear. Always verify the rivet spec sheet against your tool's rated capacity before use.
Q: How often should I lubricate my manual rivet tool?
A: Lubricate pivot points, the return spring, and the jaw mechanism every 200–300 cycles under normal use conditions. In high-volume or dusty environments, increase this frequency. Use light machine oil only — heavy grease attracts metal filings and can clog the jaw assembly over time.
Q: What causes a rivet head to deform or crack during setting?
A: Deformation usually results from the nosepiece not sitting flush against the workpiece, or from a mismatch between rivet material and substrate. Angled contact during pulling concentrates stress unevenly on the rivet head. Ensuring proper tool alignment before each pull eliminates most surface deformation issues quickly.

























Sign in to leave a comment.