Microneedling has emerged as a popular skincare treatment, sought after for its ability to rejuvenate the skin and reduce various imperfections. If you’re considering this innovative procedure in Bristol, understanding each step can enhance your experience and outcomes. In this guide, we will walk you through what to expect during your first microneedling session, ensuring you feel informed and prepared.
Understanding Microneedling
Before diving into the specifics of your session, it’s crucial to understand what microneedling entails. This minimally invasive treatment involves the use of fine needles to create micro-injuries in the skin's surface. These tiny punctures stimulate the body’s natural healing response, promoting collagen and elastin production. As a result, patients often experience improved skin texture, reduced appearance of scars, and a more youthful glow.
In Bristol, microneedling appeals to a variety of skin types and concerns, including fine lines, acne scars, enlarged pores, and overall skin laxity. This versatility makes it an excellent option for individuals seeking to enhance their skincare routine.
Step 1: Pre-Consultation
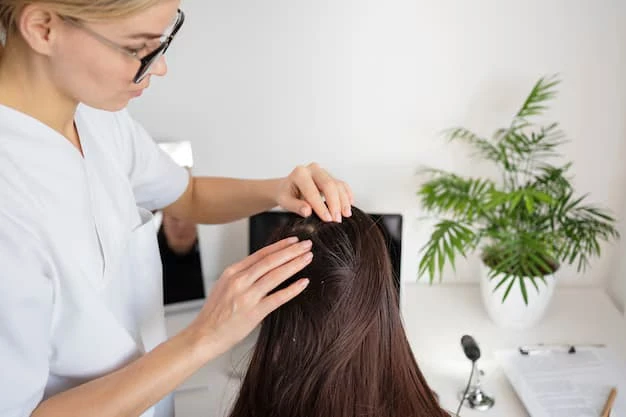
Your journey begins with a pre-consultation, an essential step where you’ll meet with a qualified practitioner. During this appointment, the practitioner will assess your skin type and discuss your specific concerns and goals. It’s a great opportunity to ask questions and voice any apprehensions you may have.
The practitioner will also review your medical history to ensure that you are a suitable candidate for the treatment. Certain conditions, such as active acne or skin infections, may need to be addressed before proceeding. This consultation is crucial for customizing the treatment plan to suit your individual needs, setting the stage for optimal results.
Step 2: Preparing for the Session
Once you’ve completed the pre-consultation and decided to move forward, it’s time to prepare for your microneedling session. Prior to your appointment, your practitioner may recommend avoiding certain medications or skincare products that could increase sensitivity, such as retinoids or blood thinners. Following these guidelines will help minimize discomfort and enhance your treatment experience.
On the day of your session, arrive with clean skin, free of makeup or any other products. This ensures that the microneedling procedure can be performed safely and effectively. It’s also advisable to wear comfortable clothing, as you may be in a reclined position for a period of time.
Step 3: The Microneedling Procedure
As you settle into the treatment room, your practitioner will explain the procedure in detail, ensuring you feel comfortable and aware of what to expect. The session typically lasts between 30 to 60 minutes, depending on the areas being treated.
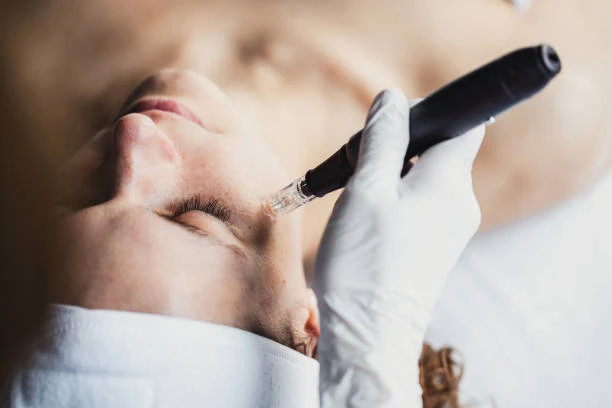
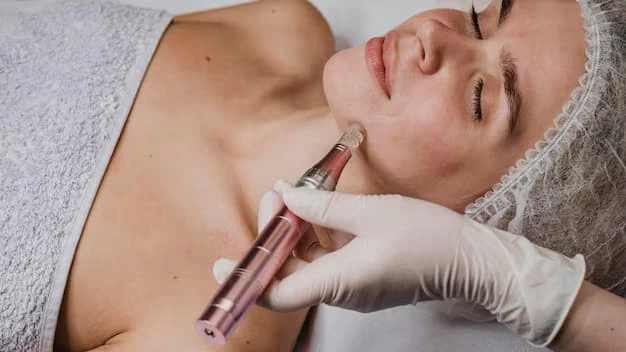
To start, a topical numbing cream will be applied to your skin to minimize any potential discomfort during the procedure. After allowing the cream to take effect, the practitioner will use a microneedling device—either a pen-like instrument or a motorized device—to create controlled micro-injuries in your skin. The depth of the needles can be adjusted based on your specific concerns, allowing for a tailored approach.
You may feel a slight prickling sensation during this process, but the numbing cream should help reduce any discomfort. The practitioner will move the device methodically across your skin, ensuring an even treatment area. Some individuals even report feeling a warm sensation, which is entirely normal.
Step 4: Post-Treatment Care
Once the microneedling procedure is complete, your skin may appear red and slightly swollen, similar to a mild sunburn. This reaction is a natural response to the treatment and typically subsides within a few hours to a couple of days.
Your practitioner will provide you with detailed aftercare instructions to ensure optimal healing and results. It's crucial to avoid direct sun exposure, harsh skincare products, and strenuous activities for at least 24 hours following your session. Hydration is essential, so be sure to drink plenty of water and apply a gentle, hydrating serum or moisturizer as advised.
Additionally, avoid picking at your skin or using makeup until your practitioner gives you the go-ahead. This will help prevent any potential irritation or infection, allowing your skin to heal effectively.
Step 5: Monitoring Results and Follow-Up Sessions
After your first microneedling session, you may begin to notice improvements in your skin over the following weeks as collagen production ramps up. Many individuals experience a noticeable enhancement in skin texture and tone, with optimal results typically seen after a series of sessions.
It’s essential to maintain open communication with your practitioner during this process. Schedule follow-up appointments to assess your progress and discuss any concerns. Depending on your skin type and goals, your practitioner may recommend additional sessions spaced several weeks apart to achieve the desired results.
Conclusion
Embarking on your microneedling in Bristol can be an exciting step towards achieving healthier, rejuvenated skin. By understanding the process and following the outlined steps, you can approach your first session with confidence, knowing what to expect at each stage.
As you contemplate this transformative treatment, consider seeking guidance from experienced professionals in the field. Este Medical Group Bristol stands ready to assist you in your microneedling journey, ensuring you receive the highest level of care and expertise. Take the first step towards revitalizing your skin, and discover the benefits of microneedling tailored to your individual needs.


Sign in to leave a comment.