
A dry basement is more than a convenience—it’s a key part of protecting your home’s structure, indoor air quality, and long-term value. Unfortunately, basements are naturally prone to moisture because they are built below ground level, where soil pressure, groundwater, and seasonal rain can all force water toward the foundation. As homeowners become more proactive about maintenance, DIY basement waterproofing has gained popularity. But while there are several tasks you can successfully handle yourself, there are also critical aspects that must be left to professionals to ensure long-lasting protection.
This guide breaks down what you can safely do as a homeowner and what requires expert intervention.
Understanding the Basics of Basement Waterproofing
Basement waterproofing includes a combination of techniques designed to stop water from entering your basement, redirect moisture, and strengthen the home’s foundation. These techniques fall under two main categories:
1. Interior Waterproofing
These solutions manage moisture after it enters the basement or prevent it from spreading. They include sealants, drainage mats, vapor barriers, and sump pump systems.
2. Exterior Waterproofing
These solutions stop water from ever touching the basement walls. They involve excavation, exterior membranes, drainage systems, and soil grading.
While some interior solutions are DIY-friendly, exterior waterproofing often involves heavy labor, specialized equipment, and technical precision—making it more suitable for professionals.
✅ DIY Waterproofing Tasks You Can Do Yourself
Not every issue requires a contractor. Many small moisture problems can be addressed with the right tools, materials, and patience. Below are the DIY-friendly improvements that can make a meaningful difference.
1. Sealing Small Cracks in Interior Walls
If your basement walls have hairline cracks—not structural cracks—you can seal them using masonry sealants or hydraulic cement. These products expand as they dry, preventing water seepage.
How to Do It:
- Clean the crack thoroughly.
- Use a chisel to widen the crack slightly to create a “keyway.”
- Apply hydraulic cement or epoxy crack filler.
- Smooth the surface.
When this works:
This solution is ideal for minor seepage caused by condensation or hydrostatic pressure.
When it won’t work:
Cracks wider than 1/8 inch, horizontal cracks, stair-step cracks, or those accompanied by wall bowing indicate structural problems—call a professional immediately.
2. Improving Gutters and Downspouts
Sometimes, basement moisture has nothing to do with the foundation itself. Poor drainage around the home can lead to water pooling against the exterior wall and eventually seeping inside.
DIY Fixes Include:
- Cleaning gutters.
- Repairing broken downspouts.
- Adding downspout extensions (recommended length: 6–10 feet away from the foundation).
Why it helps:
Proper drainage prevents surface water from saturating the soil around your home, reducing the chance of leaks.
3. Re-grading the Soil Around the Home
If the ground slopes toward your house instead of away from it, water will naturally flow toward the basement walls. Homeowners can fix small grading issues with soil, gravel, or top dressing.
DIY Steps:
- Add soil around the foundation, creating a slope of at least 6 inches over 10 feet.
- Compact it gently.
- Ensure the slope directs water toward the yard, not a neighbor’s property.
When to call a pro:
If the yard has drainage issues, retaining walls, or heavy erosion, a landscaping or waterproofing expert should assess the area.
4. Applying Interior Basement Sealants
Waterproofing paints and vapor barrier products are easy to apply and help prevent moisture migration.
What They Do:
- Reduce dampness.
- Prevent mildew growth.
- Improve basement air quality.
However:
Sealants only address minor humidity—not active water leaks. They should be used as part of a bigger waterproofing strategy, not the solution on their own.
5. Installing a Dehumidifier
Basements naturally attract humidity. A good-quality dehumidifier can maintain moisture levels at 50% or less, preventing mold and mildew.
Signs You Need One:
- Musty odor.
- Condensation on windows.
- Damp spots on walls.
- Mold growth.
While this isn’t waterproofing in the traditional sense, it significantly improves the environment inside the basement.
❌ Basement Waterproofing Tasks You Should Not DIY
While some tasks are simple, others require professional-grade tools, expert knowledge, and safety precautions. Attempting these projects without proper training may cause serious damage, increase repair costs, or create long-term structural issues.
Here’s what to avoid doing on your own:
1. Exterior Excavation and Waterproof Membranes
Exterior waterproofing is the gold standard for preventing water intrusion—but it’s also labor-intensive and technically complex.
Why DIY is Risky:
- Requires digging 6–10 feet around the foundation.
- Heavy equipment is usually needed.
- Incorrect installation can worsen drainage issues.
- Mistakes can cause structural damage.
Professional crews apply specialized membranes, drainage boards, and weeping tile systems designed to last decades. This is not a DIY job under any circumstance.
2. Installing or Repairing French Drains
Interior French drains (also called perimeter drains) require breaking concrete, accessing footers, and correctly sloping pipes to a sump pump. Exterior French drains require trenching and strategically placing gravel and pipes.
DIY dangers include:
- Inadequate slope for drainage.
- Pipe clogs.
- Basement flooding due to improper installation.
- Damage to existing plumbing or electrical lines.
A poorly installed French drain often costs more to fix than a professional installation.
3. Sump Pump Installation and Backup Systems
While replacing a sump pump may be feasible for some homeowners, installing a new system is not. It requires:
- Cutting the concrete slab.
- Gravel preparation.
- Proper basin installation.
- Correct electrical wiring.
- Testing for groundwater conditions.
Incorrect installation may lead to continuous flooding or pump burnout.
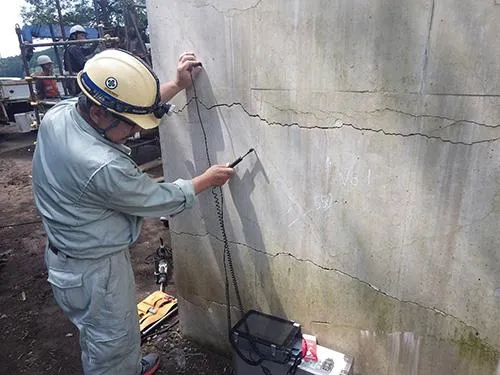
4. Structural Crack Repairs
Large or horizontal cracks, wall bowing, or foundation shifting require immediate professional assessment.
DIY repairs are dangerous because:
- Surface sealants won’t fix underlying structural issues.
- Bowing walls may require steel I-beams, carbon fiber straps, or hydraulic bracing.
- Foundation settlement may require underpinning.
This is not an area where you want to experiment.
5. Mold Remediation
If basement moisture has led to extensive mold growth, DIY cleaning can be hazardous to your health. Mold spores spread easily, and improper handling can worsen air quality.
Professional mold remediation ensures:
- Safe containment.
- Proper filtration.
- Removal of contaminated materials.
- Prevention of regrowth.
When to Call a Professional Waterproofing Contractor
You should seek expert help if you notice:
- Repeated flooding during heavy rain.
- Wall bowing or large cracks.
- Water pooling around the exterior of your home.
- Persistent dampness despite DIY fixes.
- Mold odors or visible mold patches.
- Efflorescence (white powdery residue on walls).
- Peeling paint or bubbling drywall.
Professionals offer long-term solutions, including:
- Exterior membranes
- French drains
- Sump pumps
- Foundation crack repair
- Vapor barriers
- Crawl space encapsulation
These solutions target the root cause, not just the symptoms.
Final Thoughts
DIY basement waterproofing can save money—if you know your limits. Tasks like sealing minor cracks, improving drainage, applying waterproof coatings, and reducing humidity are all homeowner-friendly. But anything involving structural work, major excavation, advanced drainage systems, or mold remediation belongs in professional hands.
A dry basement isn’t just an upgrade; it’s an investment in the safety, comfort, and value of your home. Knowing what you can and can’t do yourself ensures that you get the best results without risking costly mistakes.


Sign in to leave a comment.