
My first podcast episode sounded like I recorded it inside a cardboard box during a windstorm. Honestly, it was embarrassing. I thought my laptop microphone would work fine—after all, how hard could audio recording be? That naive assumption cost me weeks of re-recording and taught me a painful lesson about audio quality.
High-quality audio isn't optional in podcasting. It's the foundation everything else builds on. Here's what actually works.
Choose the Right Recording Environment
Your recording space matters more than expensive equipment. I've heard crystal-clear podcasts recorded in closets and terrible audio from fancy home studios. The difference? Understanding acoustics.
Hard surfaces create echo. Recording in an empty room with tile floors sounds awful because sound bounces everywhere. Soft materials absorb sound—carpets, curtains, furniture, even clothes hanging in closets help tremendously.
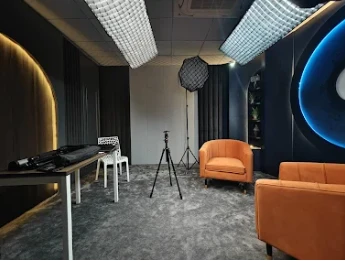
This is exactly why professional podcast recording studios in Jaipur exist. They've solved these acoustic problems with proper treatment. When I finally recorded at a podcast studio on rent in Jaipur, the difference was shocking. No echo, no background noise, just clean audio that needed minimal editing.
If you're recording at home temporarily, pick the quietest room available. Turn off air conditioning, close windows, and put your phone on airplane mode. Small details make huge differences.
Invest in Decent Equipment (But Don't Overthink It)
You don't need thousand-dollar microphones to sound professional. I started with a $100 USB microphone that delivered excellent results compared to my laptop's built-in mic. The jump from terrible to good doesn't require massive investment.
Dynamic microphones work better for most podcasters than condenser mics. They pick up less background noise and handle varying voice volumes better. Popular options like the Audio-Technica ATR2100 or Samson Q2U cost under 10,000 rupees and sound great.
However, checking podcast studio rental rates in Jaipur often reveals that renting professional equipment costs less than buying it yourself. I spent 25,000 rupees on equipment that sat unused after six months because I switched to studio recording. That money would've funded twenty professional recording sessions instead.
Master Microphone Technique
How you use your microphone matters as much as which microphone you own. Stay about 6-8 inches away from the mic—too close creates muddy bass, too far sounds distant and picks up room noise.
Speak across the microphone, not directly into it. This prevents plosive sounds (those annoying "p" and "b" pops) from ruining your recording. A simple pop filter helps too, but technique matters more.
Maintain consistent distance while recording. Don't lean in for emphasis or back away during pauses. These distance changes create volume fluctuations that sound unprofessional and require tedious editing to fix.
Monitor Your Audio in Real-Time
Always wear headphones while recording. This seems obvious but many beginners skip it, discovering problems only during editing when it's too late. Headphones let you catch issues immediately—background noises, technical glitches, or audio quality problems.
I missed an entire interview because I wasn't monitoring and didn't realize my microphone had disconnected. That mistake taught me to always check levels before starting and monitor throughout recording.
Professional facilities like those offering podcast studio on rent price in Jaipur provide real-time monitoring equipment and technicians who catch problems before they ruin recordings. This safety net is invaluable, especially for important episodes.
Set Proper Recording Levels
Your audio should peak around -12 to -6 dB during recording. Too quiet and you'll amplify background noise during editing. Too loud and your audio clips, creating distortion that can't be fixed.
Most recording software shows level meters. Watch them while doing test recordings. Adjust your input gain until loud parts hit around -6 dB without ever reaching 0 dB (which causes clipping).
This technical stuff confuses beginners, which is another advantage of recording at a podcast recording studio in Jaipur—experienced technicians handle these details, ensuring proper levels every time.
Record in the Right Format
Always record in WAV or AIFF format, not MP3. These uncompressed formats preserve audio quality for editing. You can export to MP3 later for distribution, but editing compressed audio degrades quality with each save.
Record in mono unless you have specific reasons for stereo. Most podcasts are single-voice or interview format where mono makes more sense and creates smaller file sizes. Stereo is only necessary for music or spatial audio effects.
Sample rate should be 44.1kHz or 48kHz. Bit depth should be at least 16-bit, though 24-bit is better if your equipment supports it. These settings match professional broadcast standards.
Minimize Background Noise
Turn off everything possible—fans, air conditioning, refrigerators. Tell family members you're recording. Put a sign on your door. Close windows if traffic noise is an issue.
Record during quiet times. Early morning or late evening typically have less ambient noise than midday. I schedule my home test recordings at 6 AM when my neighborhood is silent.
Use noise gates carefully during editing to remove background hum between speaking, but prevention beats correction. Recording in a properly treated podcast studio on rent in Jaipur eliminates most noise problems before they start.
Test Everything Before Important Recordings
Always do test recordings. Record thirty seconds, listen back through headphones, check for problems. This five-minute investment prevents disasters during actual episodes.
Test your entire signal chain—microphone, cable connections, recording software, everything. I've had cables fail mid-episode, software crash, and storage run out. Testing catches these issues early.
For crucial interviews or episodes, professional studios provide reliability home setups can't match. The best podcast studio in Jaipur facilities maintain and test their equipment constantly, ensuring sessions go smoothly.
Recording high-quality audio takes practice and attention to detail, but the fundamentals aren't complicated. Start with a decent environment and equipment, master basic technique, and monitor your work carefully. Your listeners will absolutely notice the difference.




















Sign in to leave a comment.