As modern workplaces, data centers, and control rooms grow more complex, the need for flexible, scalable, and responsive KVM over IP solutions has become critical. Whether you’re managing dozens of PCs, building a real-time video wall, or enabling remote access for operators, a KVM over IP system provides the foundation for seamless connectivity.
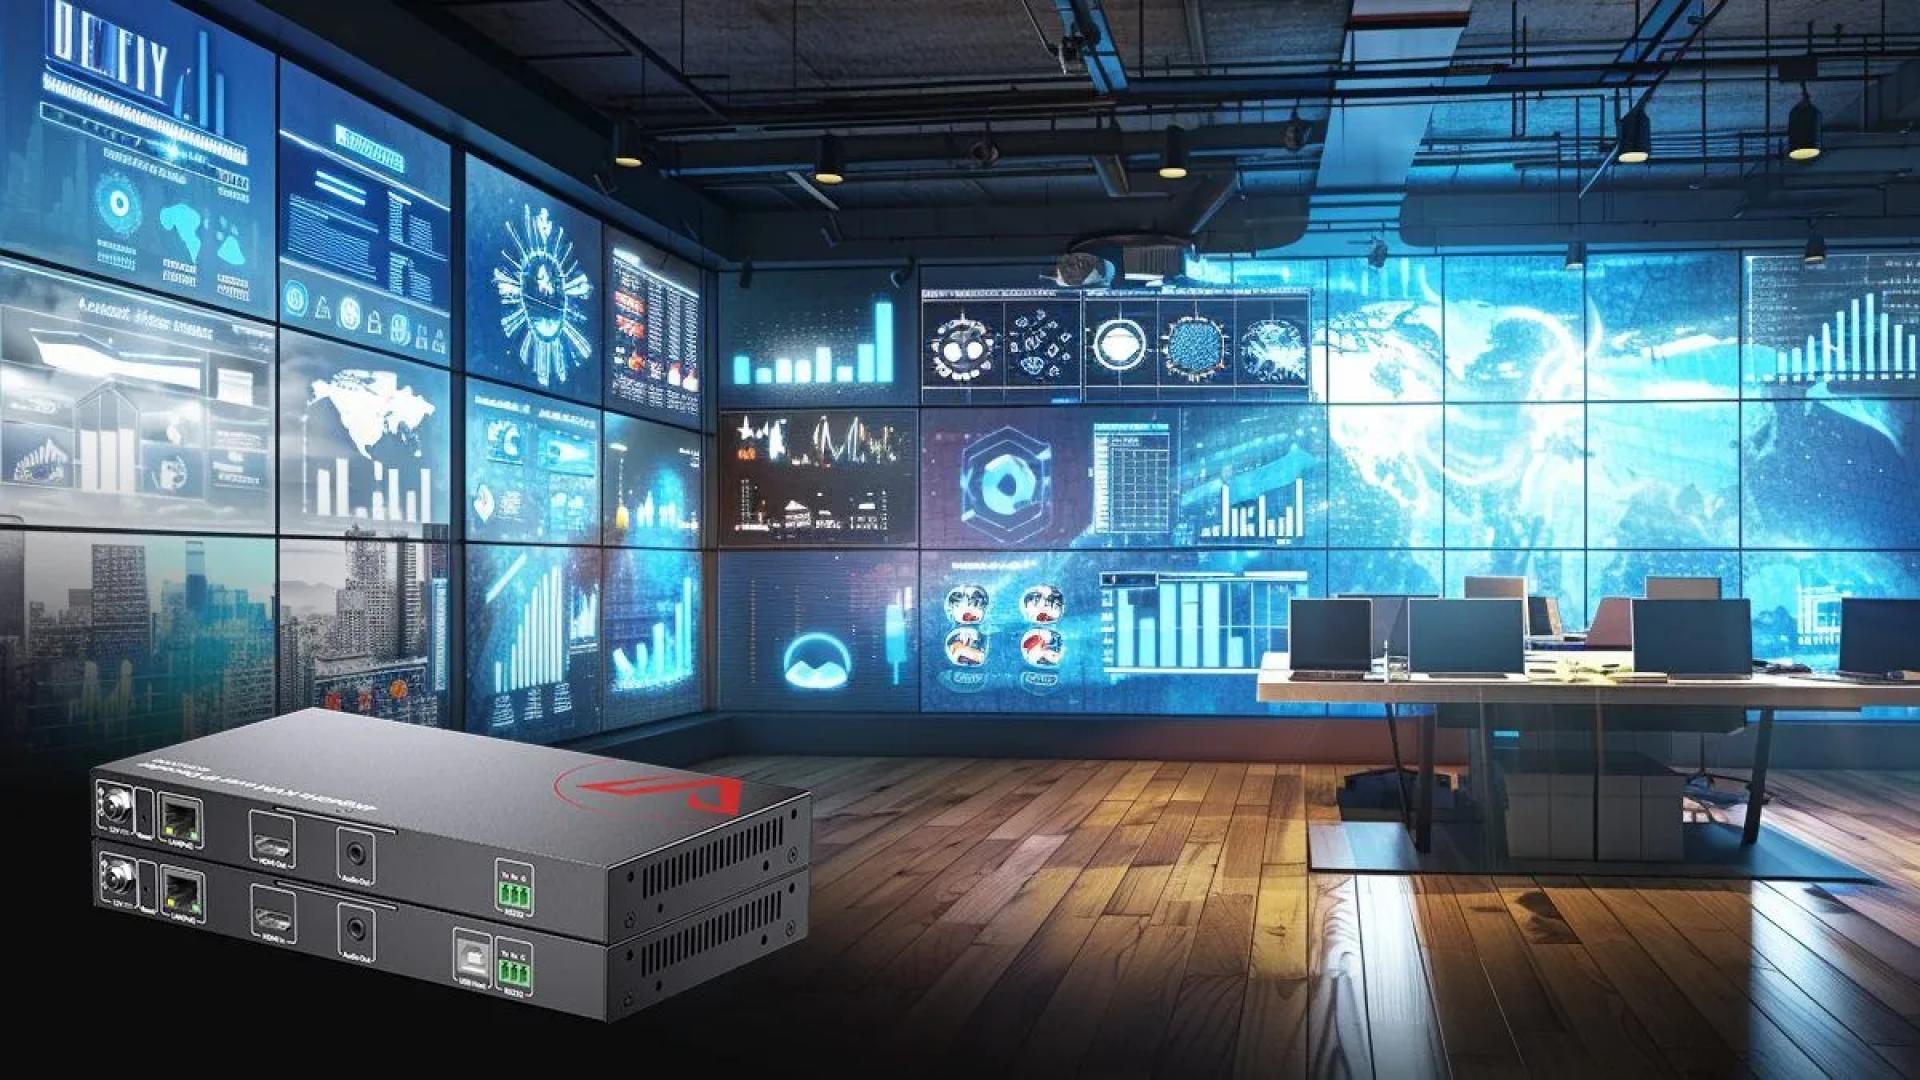
This guide walks you through six simple steps to set up a KVM over IP system using the AV Access 4KIPJ200 series, a professional solution that delivers 4K@60Hz video, ultra-low latency, keyboard/mouse roaming, and video wall capabilities.
Step 1: Understand What a KVM over IP System Is
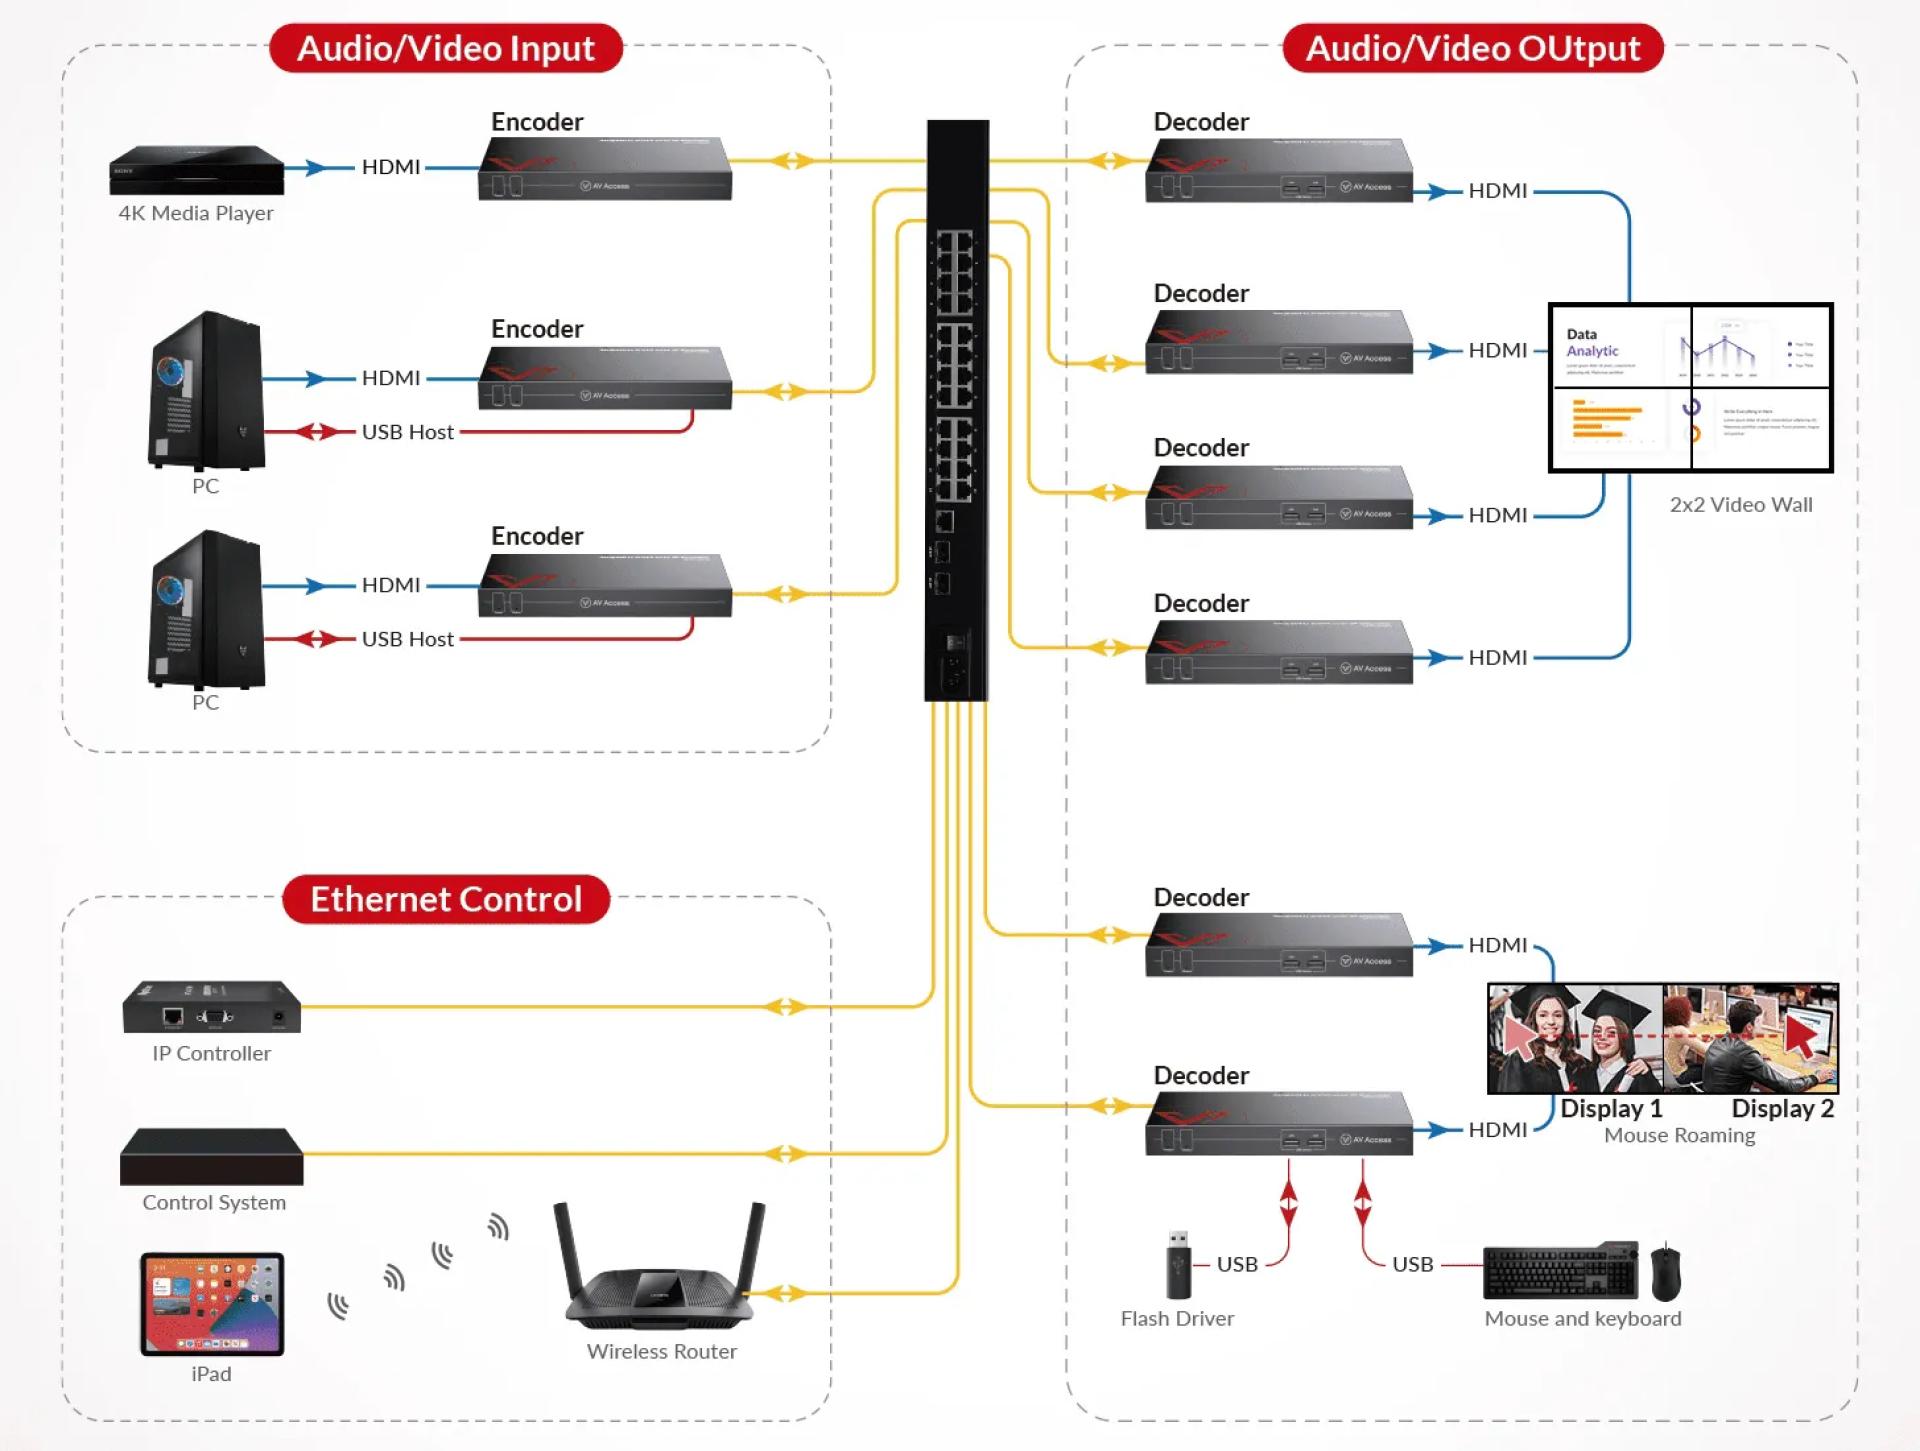
A KVM (Keyboard, Video, Mouse) over IP system allows you to control multiple PCs remotely over a secure IP network. By connecting encoders and decoders to your computers and displays, operators can access and switch between devices in real time.
With the AV Access 4KIPJ200 solution, you can:
- Extend HDMI 2.0 and USB signals with ultra-low latency (<4ms).
- Build a matrix system with video walls up to 16×16.
- Control up to 17 PCs with one set of keyboard and mouse through KM roaming.
Step 2: Gather the Required Hardware
To set up your system, you’ll need the following components:
- 4KIPJ200E Encoders (connected to source PCs/servers)
- 4KIPJ200D Decoders (connected to monitors/displays/USB peripherals)
- A Gigabit Ethernet Switch (IGMP enabled)
- Optional HDIP-IPC Control Box for Web GUI and visual control
- Standard CAT cables (PoE+ capable for simplified installation)
Important note: Encoders and decoders must be used together for proper operation.

Step 3: Connect Encoders and Decoders
- Plug each encoder into the HDMI and USB ports of the source PC.
- Connect each decoder to the destination display via HDMI.
- Use CAT cables to link all encoders and decoders to the Gigabit switch.
- If your switch supports PoE+, it can also deliver power directly, reducing cable clutter.
Step 4: Configure the Network
For one-to-many or many-to-many applications, configure IGMP on your Gigabit switch. This ensures efficient multicast transmission and prevents unnecessary network flooding.
Once connected, the system will recognize each device, allowing you to scale up by simply adding more encoders and decoders. This modular architecture makes it easy to expand from a small deployment to a large-scale control center.
Step 5: Set Up Control Options
The 4KIPJ200 provides multiple ways to manage your system:
- Web GUI: Configure and switch sources via a browser interface.
- VisualM App (iPad): Preview and control devices visually.
- OSD Menu: Access the built-in On-Screen Display using your keyboard.
- Third-Party Control Systems: Integrate with existing AV or automation setups.
These options make the solution adaptable for different environments, from classrooms to mission-critical command centers.
Step 6: Optimize for Performance
Once your system is up and running, you can take advantage of advanced features:
- Ultra-Low Latency: Less than 4ms delay for real-time responsiveness.
- Fast Switching: Built-in scaler ensures seamless transitions within 1 second.
- Keyboard/Mouse Roaming: Move your cursor across screens to control up to 17 PCs with one keyboard/mouse set.
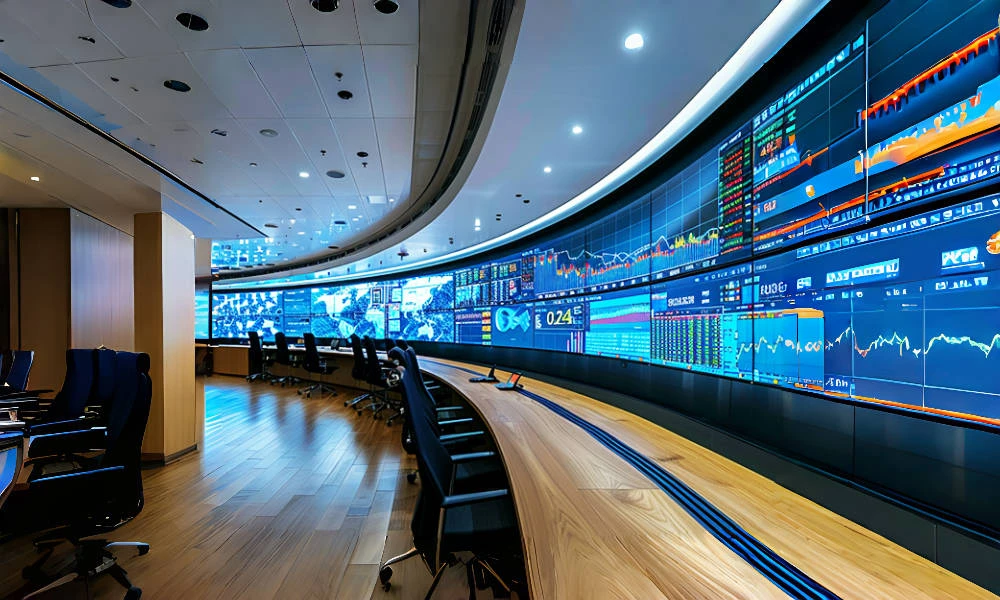
- Video Wall Mode: Create a display wall up to 16×16, with options to rotate images by 90/180/270 degrees.
- PoE+ Support: Power high-demand USB peripherals (e.g., USB cameras or hard drives) directly through the network.

Conclusion
Setting up a KVM over IP system may sound complex, but with the right solution, it becomes a straightforward process. The AV Access 4KIPJ200 series makes it easy to create a flexible, scalable, and future-proof system that delivers ultra-low latency, 4K video, and intuitive control options.
Whether you’re deploying it in a control center, a university campus, or a government facility, this solution ensures real-time access, seamless switching, and reliable performance for all your operational needs.
More Resources
- Case Study: Application of HDIP100 AV over IP Solution in “Buffalo Wild Wings” Sports Bar to Build an IP Matrix with Video Wall
- Case Study: Application of HDIP100 AV over IP Solution in Sports Bars to Build a Distributed IP Matrix System
- Plug-n-Play AV over IP Solution in Sports Bar and Shopping Mall
- 7 Steps to Build a Robust HDMI over IP System in Your Sports Bar
- How to Build an Effective HDMI over IP System in a Shopping Mall?
- 6 Steps to Set up a Powerful HDMI Distribution System in Your Restaurant


Sign in to leave a comment.