Drywall is a popular material used in construction for creating smooth and sturdy walls. However, accidents happen, and dings, dents, and holes can mar the surface of your drywall over time. The good news is that you can learn how to repair drywall like a pro with simple steps. This article will guide you through repairing drywall, helping you achieve professional-looking results.
Step 1: Gather the necessary tools and materials.
Before you start the repair process, ensure you have all the essential tools and materials. These typically include a putty knife, sandpaper, joint compound, drywall tape, a utility knife, a drywall saw, a sanding block, and a primer. Having everything ready will make the process smoother and more efficient.
Step 2: Prepare the damaged area.
Estimate the damage and determine the extent of the repair needed. You can skip this step if you have a small hole or crack. For larger holes, use a utility knife or a drywall saw to shape the hole into a square or rectangular shape. Be careful not to cut into the surrounding intact drywall. Remove any loose or damaged pieces.
Step 3: Apply drywall tape.
For larger holes or cracks, it’s essential to reinforce the repair area with drywall tape. Measure and cut a piece of drywall tape slightly longer than the damaged area. Place the tape over the hole, ensuring it is centered and covers the entire damaged section.
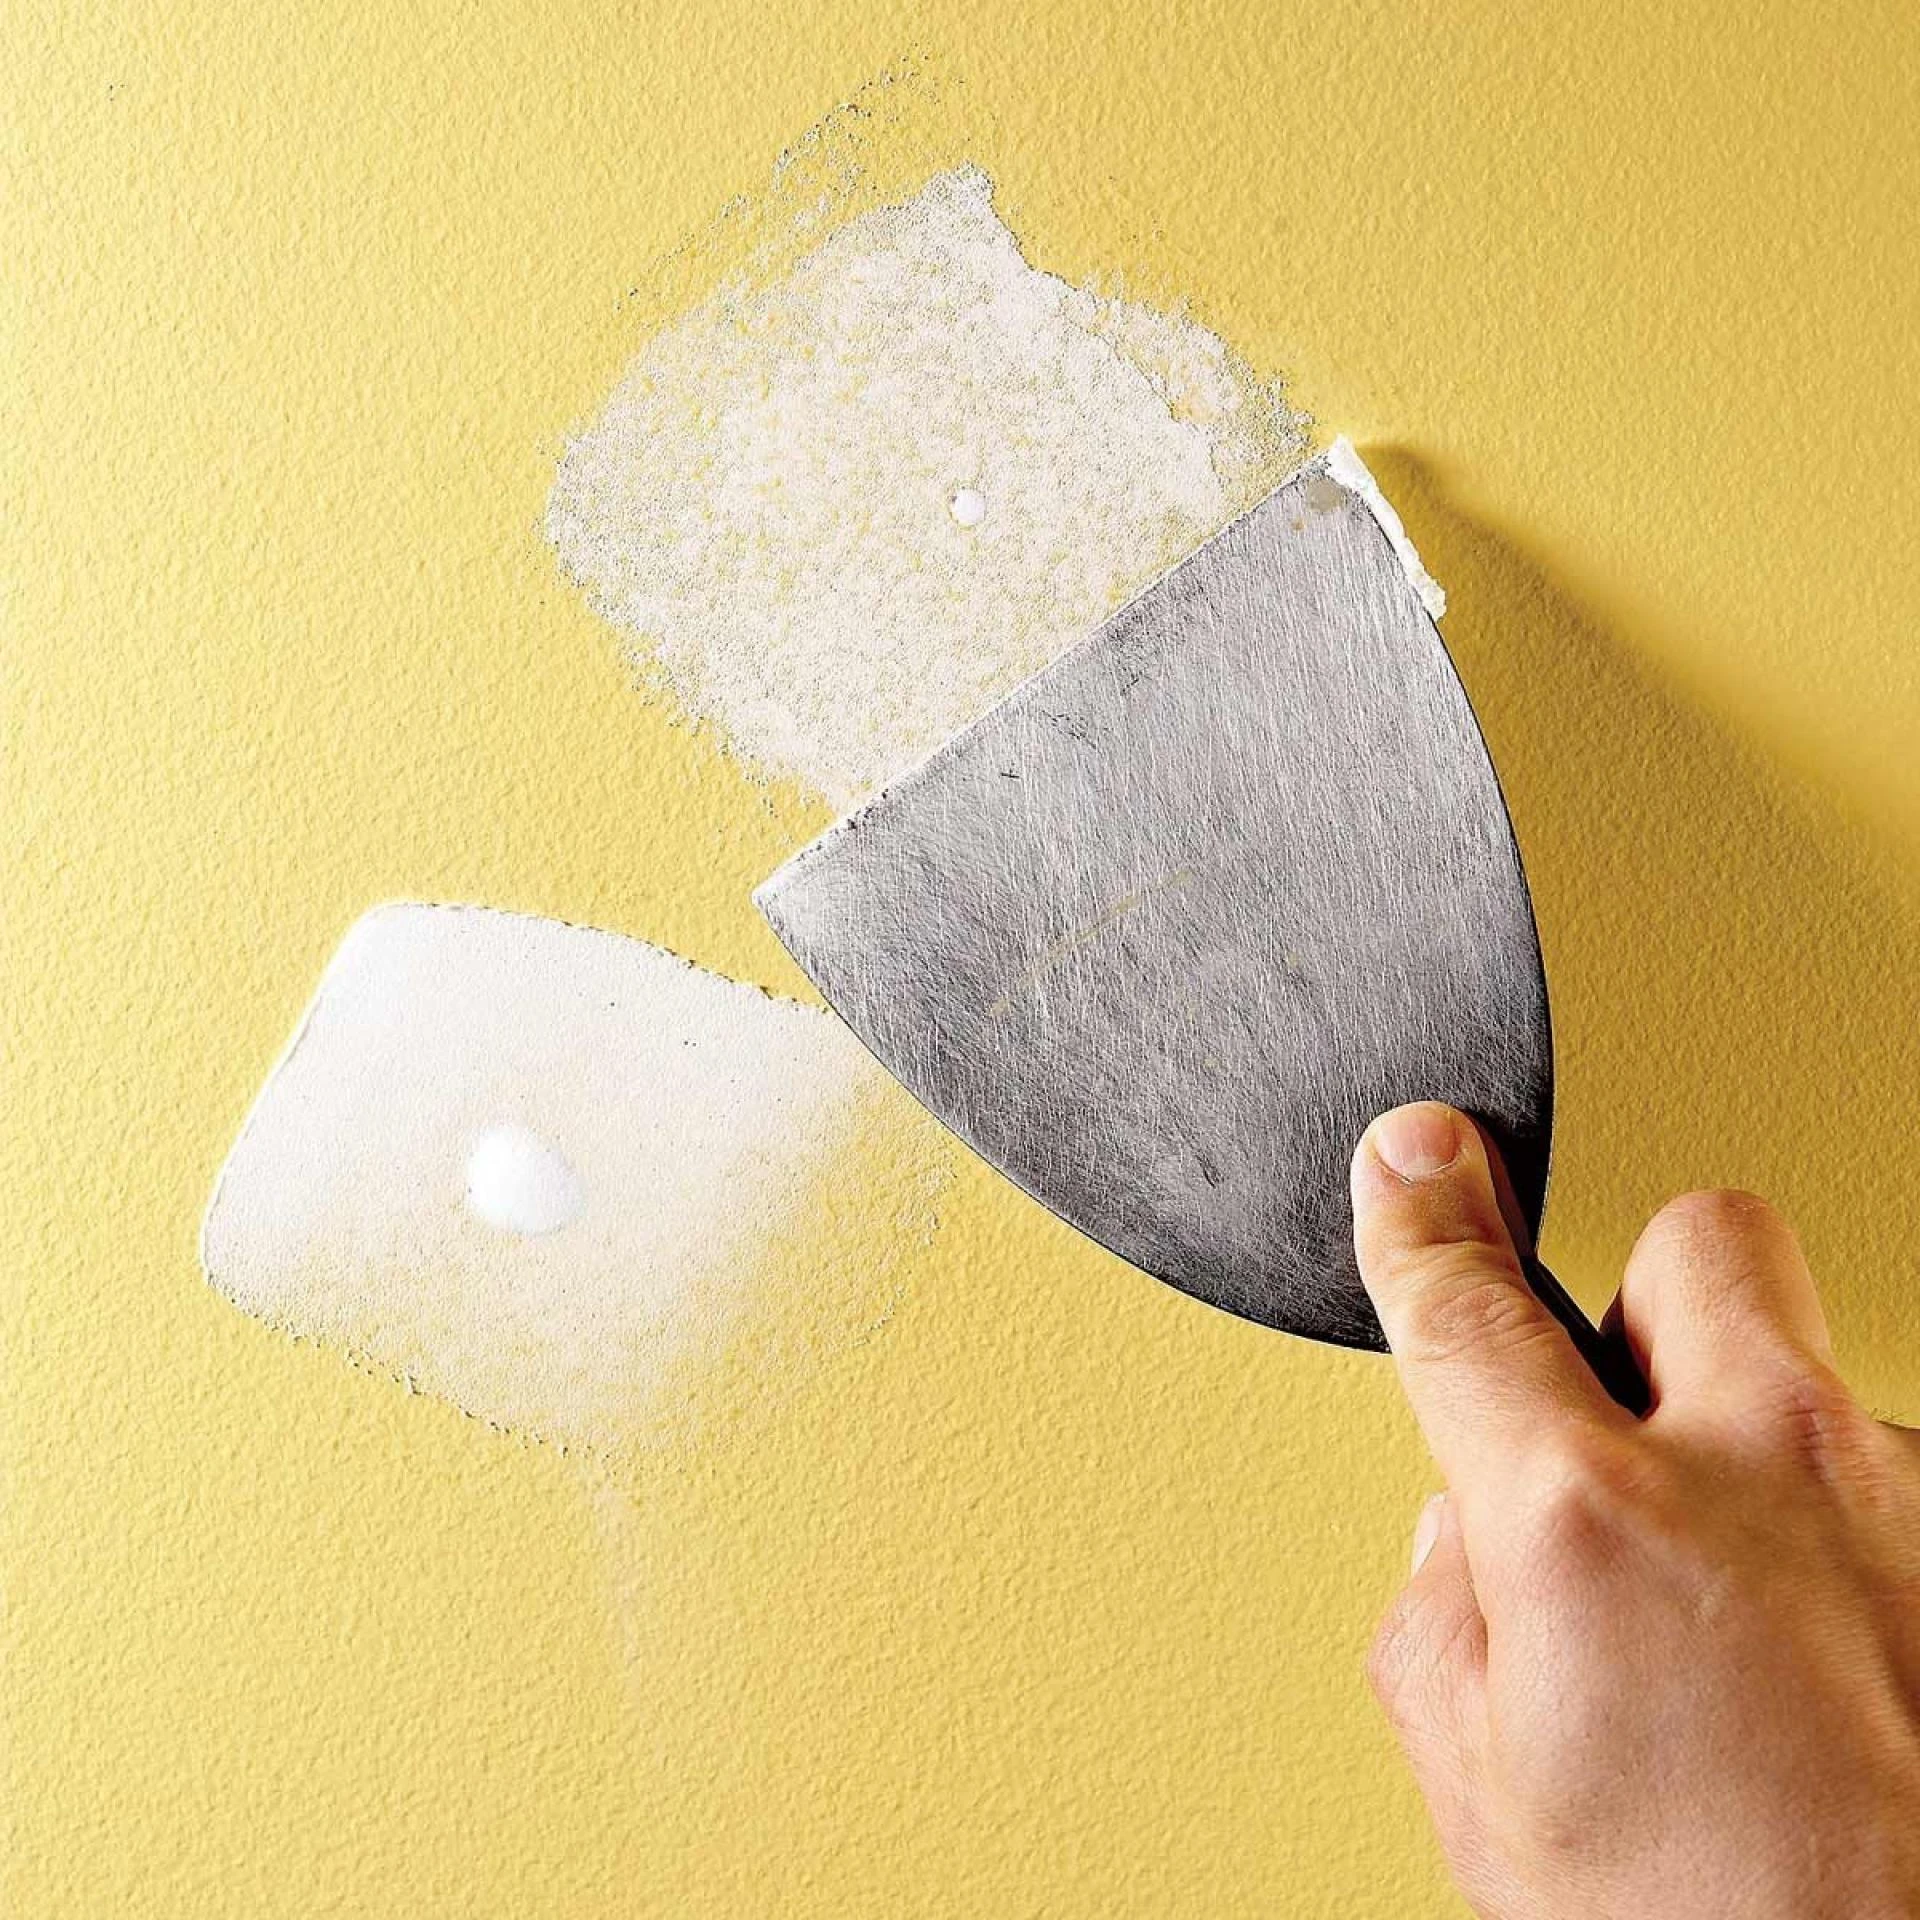
Step 4: Apply joint compound.
Using a putty knife, apply a thin layer of joint compound over the damaged area, including the drywall tape. Spread the compound evenly, feathering the edges seamlessly and blending with the surrounding wall. Allow it to dry totally according to the manufacturer’s instructions.
Step 5: Sand and repeat.
Once the joint compound is dry, sandpaper or a sanding block will smooth the repaired area. Sand gently in a circular motion until the surface is even and flush with the surrounding wall. Wipe away any dust with a clean cloth.
Step 6: Apply primer and paint.
To achieve a professional finish, apply a coat of primer over the repaired area. Allow it to dry, and then paint the area to match the rest of the wall. Choose high-quality paint and use a brush or roller for a seamless blend.
Conclusion: Repairing drywall doesn’t have to be a daunting task. Following these easy steps, you can repair drywall like a pro. Gather the necessary tools, prepare the damaged area, apply drywall tape, and spread the joint compound evenly. Sand the repaired area, apply primer, and finish with a fresh coat of paint. With a little patience and attention to detail, you can achieve flawless results, restoring the beauty of your walls and saving money on professional repairs.
If you need drywall repair service, trust Patch It Up. We are a reliable company based in Long Island, NY, specializing in high-quality, seamless drywall repairs. From dings to holes, our experts will restore your walls to perfection. With our attention to detail and customer satisfaction, you can rely on us for exceptional results. Visit our website for more information and a free estimate.


Sign in to leave a comment.