
In the ever-evolving world of interior design, the pursuit of creating a home that feels both personal and polished often leads us back to the timeless principles of texture, symmetry, and detail. While a fresh coat of paint can certainly revitalize a room, discerning homeowners are increasingly looking for ways to add architectural interest without undertaking a full-scale renovation. This is where the concept of wall molding steps into the spotlight. Traditionally associated with grand, historic estates and requiring skilled carpenters for installation, wall molding has been demystified and made accessible through the innovation of the premium wall molding kit. These comprehensive kits are revolutionizing home decoration, offering a streamlined path to achieving the kind of sophisticated, elegant walls that serve as the backdrop for a truly distinguished living space.
The Aesthetic Appeal of Molding in Modern Interiors
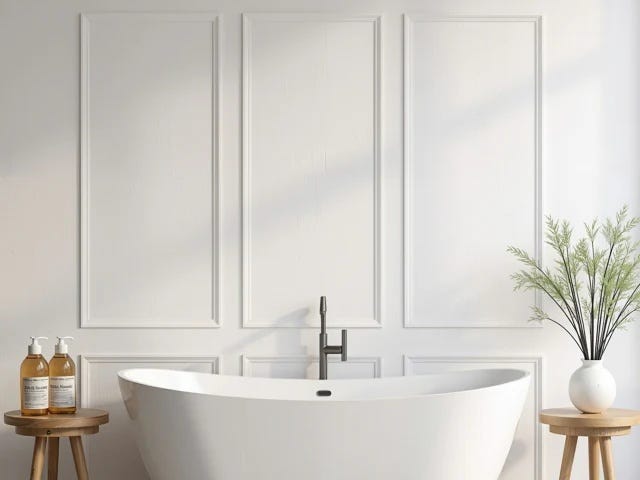
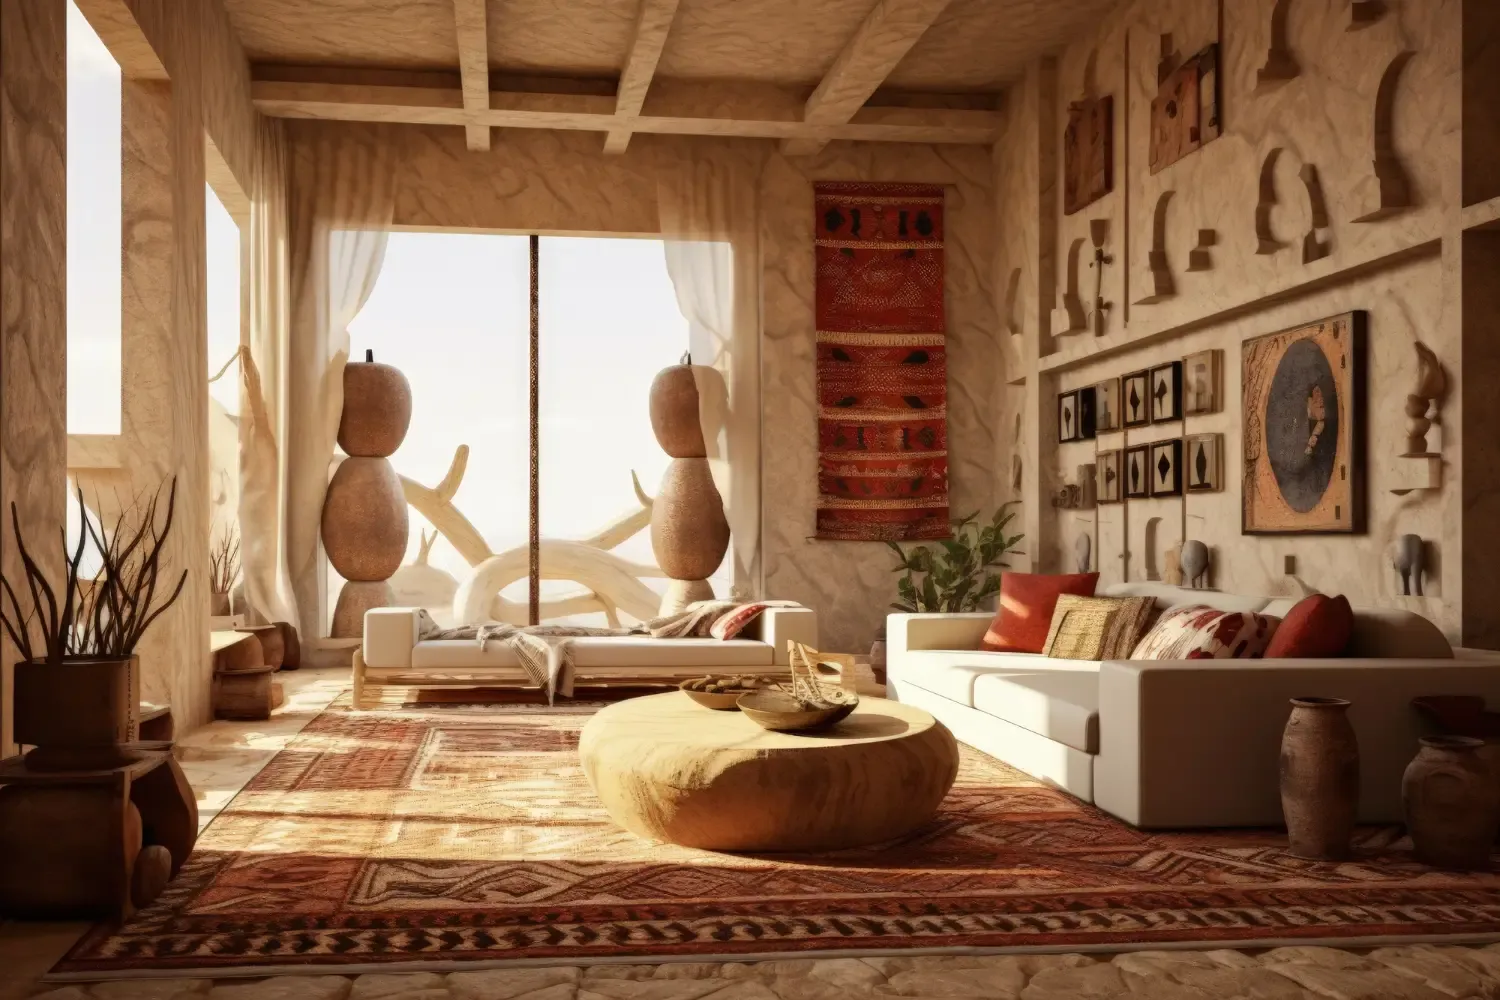
At its core, the allure of wall molding lies in its ability to introduce character and depth to what might otherwise be a flat, unremarkable surface. In modern interiors, where minimalism often reigns, molding provides a counterbalance of warmth and visual weight. It breaks up large expanses of wall, creating panels that can be painted in complementary or contrasting colors to establish a dynamic focal point. Whether you opt for the classic simplicity of a single picture rail, the formality of chair rail molding paired with paneling below, or the intricate geometry of a full wall grid, molding adds a layer of intentionality to your decor. It frames your space much like a picture frame enhances a photograph, giving your furniture and artwork a structured and intentional setting. This architectural detail communicates a sense of craftsmanship and attention to detail, instantly elevating the perceived value and elegance of any room, from a cozy home office to a formal dining area.
Key Components of a High-Quality Molding Kit
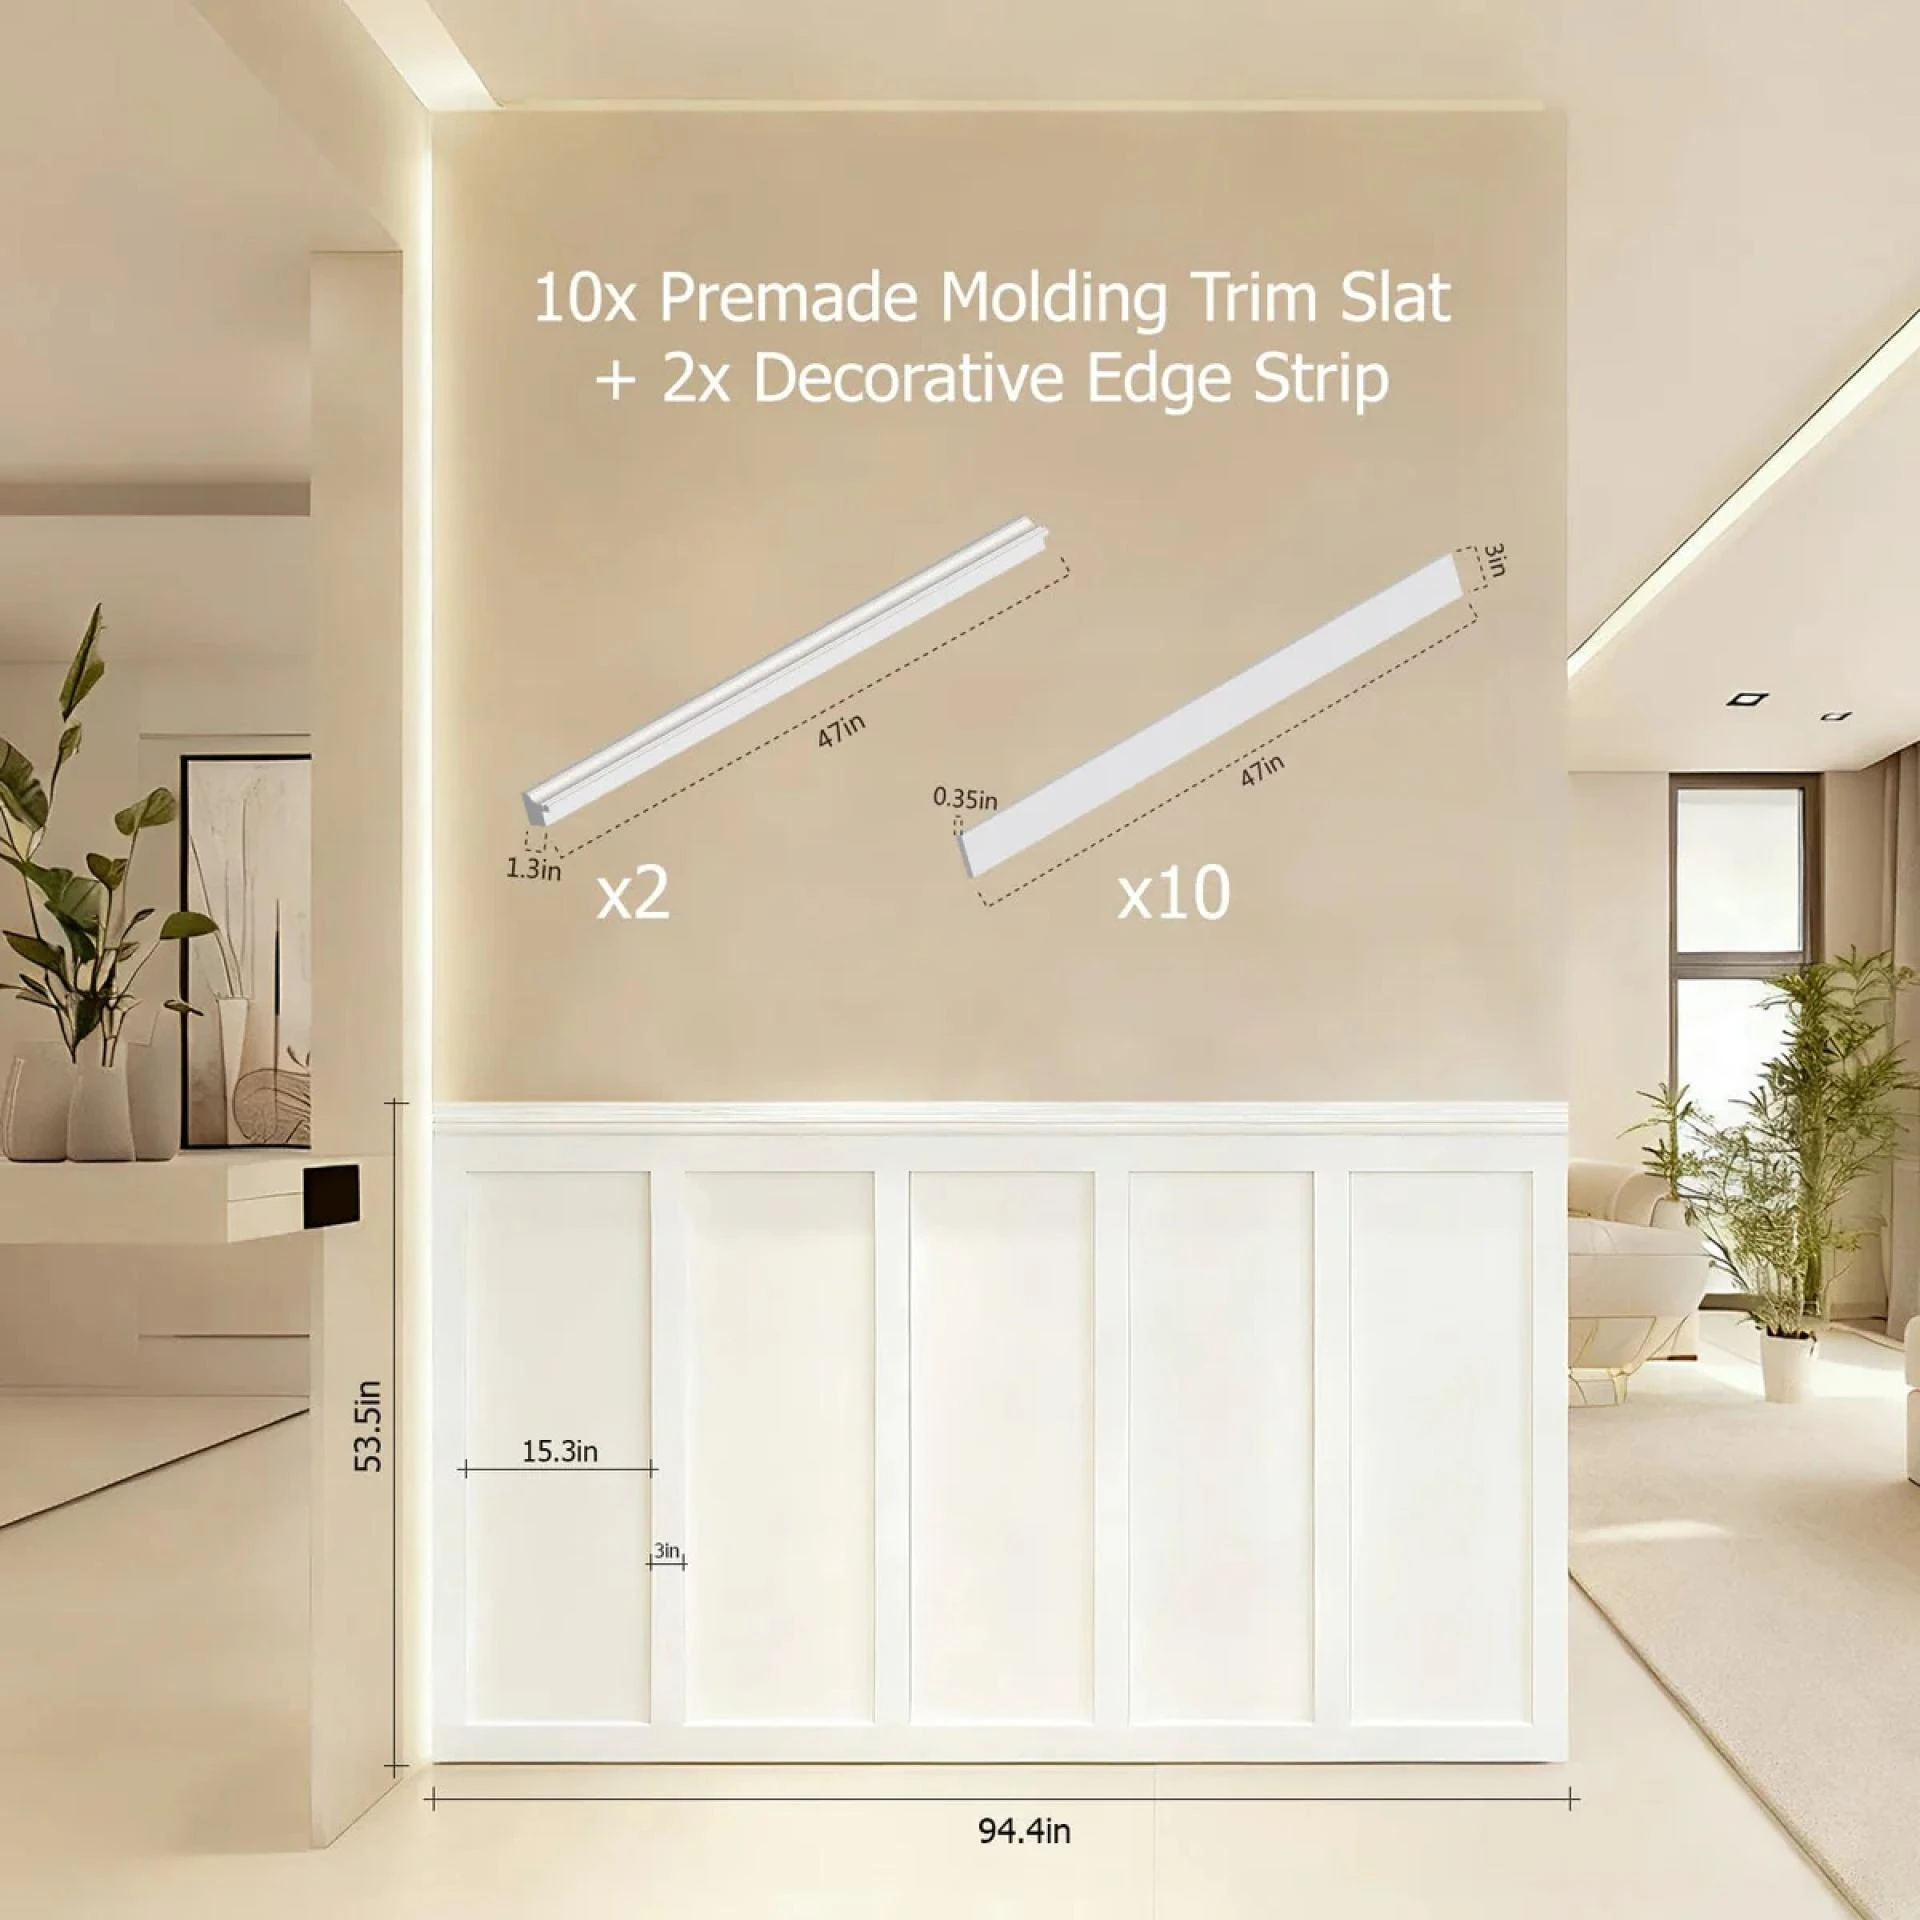
The genius of a premium wall molding kit is its all-in-one nature, designed to take the guesswork out of a complex project. Unlike sourcing materials piecemeal from a hardware store, a quality kit provides a cohesive system of components engineered to work together seamlessly. The primary material is often high-density polyurethane or PVC, favored over traditional wood for its dimensional stability, meaning it won’t warp, crack, or swell with changes in humidity. A comprehensive kit typically includes the main molding profiles in various lengths, pre-cut or easily-scribed corner pieces, and specialized adhesive formulated for strong, long-lasting bonds on drywall. Furthermore, premium kits often come with filler material and detailed templates or cutting guides. This thoughtful curation of materials ensures that the homeowner receives everything necessary for a successful installation, promising a uniform look and professional-grade durability that paint and caulk alone cannot achieve.
Preparing Your Space for a Seamless Installation
The foundation of any successful DIY project is thorough preparation, and installing a wall molding kit is no exception. Before the first piece of molding is cut or adhered, the wall itself must be in optimal condition. This begins with clearing the room or at least moving furniture away from the work area to provide ample space. The next critical step is to carefully inspect the walls. Any imperfections, such as nail holes, dents, or bumps, should be filled with spackle and sanded smooth to create a perfectly flat canvas. It is also essential to clean the wall surface to remove any dust or grease, ensuring maximum adhesion for the molding glue. Prior to opening the adhesive, a dry layout is highly recommended. Using a level and a pencil, you can map out the placement of your panels directly on the wall, marking stud locations if necessary for extra support with heavier profiles. This planning phase is invaluable, allowing you to visualize the final design and make any necessary adjustments before committing to the permanent installation.

Step-by-Step Guide to Applying Your Molding Kit
With the walls prepped and the design mapped out, the installation process can begin, transforming your room one piece at a time. The first step is to cut your molding pieces according to the measurements from your dry layout. For clean, precise corners, a miter saw is the ideal tool, but a quality miter box and fine-toothed hand saw can also yield excellent results. Once your pieces are cut, apply the recommended adhesive to the back of the molding in a serpentine pattern, ensuring full coverage near the edges. Press the piece firmly onto the wall along your pencil guidelines and hold it in place for the time specified by the manufacturer, or use painter’s tape to secure it while the adhesive sets. For longer or heavier profiles, using a pin nailer can provide additional support as the glue dries. After all pieces are installed and the adhesive is fully cured, the final step is to seal the seams. Apply a small bead of paintable caulk or the provided filler to the joints between molding pieces and where the molding meets the wall, smoothing it with a damp finger for an invisible, seamless transition.
Painting and Finishing for a Flawless Look
The true magic of wall molding is often revealed in the finishing. A coat of paint unifies the new architectural elements with the wall, creating the seamless, built-in look that defines elegance. It is generally best to paint the entire wall, including the molding, after installation for a uniform finish. Before painting, ensure all caulk and filler are completely dry and lightly sand any rough spots. Applying a high-quality primer is crucial, especially if you are using polyurethane molding, as it ensures the topcoat adheres properly and prevents any discoloration from bleeding through. When it comes to the final paint, you have a choice that can dramatically affect the room’s ambiance. Painting the molding the same color as the wall in a flat or matte sheen creates a subtle, textural effect. Conversely, painting the molding a semi-gloss or high-gloss white while keeping the walls a soft, muted color provides a classic, high-contrast look that highlights the architectural detail and adds a layer of refined sophistication to your home decor.


Sign in to leave a comment.