First-time exhibitors consistently underestimate how much planning a trade show booth demands. Booth space, fabrication, logistics, staffing, and on-site execution all run simultaneously, and a weak link in any one of them affects the performance of the stall. A professional exhibition booth designer handles the full chain, from concept through dismantling, keeping the brand consistent at every touchpoint. This guide covers the planning process as a practical trade show marketing strategy framework, from goal-setting through exhibition booth setup and execution.
Step 1: Define Your Exhibition Goals
Set the objective before booking floor space. Lead generation, brand awareness, a product launch and market expansion each demand a different booth structure, managing hierarchy and staffing model. An exhibitor launching a product needs demo space and a lead capture mechanism. One building brand presence needs a high visual impact over square footage.
Measurable KPIs distinguish productive attendance from vague participation. Set targets in advance: qualified leads collected, demos completed or confirmed meetings. These numbers give your booth designer a concrete brief as opposed to a mood board. Event branding solutions built around a specific commercial objective consistently outperform those constructed around aesthetics alone.
Step 2: Understand Your Target Audience
Visitor demographics at a trade show will be different depending on the industry, seniority and buying stage. Procurement managers at an industrial manufacturing expo judge suppliers differently from retail buyers at a consumer goods show. Identify the decision-maker profile for the specific event before you commit to any design or messaging direction.
Technical buyers want specification detail and hands-on product access. Senior decision-makers with 5 to 10 minutes on the floor need the core value proposition visible from 3 meters without reading anything. Strong exhibition booth design addresses both audiences through spatial zoning and layered visual hierarchy, not by splitting focus between them.
Step 3: Set Your Budget and Resource Plan
Most first-time exhibitors budget for booth based on construction and graphics only. Logistics and freight, electrical connections at the venue, storage charges for packing crates, on-site labour, and equipment rentals all add to the cost that does not appear in the initial design quote. Set aside 12 to 15% of the total as contingency from the start.
Experienced designers know where costs spike unnecessarily and where modular booth systems deliver the same visual quality at 30 to 40% lower build cost than custom one-use structures. A professional exhibition booth designer at the budgeting stage catches hidden expenses before they land as surprises. Reusable modular systems cut per-show spend on every subsequent event.
Step 4: Choose the Right Booth Design Type
Booth type determines floor visibility, visitor access, and total cost. Each format suits a different budget and objective, and the right choice at this stage avoids expensive redesigns later.
Inline Booth
Accessible from one aisle only, inline booths sit in a continuous row with neighbouring exhibitors. Cost-effective for first-time exhibitors with a focused product range and a direct conversation goal.
Corner Booth
Two open sides create double the aisle exposure. Corner positions attract more passive footfall than inline spots at the same square meterage.
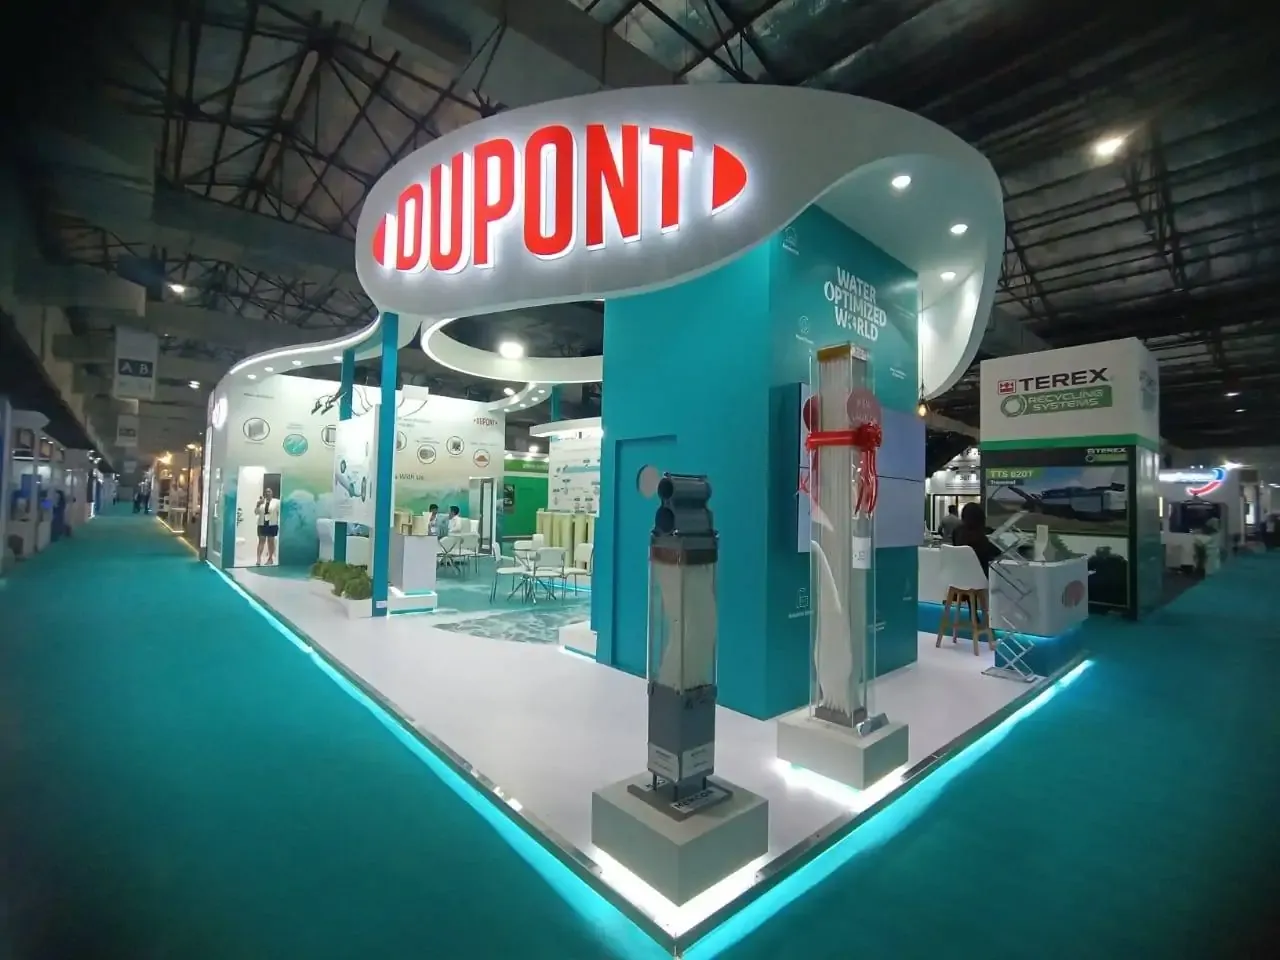
Island Booth
Four open sides with 360 ° visibility. Island configurations support ambitious exhibition booth design with large-format signage readable from 10 to 15 meters across the hall.
Custom Modular Booths
An exhibition booth designer builds modular systems for reconfiguration across different floor sizes and event formats. One structure serves multiple shows over 3 to 5 years.
Double-Decker Booths
Two-level structures separate product display from private meeting space, practical for high-traffic shows where brand presence and client conversations both matter.
Step 5: Create a Strong Booth Design Concept
Branding consistency is the foundation. Logo placement, colour palette and copy tone must all be consistent with the existing brand identity on every surface. Any inconsistency between the booth graphics and website materials will give buyers the impression of being disorganised. Primary messaging needs to be clear at 5 meters.
Lighting does more structural work than most exhibitors plan for. Directed spotlighting on product displays increases dwell time at those areas by a measurable margin. An exhibition booth designer layers ambient, accent, and task lighting to guide visitor attention, rather than illuminating the space evenly and flattening the visual hierarchy.
Step 6: Plan Booth Layout and Visitor Flow
Open entry points, separated functional zones, and a clear sightline from the aisle to the back of the booth define effective spatial planning. Dedicate distinct areas to product display, live demonstrations, and one-on-one discussions; running all three from the same counter creates congestion and drops conversation quality.
Three seconds of visual clarity at the entry point determines whether foot traffic converts to engagement. A visitor who sees no clear reason to step in will not step in. Overcrowding with too many products, too many display boards, and too many staff at the front generates that hesitation.
Step 7: Incorporate Technology and Engagement Tools
Digital screens running 60 to 90-second product videos cut the verbal explanation burden on staff and deliver consistent messaging across every hour of the show. AR and VR demo stations work well for products that cannot appear on the floor in full scale or operating condition. QR codes linked to lead capture forms reduce manual data entry and improve contact accuracy.
Social media walls showing live event hashtag content provide ambient engagement without requiring staff time. Select simple technologies based on the target audience’s comfort level and the operational capacity on the day. A poorly managed feature will damage perception more quickly than not having it.
Step 8: Hire the Right Exhibition Booth Designer
Review portfolio depth across at least two or three industries before shortlisting any designer. Generic booth builders produce generic results. Look for evidence of custom fabrication, on-site installation support, and post-show dismantling coordination. These three services separate full-service designers from suppliers who hand off a flat-pack on delivery day.
A skilled exhibition booth designer presents options at multiple price points without sacrificing quality at the lower end. Single-point-of-contact operations remove the coordination overhead of managing separate vendors for design, print, fabrication, and logistics.
Quick Booth Planning Checklist:
- Goals and KPIs defined
- Target audience documented
- Budget finalised with 12–15% contingency
- Booth type selected
- Design brief signed off with designer
- Technology requirements confirmed
- Layout and visitor flow reviewed
- Staff briefed at least one week before the event
Common Mistakes to Avoid
Overcrowded booths communicate nothing. Exhibitors who display every product variant, every certification, and every brand message on a 9-square-meter stand produce visual noise that buyers walk past. Prioritise one primary message and let everything else support it.
Poor lighting is the second most consistent problem. A booth with strong graphics but flat overhead lighting reads as cheaper than a smaller, well-lit space. Last-minute planning compounds both: fabrication quality drops under compressed timelines, vendor costs rise by 20 to 30 % inside four weeks of the event, and avoidable errors go unfixed. Begin planning at least 12 weeks out.
Conclusion
Each step builds directly on the previous one. Skipping goal-setting leaves the design without a brief; skipping budget planning turns costs into surprises; skipping layout review means the floor experience underdelivers regardless of graphics quality. A professional exhibition booth designer manages the full sequence. Plan your next trade show booth with a structured exhibition booth design brief and secure a measurable presence on the floor.


Sign in to leave a comment.