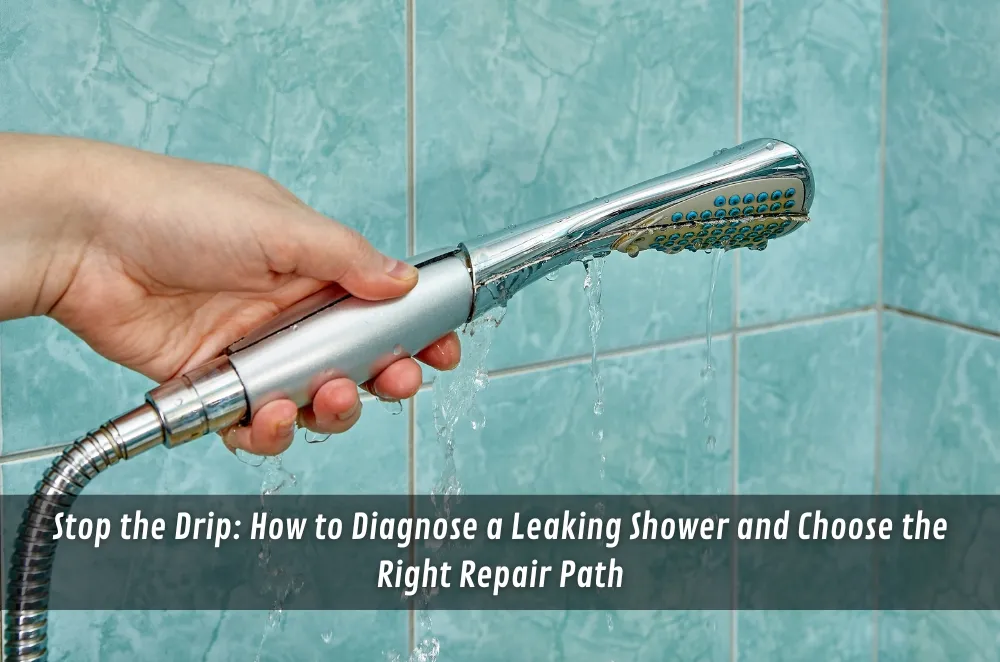
A leaking shower is rarely “just a bit of water.” In Sydney homes and apartments, a slow leak can quietly spread into wall cavities, soften subfloors, stain ceilings below, and leave that stubborn damp smell that never quite shifts.
If you’re looking for a professional leaking shower repair service, the hardest part is often working out what’s actually failing, because the first visible sign is rarely where the water started.
The tricky part is that showers can leak for weeks (or months) before there’s an obvious puddle. By the time paint bubbles or grout lines darken, water has usually been travelling somewhere it shouldn’t.
This guide breaks down what leaking showers look like in real life, what you can check without ripping tiles off, and how to choose the right repair path when the simple fixes don’t stick.
Why leaking showers rarely fix themselves
Most shower leaks aren’t caused by one dramatic failure. They start as minor gaps, hairline cracks, or waterproofing weaknesses that get worse with every shower cycle.
Water is persistent, but it’s also predictable: it follows gravity, wicks along porous materials, and finds tiny paths behind tiles that look perfectly fine from the front.
If the shower is leaking today, the main question isn’t “can I live with it for a bit?” It’s “what’s it doing to the structure behind what I can’t see?”
The common causes and what each looks like
Different causes leave different clues. Getting the likely cause right helps avoid spending money on the wrong fix.
Silicone and junction failures (the “edge” leak)
This is when the leak is coming from transitions: wall-to-floor corners, around the screen, at taps and penetrations, or where a hob meets the floor.
You’ll often see lifting silicone, gaps, mould returning quickly, or water tracking outside the shower after use.
The catch is that silicone can fail because it’s old, or because something behind it is moving, so resealing may be a short-term patch rather than a repair.
Grout and tile cracks (the “surface” leak)
Grout isn’t waterproof. It slows water down, but it doesn’t stop it. When grout cracks, water can get behind tiles faster than usual.
Signs include fine cracking, missing grout, drummy or loose tiles, and grout that stays dark long after the shower is dry.
If water is getting behind tiles, the real defence is the waterproofing membrane underneath, not the grout itself.
Waterproofing membrane failure (the “behind the tiles” leak)
This is the one people hope it isn’t, because it can mean a more involved repair.
Common tells: recurring damp smells, swelling skirting boards outside the bathroom, ceiling stains below the shower, or water appearing in adjacent rooms without obvious splashing.
Membrane failure doesn’t always mean “rip out the whole bathroom,” but it does mean surface fixes are less likely to last.
Shower base and waste issues (the “plumbing-adjacent” leak)
Not every shower leak is waterproofing. Cracked bases, failed puddle flanges, loose wastes, and pipe issues can also present as a “leaking shower.”
You might notice water only during longer showers, water pooling near the drain, or leaks that worsen when the floor flexes.
These can be deceptively hard to pinpoint without a structured inspection, because water may travel before it shows itself.
Quick checks you can do without tearing anything out
You can learn a lot from a few simple observations. The goal isn’t to “DIY a diagnosis,” but to collect clues that narrow the likely cause.
Start by cleaning and drying the area thoroughly, then run a few controlled tests over a couple of days.
- Splash vs seep test: Shower normally, then shower again while deliberately keeping water away from the screen and corners. If the leak only happens with heavy splashing, it may be a screen/junction issue.
- Drain-focused test: Run the shower with water directed mostly toward the drain. If the leak appears even without wetting corners, the waste/base area becomes more likely.
- Moisture pattern check: Look for the first place moisture appears outside the shower (skirting, adjacent wall, ceiling below). Early appearance near one corner often points to that junction.
- Movement check: Gently press on suspect tiles. If they feel hollow or move, water may have compromised the adhesive bed or substrate.
- Sealant condition check: If silicone is split, lifting, or visibly mouldy despite cleaning, it’s a candidate, just don’t assume it’s the only issue.
If you’re in an apartment, also consider what’s below. A ceiling stain in the lot underneath is a strong signal that water is bypassing surface layers.
Common mistakes that make leaks worse
A lot of leaking shower problems become expensive because the early response is understandable, but slightly off target.
Re-siliconing over damp areas. If the substrate is wet, silicone may not bond properly and mould can return quickly.
Assuming grout is waterproof. Regrouting can improve appearance, but it rarely stops a leak caused by membrane failure.
Chasing the symptom instead of the path. Painting over stains, patching a skirting board, or sealing one corner can hide where the water is actually travelling.
Using harsh chemicals to “fix mould.” Strong cleaners can degrade some sealants and finishes. They also don’t address the moisture source.
Waiting for it to get “bad enough.” Leaks don’t announce themselves with a deadline. They quietly damage what’s behind walls, then show up when repairs are bigger.
Decision factors: repair vs partial rebuild vs full renovation
Choosing the right approach comes down to evidence, risk tolerance, and the condition of the existing bathroom.
When a targeted repair is often reasonable
- The leak is localised to a junction or screen area
- There’s no sign of widespread moisture in adjacent rooms
- Tiles are stable and the shower base isn’t flexing
- The bathroom is otherwise in good condition
In these cases, a focused repair can be a sensible way to stop the leak without overcapitalising.
When partial rebuild is worth considering
- Tiles are loose or hollow in multiple areas
- Moisture has spread beyond the shower footprint
- The substrate has softened (movement underfoot, swelling trims)
- There have been repeated “repairs” that didn’t last
Partial rebuilds can address the failing area properly while keeping the rest of the bathroom intact, often a decent middle ground.
When a full renovation becomes the practical option
- The bathroom is near end-of-life (multiple issues, dated services)
- Waterproofing has failed widely
- You want layout changes or major upgrades anyway
- Repairs would be close in cost to doing it once, properly
This isn’t the default answer. It’s the answer when the numbers and the risk line up.
What a professional repair process typically includes
A solid leaking shower repair process is less about a single “magic product” and more about removing uncertainty.
It usually starts with controlled testing and inspection: mapping where moisture appears, checking penetrations, assessing movement, and working out whether the issue is surface-level, membrane-level, or waste/base-related.
From there, repair options can be scoped based on what’s actually failing. Sometimes that’s targeted sealing and junction work, sometimes it’s re-waterproofing a defined area, and sometimes it’s recommending a broader rebuild because the substrate has been compromised.
If the leak is recurring, there’s movement in tiles, or the bathroom smells damp even after cleaning, a structured assessment helps, start with the Pro Leak Waterproofing shower repair guide.
A good process should also spell out constraints. Some “non-invasive” approaches, for example, depend on the existing tile bed being stable; if there’s widespread movement, you’re usually into a different class of repair.
Operator experience moment
One pattern that comes up often is the “fresh silicone loop”: a shower gets resealed, looks better for a few weeks, then the damp smell returns and the mould creeps back along the same line. The issue isn’t effort, it’s that water is already travelling behind the tiles, so the surface fix never had a fair chance. The quickest wins usually come from stopping the water path, not chasing the mark.
A simple 7–14 day action plan
You don’t need to solve everything today, but you do want momentum. Here’s a practical plan that suits most households.
Days 1–2: Observe and document
Take photos of suspect grout lines, corners, screen edges, and any stains outside the shower. Note when the leak shows up (immediately, hours later, only after long showers).
Days 3–5: Run controlled tests
Do the splash vs seep and drain-focused checks. Try to replicate the leak without changing too many variables at once.
Days 6–7: Reduce exposure
Shorten showers, use a bath mat to catch splash-out, and keep the bathroom ventilated. This won’t fix the leak, but it can limit extra moisture while you plan the repair.
Days 8–10: Decide your tolerance for risk
If there are signs of water outside the shower footprint (skirting swelling, ceiling below, damp smell), prioritise professional assessment sooner rather than later.
Days 11–14: Book the right scope
Ask for a clear explanation of likely cause, repair options, and what would change the recommendation (for example: “If we find movement here, the plan shifts to X.”). Avoid vague “we’ll just seal it up” answers when symptoms suggest deeper failure.
Local SMB mini-walkthrough (Sydney, NSW)
In Sydney apartments, a leaking shower can become a strata issue quickly if moisture shows in the ceiling of the lot below.
Older walk-ups often have bathrooms where ventilation is limited, so damp smells can mask an active leak.
Coastal suburbs can see faster sealant degradation from humidity and salt-laden air.
Renovated units sometimes hide shortcuts, new tiles over old problems, so “it looks new” isn’t always a good signal.
If there’s a tenant involved, fast documentation helps keep maintenance decisions clean and reasonable.
When trades access is tight (parking, building rules, lift bookings), planning the scope upfront avoids repeat visits.
Practical Opinions
Fix the cause you can prove, not the symptom you can see.
If a repair depends on “hoping nothing behind the tiles is wet,” treat it as a hold, not a finish line.
When there’s movement, smell, or staining beyond the shower, escalate the approach early.
Key Takeaways
- Leaking showers usually worsen over time because water keeps finding paths behind surfaces.
- Grout and silicone failures are common, but they’re not always the root cause.
- Controlled tests help narrow the problem without demolition.
- Repeated resealing is a red flag that something deeper may be failing.
- A clear scope and constraints matter more than “quick fix” promises.
Common questions we get from Aussie business owners
How do you tell if it’s the shower screen or waterproofing?
Usually the pattern gives it away: if leaks happen mainly with splashing near the screen and corners, it can point to junctions and screen edges, while damp smells, stains below, or moisture in adjacent rooms suggest deeper issues. A practical next step is to run a splash-controlled shower test and document where water appears. In Sydney apartments, checking the ceiling below (if applicable) can provide an early clue.
Can regrouting or resealing stop a leaking shower?
It depends on what’s failing. Regrouting and resealing can help if the issue is localised and the substrate is sound, but they won’t reliably solve a membrane failure or movement-related problem. A practical next step is to check for hollow or shifting tiles and persistent damp smell after drying out the bathroom. In most cases around older NSW bathrooms, recurring mould in the same line is a hint that water is getting behind the tiles.
Is a leaking shower always a full bathroom renovation?
In most cases, no, especially if the bathroom is otherwise in good shape and the leak is confined to a specific area. The practical next step is to confirm whether moisture has spread outside the shower footprint (skirting, adjacent walls, ceiling below). In Sydney, strata and access constraints sometimes make targeted repairs more appealing when they’re technically sound.
What should landlords or property managers do first?
Usually the best first step is to document symptoms and timing, then reduce the risk of escalation by arranging a proper assessment rather than repeating cosmetic fixes. A practical next step is to log photos, tenant notes, and any visible staining, and to limit shower use if the leak is active. In NSW rentals, clear documentation helps speed up maintenance approvals and reduces friction if strata involvement is needed.


Sign in to leave a comment.