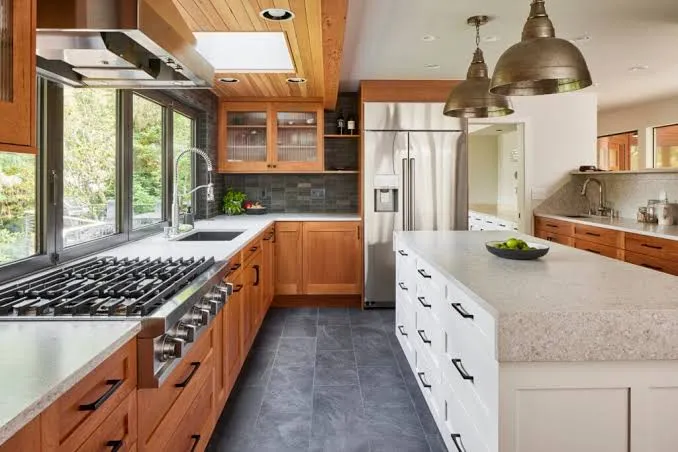

A kitchen remodel can improve how your home looks, functions, and supports everyday life. It can also involve dozens of interconnected decisions—from the layout and cabinetry to plumbing, electrical work, flooring, lighting, and final finishes.
Without a clear plan, homeowners may encounter delayed materials, unexpected expenses, design conflicts, and last-minute changes. A detailed kitchen remodeling checklist helps keep the project organized and ensures important decisions are made at the right time.
Whether you are making a few targeted upgrades or planning a complete kitchen renovation, use this checklist to guide your project from the first idea to the final walkthrough.
Phase 1: Define Your Remodeling Goals
Before selecting cabinets or comparing countertop samples, identify what you want the remodel to accomplish.
Consider what is not working in your current kitchen. You may need more storage, better lighting, additional counter space, improved traffic flow, or a layout that feels more connected to nearby living areas.
Ask yourself:
- Who uses the kitchen most often?
- How frequently do you cook?
- Do multiple people prepare meals at the same time?
- Do you need more seating?
- Do you regularly entertain guests?
- Which appliances must remain?
- What storage problems need to be solved?
- Are accessibility or aging-in-place features important?
- How long do you expect to remain in the home?
- Which existing features would you like to keep?
Separate your goals into three categories:
Must-haves
These are essential improvements that solve major functional problems, such as replacing failing cabinets, improving electrical capacity, or correcting an inefficient layout.
Nice-to-haves
These features would improve the kitchen but are not essential. Examples include a beverage station, pot filler, built-in pantry, or decorative range hood.
Future possibilities
These are ideas that may be completed later if they do not fit the current budget or construction scope.
Establishing priorities early makes it easier to evaluate design choices and control costs.
Concept checklist
- Identify the main problems with the existing kitchen
- Define your functional priorities
- List your must-have features
- List optional upgrades
- Determine who will use the kitchen
- Consider future household needs
- Save inspiration photos
- Decide which existing elements may remain
Phase 2: Establish a Realistic Budget
Your remodeling budget should account for more than cabinets, countertops, and appliances. Labor, design work, permits, demolition, plumbing, electrical work, structural modifications, and finish materials can all affect the total investment.
Create an overall spending range before finalizing the design. Then divide the budget into project categories.
Common kitchen remodeling expenses include:
- Design and planning
- Demolition and debris removal
- Permits and inspections
- Structural modifications
- Cabinetry
- Countertops
- Appliances
- Plumbing fixtures
- Electrical upgrades
- Lighting
- Flooring
- Backsplash tile
- Painting
- Finish carpentry
- Hardware
- Labor
- Temporary kitchen arrangements
Include a contingency allowance for conditions that may not be visible before demolition. Older homes may contain outdated wiring, damaged subfloors, hidden plumbing problems, or walls that require additional work.
A contingency fund gives you greater flexibility when unexpected issues arise.
Avoid building a budget around promotional prices or online estimates alone. Remodeling costs depend on the kitchen’s size, material selections, layout changes, structural requirements, and local labor conditions.
Budget checklist
- Set a comfortable overall investment range
- Separate essential costs from optional upgrades
- Include design and permit expenses
- Account for labor and installation
- Include delivery and disposal costs
- Create a contingency allowance
- Determine how the project will be financed
- Avoid ordering products before the complete scope is established
Phase 3: Evaluate the Existing Space
Accurate information about the current kitchen is essential for effective planning.
Measure the room and document the locations of:
- Walls
- Doors
- Windows
- Ceiling heights
- Plumbing lines
- Electrical outlets
- Switches
- Appliances
- HVAC vents
- Gas connections
- Structural columns
- Adjacent rooms
Your contractor may need to determine whether walls are load-bearing and whether structural beams will be required to create an open layout.
It is also important to evaluate the condition of the subfloor, walls, plumbing, electrical system, and ventilation. Some of these conditions may not be fully visible until demolition begins, but an experienced contractor can identify many potential concerns during the initial evaluation.
Existing-space checklist
- Measure the room
- Record ceiling heights
- Locate doors and windows
- Document plumbing and gas connections
- Identify the electrical panel capacity
- Locate HVAC vents
- Determine whether walls may be structural
- Inspect visible flooring and moisture damage
- Photograph the existing kitchen
- Note access routes for materials and equipment
Phase 4: Hire the Right Kitchen Remodeling Contractor
Choosing a qualified contractor is one of the most important decisions in the remodeling process.
Your contractor will coordinate multiple trades, manage scheduling, oversee construction quality, address unexpected conditions, and help ensure the work follows the approved plan.
When evaluating kitchen remodeling contractors, ask about:
- Licensing and insurance
- Experience with similar kitchen projects
- Design and planning services
- Permit management
- Structural work
- Plumbing and electrical coordination
- Project supervision
- Communication procedures
- Written estimates
- Payment schedules
- Warranty coverage
- References and completed projects
Review the proposed scope carefully. It should clearly explain which work, materials, and services are included.
Be cautious of estimates that are unusually low or lack detail. An incomplete estimate may exclude necessary work that later appears as an additional cost.
Contractor checklist
- Confirm licensing and insurance
- Review completed kitchen projects
- Ask for client references or reviews
- Discuss who will manage the project
- Confirm how frequently updates will be provided
- Review the written scope of work
- Understand the payment schedule
- Ask who will obtain permits
- Review warranty information
- Confirm how changes will be documented and approved
Phase 5: Finalize the Kitchen Layout
A beautiful kitchen can still be frustrating when its layout does not support everyday tasks.
Think about the relationship between the refrigerator, sink, cooktop, preparation areas, pantry, and waste storage. Frequently used features should be positioned to reduce unnecessary movement.
Your layout options may include:
One-wall kitchen
Cabinets and appliances are arranged along one wall. This configuration is often used in apartments, open-concept spaces, and smaller homes.
Galley kitchen
Two parallel runs of cabinets create an efficient work area. Proper aisle width is important, especially when more than one person uses the kitchen.
L-shaped kitchen
Cabinets occupy two adjoining walls. This layout can provide good traffic flow and space for an island or dining table.
U-shaped kitchen
Cabinets are installed along three walls, creating substantial work and storage space.
Kitchen with an island
An island can provide additional seating, preparation space, storage, or appliance locations. It must be appropriately sized so that doors and drawers can open without obstructing walkways.
Before approving the layout, imagine completing common tasks such as unloading groceries, preparing meals, using the dishwasher, and serving guests.
Layout checklist
- Confirm the location of major appliances
- Plan comfortable walkways
- Check appliance-door clearances
- Check cabinet and drawer clearances
- Include landing space near appliances
- Position waste storage near preparation areas
- Plan seating without blocking movement
- Identify frequently used storage zones
- Confirm the island size and location
- Review the final layout with your contractor
Phase 6: Plan Storage Around Your Needs
Kitchen storage should be designed around the items you actually own and use.
Take inventory of your cookware, dishes, food storage containers, small appliances, pantry items, cleaning products, and serving pieces.
Helpful storage features may include:
- Deep drawers for pots and pans
- Pull-out pantry shelves
- Tray dividers
- Spice drawers
- Corner cabinet organizers
- Appliance garages
- Drawer inserts
- Waste and recycling pull-outs
- Vertical baking-sheet storage
- Under-sink organizers
- Rollout shelves
- Island storage
- Glass-front display cabinets
Frequently used items should be stored close to where they are needed. For example, cookware belongs near the range, while dishes and utensils may be most convenient near the dishwasher.
Storage checklist
- Inventory existing kitchen items
- Identify items that can be donated or discarded
- Plan pantry storage
- Include deep drawers where practical
- Add organizers for difficult corners
- Select a waste and recycling location
- Plan small-appliance storage
- Include tray and baking-sheet dividers
- Decide whether open shelving is appropriate
- Confirm that plumbing will not consume excessive cabinet space
Phase 7: Select Cabinets and Hardware
Cabinetry has a major influence on the kitchen’s appearance, functionality, and overall cost.
Cabinet options generally include stock, semi-custom, and custom products. The right choice depends on your budget, desired features, construction quality, and room dimensions.
When comparing cabinets, consider:
- Cabinet-box construction
- Door material
- Drawer construction
- Hinges and slides
- Interior finishes
- Storage accessories
- Warranty coverage
- Lead times
- Installation requirements
Choose a door style and finish that coordinate with the architecture of your home. Shaker-style cabinetry, natural wood finishes, and balanced neutral colors can provide a versatile foundation.
Cabinet hardware should be comfortable to use and properly sized for the doors and drawers. Purchase a few samples and evaluate them in the kitchen before placing the full order.
Cabinet checklist
- Choose stock, semi-custom, or custom cabinetry
- Approve the door style
- Approve the finish or paint color
- Review cabinet-box and drawer construction
- Select internal storage accessories
- Choose knobs, pulls, or a combination
- Verify hardware sizes
- Approve finished end panels and trim
- Confirm appliance-panel requirements
- Review the final cabinet order before production
Phase 8: Choose Countertops and Backsplash Materials
Countertops must balance appearance, durability, maintenance, and cost.
Popular materials include:
- Quartz
- Granite
- Quartzite
- Marble
- Butcher block
- Porcelain
- Solid-surface materials
Consider how each material responds to heat, scratches, stains, moisture, and daily cleaning. Examine full slabs whenever possible, particularly when selecting natural stone with significant color or pattern variation.
The backsplash should complement the cabinets and countertops without competing with them. Options include ceramic tile, porcelain tile, natural stone, glass, and full-height countertop material.
Finalize the countertop before selecting the exact backsplash color. Countertop undertones may influence which tile looks best in the completed room.
Surface-material checklist
- Compare countertop maintenance requirements
- View full slabs when possible
- Select the countertop edge profile
- Confirm countertop thickness
- Choose the sink installation style
- Approve countertop overhangs
- Select backsplash material
- Choose the tile layout
- Select grout color
- Order additional tile for future repairs
Phase 9: Select Appliances Early
Appliance dimensions directly affect cabinetry, countertops, plumbing, electrical work, ventilation, and the overall layout.
Choose appliances before the final cabinet order is approved. Provide complete specification sheets to your designer and contractor.
Decisions may include:
- Standard or counter-depth refrigerator
- Freestanding or built-in refrigerator
- Gas, electric, or induction cooktop
- Freestanding or wall oven
- Built-in or countertop microwave
- Standard or panel-ready dishwasher
- Under-cabinet or decorative range hood
- Beverage refrigerator
- Ice maker
- Warming drawer
Make sure the electrical system, gas supply, water lines, ventilation, and cabinetry are compatible with the selected models.
Appliance checklist
- Select all major appliances
- Save specification sheets
- Confirm appliance dimensions
- Review electrical requirements
- Review gas requirements
- Confirm water-line locations
- Plan ventilation
- Check appliance-door clearances
- Coordinate panel-ready models with cabinetry
- Confirm delivery and installation responsibilities
Phase 10: Plan Plumbing, Electrical, Lighting, and Ventilation
Utility planning should happen before walls are closed and finishes are installed.
Your electrical plan may need to address:
- Appliance circuits
- Countertop outlets
- Island outlets
- Under-cabinet lighting
- Pendant lighting
- Recessed lighting
- Interior cabinet lighting
- Charging stations
- Smart switches
- Dimmer controls
The plumbing plan should identify the locations of the sink, dishwasher, refrigerator water line, disposal, pot filler, and any additional fixtures.
Proper ventilation is also essential. A range hood should be selected and installed according to the kitchen layout, cooking equipment, and applicable requirements.
Utility checklist
- Create a lighting plan
- Identify switch locations
- Confirm outlet locations
- Review appliance power requirements
- Plan island electrical service
- Confirm plumbing-fixture locations
- Select the sink and faucet
- Plan refrigerator and dishwasher connections
- Select the range hood
- Review ventilation routing
- Confirm required inspections
Phase 11: Select Flooring and Paint
Kitchen flooring should be durable, easy to clean, and appropriate for the surrounding rooms.
Common options include:
- Hardwood
- Engineered wood
- Luxury vinyl plank
- Porcelain tile
- Ceramic tile
- Natural stone
If the kitchen opens into another room, consider whether the flooring should continue throughout the space. Consistent flooring can make an open-concept area feel larger and more connected.
Paint colors should be evaluated alongside the cabinets, countertops, backsplash, flooring, and lighting. Test samples in the actual room and observe them at different times of day.
Finish checklist
- Choose a durable flooring material
- Determine whether adjacent flooring must be matched
- Confirm transition locations
- Select wall and ceiling paint
- Test paint samples in the room
- Select trim and molding profiles
- Coordinate finishes across all materials
- Confirm material quantities and availability
Phase 12: Obtain Permits and Approvals
Kitchen remodels involving structural changes, electrical work, plumbing modifications, gas lines, or mechanical systems may require permits and inspections.
Permit requirements vary according to the project and local jurisdiction. Confirm who will prepare the applications, obtain approvals, schedule inspections, and address corrections if they are required.
Do not begin work that requires authorization until the appropriate approvals have been obtained.
Permit checklist
- Determine which permits are required
- Confirm who will submit applications
- Obtain structural documentation when necessary
- Confirm inspection stages
- Keep approved plans accessible
- Do not conceal work before required inspections
- Retain final approval records
Phase 13: Order Materials and Confirm the Schedule
Do not schedule demolition simply because the design is complete. Confirm that critical materials have been ordered and that their expected arrival dates support the construction schedule.
Long-lead products may include:
- Custom cabinets
- Specialty appliances
- Plumbing fixtures
- Decorative lighting
- Imported tile
- Custom windows
- Range hoods
- Cabinet hardware
- Specialty flooring
A single delayed item can prevent several later stages from moving forward.
Your contractor should create a general construction sequence and explain which decisions must be completed before each phase begins.
Preconstruction checklist
- Approve the final scope
- Approve the construction drawings
- Finalize all major selections
- Order long-lead materials
- Confirm delivery dates
- Verify where materials will be stored
- Establish the payment schedule
- Review the anticipated construction sequence
- Exchange contact information
- Confirm the planned start date
Phase 14: Prepare Your Home for Construction
Kitchen remodeling can temporarily affect cooking, dining, cleaning, and access through the home.
Set up a temporary kitchen with essential items such as:
- A microwave
- Coffee maker
- Toaster oven
- Electric kettle
- Compact refrigerator
- Disposable or reusable dishes
- Basic utensils
- Simple pantry foods
Remove dishes, food, cookware, artwork, and personal belongings from the construction area. Protect nearby furniture and identify a safe route for workers and materials.
Discuss dust control, pets, children, parking, security, and daily cleanup with your contractor before work begins.
Home-preparation checklist
- Empty cabinets and drawers
- Remove food and fragile items
- Set up a temporary kitchen
- Protect nearby belongings
- Plan meals during construction
- Establish a safe route for workers
- Make arrangements for children and pets
- Discuss dust-control procedures
- Confirm working hours
- Identify the location of water and electrical shutoffs
Phase 15: Follow the Construction Process
Although every project is different, a full kitchen renovation commonly follows this general sequence:
- Site protection and preparation
- Demolition
- Structural modifications
- Framing
- Plumbing, electrical, and HVAC rough-ins
- Required inspections
- Insulation and drywall
- Painting preparation
- Flooring installation
- Cabinet installation
- Countertop measurement and fabrication
- Countertop installation
- Backsplash installation
- Appliance installation
- Plumbing and electrical fixture installation
- Trim, hardware, and finish work
- Touch-ups and cleanup
Maintain regular communication with your project manager. When a decision or change is needed, document it clearly before the related work proceeds.
Avoid making informal field changes without understanding how they may affect the cost, schedule, materials, and other parts of the design.
Construction checklist
- Maintain regular communication
- Review progress at agreed intervals
- Document requested changes
- Approve cost or schedule changes in writing
- Keep children and pets away from work areas
- Avoid interfering with unfinished work
- Report concerns promptly
- Keep project documents organized
Phase 16: Complete the Final Walkthrough
Near the end of construction, walk through the kitchen with your contractor and create a list of remaining items.
Inspect:
- Cabinet alignment
- Door and drawer operation
- Hardware installation
- Countertop seams
- Caulking
- Tile and grout
- Paint and trim
- Plumbing fixtures
- Lighting
- Switches and outlets
- Appliances
- Flooring
- Ventilation
- Final cleaning
Test each appliance, faucet, light, drawer, door, outlet, and switch.
Ask for care instructions, warranty documents, paint information, appliance manuals, spare materials, and final permit records.
Completion checklist
- Conduct a detailed walkthrough
- Create a written completion list
- Test appliances
- Test plumbing fixtures
- Test lighting and outlets
- Inspect cabinets and countertops
- Inspect flooring, paint, and tile
- Confirm final corrections
- Collect warranties and manuals
- Save leftover tile, paint, and flooring
- Obtain final permit records
- Confirm final payment requirements
Common Kitchen Remodeling Mistakes to Avoid
Even a carefully planned project can encounter problems when major decisions are overlooked.
Common mistakes include:
- Starting demolition before materials are available
- Choosing appliances after ordering cabinets
- Underestimating storage needs
- Installing an island that is too large
- Failing to plan adequate lighting
- Overlooking ventilation
- Ignoring outlet locations
- Selecting materials based only on appearance
- Making frequent changes during construction
- Failing to include a contingency allowance
- Hiring a contractor based only on the lowest estimate
- Approving an incomplete scope of work
Taking time during the planning stage can help prevent costly changes once construction has started.
Bring Your Kitchen Remodel From Concept to Completion
A successful kitchen renovation requires much more than selecting attractive finishes. It requires clear goals, realistic budgeting, accurate measurements, thoughtful design, coordinated material selections, qualified construction, and consistent communication.
Following a structured checklist helps ensure that decisions are completed in the correct order and that each part of the kitchen works together.
Hill Residential Contractors provides full-service kitchen remodeling for homeowners throughout Gwinnett County and North Atlanta. From design and permitting to structural modifications, cabinetry, countertops, plumbing, electrical work, flooring, tile, and final finishes, the team coordinates the entire renovation under one organized plan.
Ready to transform your kitchen? Contact Hill Residential Contractors to schedule a consultation and start planning a kitchen that fits your home, lifestyle, and long-term goals.

























Sign in to leave a comment.