Beanies are the ultimate winter accessory. But what makes them special? The answer lies in their versatility.
There are several ways to customize a beanie. Some people choose to knit their own beanies. Others prefer to purchase ready-made beanies and custom printed products.
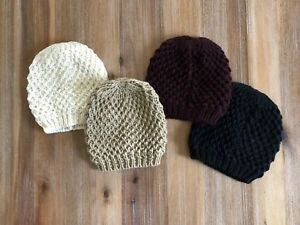
A beanie is a hat or covering worn over the ears and around the neck. They are usually knitted or crocheted and are often associated with cold weather.
To make a perfect beanie, you need to knit a basic pattern and add some details. The two most important techniques are knitting and crochet.
Making of Beanies: Step by Step
Beanies are a great way to stay warm during cold weather. They come in various styles and colors, and they are usually very affordable.
There are lots of ways to knit a beanie, but the easiest method is to crochet. Crochet is a type of knitting where you create loops instead of stitches. The result is a soft, cozy hat.
Crocheting a beanie is easier than you might think. In fact, you don’t even need special equipment or skills. All you need is some yarn, needles, and a pattern.
If you want to make a perfect beanie, follow these simple steps:
1- Start With The Right Material:
The first thing you need to do before you start making your beanie is to choose the right material. You can use any type of fabric, but cotton is the best choice.
You want something that has a nice soft feel to it and is not too thick. If you are looking for a thicker beanie, then you might have to look into other materials like fleece or cotton.
Fleece comes in a wide range of colors, patterns, and weights. Choose your custom printed products fleece based on how much warmth you need and how you want to express your particular style.
It's your choice whether or not to use buttons, sequins, or jewels as later-stage embellishments.
2- Choose Your Colors Wisely:
Once you have your beanie fabric, you can move on to choosing your colors. There are many different ways to go about this. You could choose a color scheme that represents your favorite team or band.
Or maybe you would prefer to use a color scheme that represents the season. Whatever you decide to do, make sure that you stick with just three or four colors. Too much going on can get confusing and make it less attractive.
3- Decide Yarn Size:
Measure your head. The average adult head is 21 to 23 inches (53.3 to 58.4 cm). A 58.4-cm (23-inch) hat design should work for the majority of individuals since the fleece has some stretch to give flexibility.
Choosing the proper beanie size is very important. This way, you won't be stuck with a hat that doesn't fit correctly. Also, if you want to knit a hat for yourself, then you should choose a smaller size than what you would normally wear. This way, you will get perfect Custom Printed Products.
4- Cut Out Your Design Neatly:
Now, you can start cutting out your design. Remember to keep your design simple and small. This way, you won't have to worry about having too many stitches.
Follow the pattern with sharp scissors to cut through both layers of fleece. Repeat on another cloth stretch, ideally near to the previous cut, to make four domes. Ensure the pattern doesn't shift as you cut. Using sewing needles to pin everything down will help keep it all in place.
4- Add Some Stretch:
Suppose you are using a different fabric than fleece. It is good to add some extra stretch to your custom Printed Products. You should go for some elastic bands for the beanie. These bands will help to give the beanie some added flexibility and allow it to fit better on your head.
5- Don't Forget Colorful Pom-Poms:
Adding colorful pom-poms to your beanie makes it look much better. You can add some bright colors like reds, greens, blues, etc.
Voila! It’s Ready:
You can wear a beanie any time of the year, but they are especially useful during colder months. Whether you want to stay warm or simply look cute, these versatile accessories and custom Printed Products are perfect for every occasion.
0


Sign in to leave a comment.