Creating an attractive and functional outdoor space begins with the right foundation. Whether designing a patio, pathway, or garden area, paving slabs are one of the most reliable and aesthetically pleasing materials available. Among the various sizes, 2x2 paving slabs are particularly popular due to their balanced proportions, ease of handling, and suitability for both large and small outdoor projects. Installing them properly can transform an ordinary garden into a beautiful, durable, and low-maintenance area.
This detailed guide explains how to lay 2x2 paving slabs step by step, covering everything from planning and preparation to finishing and maintenance.
Understanding 2x2 Paving Slabs
What Are 2x2 Paving Slabs
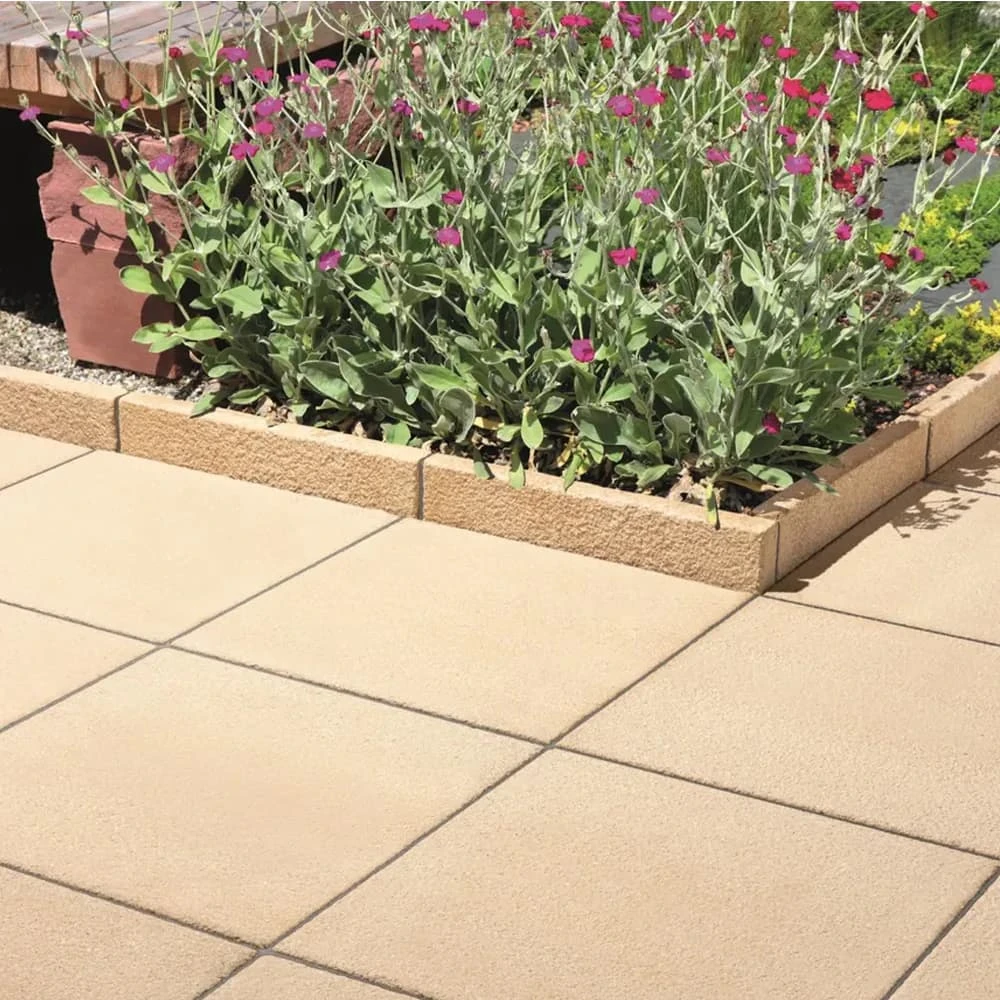
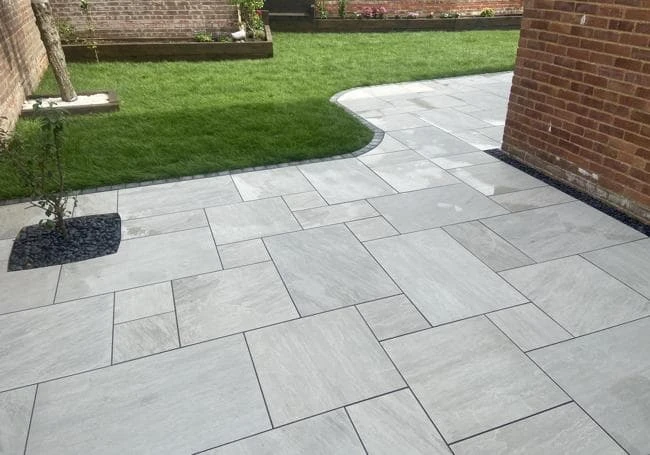
2x2 paving slabs refer to square paving stones that measure approximately 600 millimetres by 600 millimetres. They are widely used in landscaping projects for patios, garden paths, seating areas, and driveways. Available in various materials such as concrete, natural stone, and porcelain, these slabs combine practicality with visual appeal.
Benefits of Using 2x2 Paving Slabs
The size of 2x2 slabs makes them easy to install and manage without heavy machinery. They offer a uniform appearance, are cost-effective, and can be arranged in different patterns. Additionally, they provide a stable and smooth surface that can withstand heavy foot traffic and outdoor conditions.
Planning the Project
Measuring the Area
Before starting the installation, measure the space where the slabs will be laid. Accurate measurements help determine how many slabs are needed and reduce the risk of buying too few or too many. Multiply the length by the width of the area to calculate the total square metres, then divide this by the area of one slab to find the required quantity.
Choosing the Right Slabs
The material and colour of the paving slabs should complement the overall style of the outdoor space. Concrete slabs are durable and affordable, while natural stone slabs add a timeless and sophisticated look. Porcelain slabs are perfect for a modern aesthetic and are highly resistant to stains and fading.
Preparing the Tools and Materials
To lay 2x2 paving slabs successfully, gather the following materials and tools before starting:
- 2x2 paving slabs
- Shovel and rake
- Spirit level
- Rubber mallet
- Tape measure
- String line and stakes
- Compactor or hand tamper
- Sand, cement, and gravel
- Wheelbarrow and trowel
Having everything ready makes the process smoother and prevents unnecessary interruptions.
Preparing the Ground
Step 1: Clearing the Area
Start by clearing the ground of any plants, debris, or old materials. Ensure that the surface is free of obstructions. If laying slabs over grass or soil, dig to a depth of around 150 millimetres to create enough space for the sub-base, sand, and slab layers.
Step 2: Setting the Levels
Mark out the area using stakes and string to establish the layout and levels. The surface should have a slight slope of about 1 in 60 to allow rainwater to drain away from buildings. Use a spirit level to check the gradient as you set up the string lines.
Step 3: Adding the Sub-Base
A stable sub-base provides the foundation for the paving. Spread a layer of compacted hardcore or crushed stone about 100 millimetres thick. Compact it thoroughly using a vibrating plate compactor or hand tamper until it forms a firm and level surface. This prevents the slabs from sinking or shifting over time.
Creating the Bedding Layer
Step 1: Mixing the Mortar
Prepare a mortar mix using four parts sharp sand to one part cement. Add water gradually until the mixture has a firm yet workable consistency. Avoid making it too wet, as this can weaken the bond between the slab and the base.
Step 2: Laying the Bedding
Spread the mortar onto the compacted sub-base to form a bed about 40 millimetres thick. Use a trowel to create an even surface and ensure consistent coverage beneath each slab. The bedding layer helps secure the slabs and ensures they sit level.
Laying the 2x2 Paving Slabs
Step 1: Positioning the First Slab
Begin laying the slabs from one corner of the area, using the string line as a guide. Carefully lower the first 2x2 paving slab onto the mortar bed, positioning it with precision. Use a rubber mallet to tap it gently into place until it is level and sits evenly with the desired slope.
Step 2: Checking Levels and Alignment
After positioning the first slab, use a spirit level to check that it is perfectly aligned both horizontally and vertically. This first slab serves as a reference point for the rest of the layout, so it is essential to ensure it is correct.
Step 3: Continuing the Pattern
Lay additional slabs beside the first one, leaving a small gap of around 10 millimetres between each to allow for jointing. Continue placing slabs row by row, regularly checking levels and alignment to maintain a consistent pattern. Adjust the mortar bed where needed to ensure an even surface.
Step 4: Cutting Slabs for Edges
If the area requires partial slabs along the edges, use a slab cutter or angle grinder fitted with a diamond blade. Measure carefully before cutting to ensure precise fitting. Always wear protective gear such as gloves, goggles, and a dust mask during this process.
Filling the Joints
Step 1: Preparing the Jointing Material
Once all the slabs are laid, fill the gaps between them with a jointing compound or a mix of sand and cement. For a simple dry jointing method, use kiln-dried sand brushed into the gaps. For a more permanent solution, a wet jointing compound offers better stability.
Step 2: Applying the Jointing Material
Using a soft brush, sweep the jointing material across the surface, ensuring that all gaps are filled completely. For a wet mix, apply it with a trowel and press it into the joints. Remove any excess material to prevent staining the surface of the slabs.
Step 3: Finishing Touches
Lightly mist the area with water if using dry sand to help it settle. Allow the joints to dry fully before walking on the slabs. Avoid heavy loads or traffic for at least 48 hours to ensure the mortar sets properly.
Sealing and Maintaining the Slabs
Applying a Sealer
Once the paving is dry and clean, applying a suitable sealant helps protect the slabs from stains, algae, and weathering. Sealing also enhances the colour and makes cleaning easier. Always choose a sealer designed for the specific slab material.
Regular Cleaning
To maintain the appearance of the slabs, sweep them regularly to remove dirt and leaves. For deeper cleaning, use warm water mixed with mild detergent and a soft brush. Avoid using harsh chemicals that may damage the surface.
Weed and Moss Control
Even with proper installation, weeds can sometimes grow between joints. Use a natural weed remover or boiling water to control growth without damaging the slabs or surrounding plants.
Common Mistakes to Avoid
- Skipping the sub-base, which can lead to uneven and unstable paving.
- Using a weak mortar mix, resulting in loose slabs.
- Neglecting drainage, which may cause water pooling.
- Failing to maintain consistent levels, leading to an uneven surface.
- Walking on newly laid slabs before the mortar has set.
By avoiding these mistakes, homeowners can ensure their 2x2 paving slabs remain strong, stable, and visually appealing for years to come.
Additional Design Ideas
Creating Patterns
Although 2x2 paving slabs are uniform in size, they can be arranged in different layouts to enhance visual interest. Popular options include the grid pattern, stretcher bond, and diamond layout. Combining slabs with gravel or decorative edging adds depth and character.
Mixing Materials
For a creative touch, combine 2x2 slabs with smaller stones, bricks, or contrasting materials. This approach works particularly well for pathways, courtyards, and patio borders, giving the outdoor space a unique personality.
Conclusion
Laying 2x2 paving slabs is a rewarding DIY project that significantly improves the appearance and functionality of outdoor spaces. With careful preparation, accurate measurements, and attention to detail, it is possible to achieve a professional-quality finish without hiring a contractor. These slabs provide a timeless and durable surface that complements any landscape design, from modern patios to classic garden paths.
For those looking for top-quality materials and expert advice for their paving project, Darlaston Builders Merchants offers a wide range of 2x2 paving slabs to suit every style and budget.


Sign in to leave a comment.