Screen Printing 101 | Emulsion & Coating | Beginner Friendly
If you've ever coated a screen and ended up with blurry prints, pinholes, or emulsion that just won't wash out cleanly — you're not alone. Screen coating is one of those steps that looks simple on the surface, but has a lot going on underneath. Get it right, and everything downstream gets easier. Get it wrong, and no amount of perfect exposure time or great artwork will save your print.
The good news? You don't need to be a chemist or own a ton of fancy equipment. You just need to understand a handful of core principles — and once they click, coating screens becomes one of the most predictable parts of your whole workflow.
In this post, we're breaking down 9 essential principles of consistent screen coating — written for beginners, but useful for printers at every level. Let's get into it.
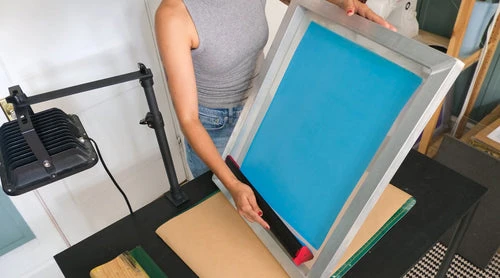
🖨️ Quick Vocab Check — What Is Screen Coating? Screen coating is the process of applying liquid emulsion to your mesh screen before exposure. The emulsion acts as your stencil — it fills in the areas you DON'T want ink to pass through. A good coat = a clean, sharp stencil. A bad coat = all kinds of problems down the line. |
| 01 | Emulsion Builds Up on the Opposite Side |
Here's something that trips up a lot of beginners: when you coat a screen, the emulsion doesn't just sit where you put it. It actually migrates to the opposite side of the mesh during the wet-on-wet coating process.
What does this mean practically? Start by coating the substrate side first (that's the side that touches your shirt), then follow up with a coat on the squeegee side. The act of coating the squeegee side actually pushes emulsion through the mesh and builds up thickness on the substrate side — right where you want it.
A great sign that you've done this correctly? When you hold the screen up to the light, the substrate side should have a nice, even gloss to it. That sheen means the emulsion has fully encapsulated the mesh threads — which is exactly what you're going for.
| 💡 Pro Tip: A standard starting point for most jobs is 2 coats on the substrate side + 1 coat on the squeegee side (often written as "2+1"). This is a great baseline when you're learning. |
| 02 | Finer Mesh = More Coats Required |
Not all mesh counts are created equal — and the mesh count you use directly affects how many coats of emulsion you'll need.
Think of it like this: coarser mesh (like a 110 or 160) has larger openings, so emulsion flows through and builds up more easily. Finer mesh (like a 230 or 305) has tiny, tightly-packed openings that restrict emulsion flow — meaning you need more coats to achieve the same emulsion thickness.
| Mesh Count | Type of Use | Recommended Coats | Notes |
| 40–110 | Glitter, chunky ink | 2+1 | Large openings fill fast |
| 137–160 | General plastisol | 2+1 | Great starting point |
| 200–230 | Fine detail / halftones | 2+2 | May need extra coats |
| 280–305 | Very fine detail / CMYK | 2+2 or more | Emulsion flows slowly |
| 💡 Pro Tip: If you're just getting started, a 137 or 160 mesh is the most forgiving option. It works for most general-purpose plastisol printing and doesn't require as many coats to get a solid stencil. |
| 03 | Your Scoop Coater Edge Matters More Than You Think |
Here's something that often gets overlooked by beginners: your scoop coater (the tool you use to apply emulsion to the screen) has two different edges — and which edge you use makes a real difference in how much emulsion ends up on your screen.
Round edge: Deposits more emulsion. Great for building up thickness during your base coats. Think of it like spreading peanut butter with a spoon — you get a lot more on there.
Sharp edge: Deposits less emulsion. Designed for precision — ideal for thin, smooth face coats on top of a dried base (more on that in Principle 5).
Also important: the fill level inside your scoop coater matters. If you run low on emulsion mid-stroke, you'll end up with a thinner coat at the top of your screen than at the bottom. This creates an uneven stencil — which leads to inconsistent prints. Keep that coater well-filled!
| 💡 Pro Tip: Fill your scoop coater generously before each pass. The weight of the emulsion pressing against the mesh actually helps push it into the openings for a more even coat. |
| 04 | Always Keep Your Coater Well-Filled |
This one sounds almost too simple, but it's a mistake that causes a surprising number of coating problems. If you've ever had a screen that looks thick and good at the bottom but thin and uneven toward the top — a half-empty scoop coater is usually the culprit.
Here's why: as you pull the coater up the screen, the emulsion inside depletes. As the level drops, less emulsion is being pushed against the mesh, and your coat gets thinner. By the time you reach the top of the screen, you've barely got any coverage.
The fix is simple: refill your scoop coater between coats (or at least check the level before starting a new pass). For larger screens, you may need to refill mid-coat. Don't skip this — it only takes a few seconds and it'll save you from reclaiming and recoating screens down the road.
| ⚠️ Common Mistake: A half-empty coater is one of the most common causes of uneven emulsion and wasted screens. Keep it topped up — always! |
| 05 | Fine Details Need Thin, Smooth Emulsion Layers |
If you're printing fine details — like tight text, thin lines, or halftone dots — you need a smooth, consistent emulsion surface. Thick or uneven emulsion can blur your edges and make fine details impossible to hold.
For this kind of work, your standard wet-on-wet approach may not be enough on its own. One proven technique is called a face coat: you apply your normal base coats, let the screen dry completely, and then apply one additional thin coat on the substrate side using the sharp edge of your scoop coater.
This face coat fills in any small surface imperfections and creates a super-smooth printing surface. For the cleanest fine-detail prints, you can repeat this process up to three times (dry between each coat). The result is an incredibly flat, even stencil that holds even the smallest details.
📐 When Should You Use a Face Coat? Face coats are especially helpful for: halftone printing, photographic or gradient artwork, small text (under 12pt), and fine line work. For bold, simple graphics, a standard 2+1 wet-on-wet coat is usually all you need. |
| 06 | Use the Sharp Edge for Face Coats |
Building on Principle 5 — when you DO apply a face coat, always use the sharp edge of your scoop coater. Here's why: a face coat is meant to fill tiny surface voids in your dried emulsion, not add a thick new layer on top.
The sharp edge acts almost like a squeegee — it skims across the dried surface and deposits just enough emulsion to fill in the gaps, without adding excess thickness. The round edge would deposit too much emulsion and could actually create an uneven surface instead of smoothing it out.
Think of it like sanding and finishing wood. Your base coats are the sanding — building up the material. The face coat with the sharp edge is the finish — smoothing it all down to a clean, polished surface.
| 💡 Pro Tip: If your scoop coater only has one edge, you can still adjust by changing your angle and speed. A steeper angle with a faster stroke deposits less emulsion — mimicking what the sharp edge does. |
| 07 | Consistency Is Everything — Angle, Speed & Pressure |
Here's a truth that every screen printer eventually learns the hard way: it doesn't matter if you know all the right techniques if you apply them differently every single time. Consistency is the secret ingredient to great screen coating.
Three variables have the biggest impact on how much emulsion lands on your screen:
• Angle: The angle of the scoop coater against the screen. Tilt it more toward the screen = more emulsion. More upright = less.
• Speed: How fast you pull the coater up. Faster = less emulsion and more risk of bubbles. Slower = more emulsion deposited.
• Pressure: How firmly you press the coater against the mesh. Too little = streaky, uneven coating. Too much = you can damage the mesh.
The goal is to find a combination that works for your setup and then repeat it the exact same way every single time. Some printers even use a coating stand to remove the variable of holding the screen by hand — which can introduce subtle wobble and pressure changes.
| 💡 Pro Tip: Try this: coat a screen, note the angle, speed, and pressure you used, and write it down. Reference those notes every time until the motion becomes muscle memory. Consistency = repeatability. |
| 08 | Wet-On-Wet Coating Works Great for Most Jobs |
Wet-on-wet coating sounds fancy, but it's actually what most beginners do naturally — you apply one coat, then immediately apply another while the first is still wet. No drying between coats.
The good news: for the vast majority of screen printing jobs (standard plastisol on t-shirts, hoodies, bags, etc.), wet-on-wet coating is all you need. A simple 2+1 approach — 2 coats on the substrate side, 1 coat on the squeegee side, all done wet-on-wet — gives you a solid, reliable stencil with a thickness tolerance of about ±2 microns.
You only need to get fancier (like the face coat technique from Principles 5 and 6) when you're chasing super fine detail or specialty print effects. For everyday printing, keep it simple.
✅ The Beginner-Friendly Coating Formula For most standard jobs: 2 coats on the substrate side (shirt side) + 1 coat on the squeegee side, done wet-on-wet. Apply coats immediately back to back without drying in between. Dry horizontally, substrate side down. That's it! |
| 09 | Always Dry Your Screens Substrate-Side Down |
Last one — and it's deceptively important. After you finish coating your screen, how you dry it determines where the emulsion settles.
Here's the science in plain English: gravity pulls the wet emulsion downward. When you dry the screen horizontally with the substrate side facing down, emulsion naturally flows toward the substrate side — which is exactly where you want the thickest part of your stencil to be.
If you dry it substrate-side UP, the emulsion migrates to the squeegee side instead. That means your print surface ends up too thin, and your squeegee side ends up too thick. This leads to ink bleed, loss of detail, and frustrating print quality issues.
The rule is simple: substrate side down, always. If you're using a screen drying rack or cabinet, make sure screens are oriented correctly before you walk away.
| 💡 Pro Tip: Face coats can be dried in any position since they're being applied to an already-dry base coat. But for your initial wet-on-wet coats — substrate side down, no exceptions! |
Quick Reference: All 9 Principles at a Glance
| # | Principle | Key Takeaway |
| #1 | Emulsion Builds Up on the Opposite Side | Coat substrate side first, follow with squeegee side |
| #2 | Finer Mesh Needs More Coats | Higher mesh count = more coats to reach same thickness |
| #3 | Scoop Coater Edge Matters | Round edge = more emulsion; Sharp edge = less emulsion |
| #4 | Keep Your Coater Well-Filled | Depleted emulsion = thin, uneven coats at the top of screen |
| #5 | Fine Details Need Thin Layers | Use face coats for halftones, fine text, and detail work |
| #6 | Sharp Edge for Face Coats | Sharp edge smooths dried base without adding too much thickness |
| #7 | Consistency Is Everything | Same angle, speed & pressure = same results every time |
| #8 | Wet-On-Wet Works for Most Jobs | 2+1 wet-on-wet is your go-to for everyday screen printing |
| #9 | Dry Substrate-Side Down | Gravity pulls emulsion down — dry screens correctly or stencil suffers |
Putting It All Together
Screen coating doesn't have to be complicated. Yes, there's science behind it — emulsion thickness, mesh open area, surface tension — but at the end of the day, most of it boils down to a few simple habits:
• Know your mesh count and adjust your number of coats accordingly
• Use the right edge of your scoop coater for the job
• Keep your coater filled and maintain a consistent technique
• Dry your screens substrate-side down, every single time
• Save the fancy face coats for when you actually need them — fine detail work
Follow these nine principles, and you'll end up with screens that expose cleanly, hold up on press, and produce sharp, consistent prints run after run. That's the goal and now you've got the roadmap to get there.
Shop Related Products
Got questions about screen coating? We're always here to help. Drop a comment below or shoot us an email at [email protected]. And if you're stocking up on emulsion, scoop coaters, or screens, check out what we've got in stock at Screen Print Direct — we carry everything you need to get coating with confidence.
"This content is originally posted at- screenprintdirect.com do check it out.


Sign in to leave a comment.