Managing your business finances with QuickBooks Enterprise is a smart move. But if you are still running it on a local desktop or office server, you may be limiting your team's productivity, security, and flexibility. Moving to cloud hosting is no longer a luxury it is quickly becoming a necessity for businesses that need remote access, stronger data protection, and seamless collaboration.
Making the move is far simpler than most business owners expect. This guide walks you through everything you need to know to transition to cloud-based QuickBooks Enterprise smoothly and without disruption.
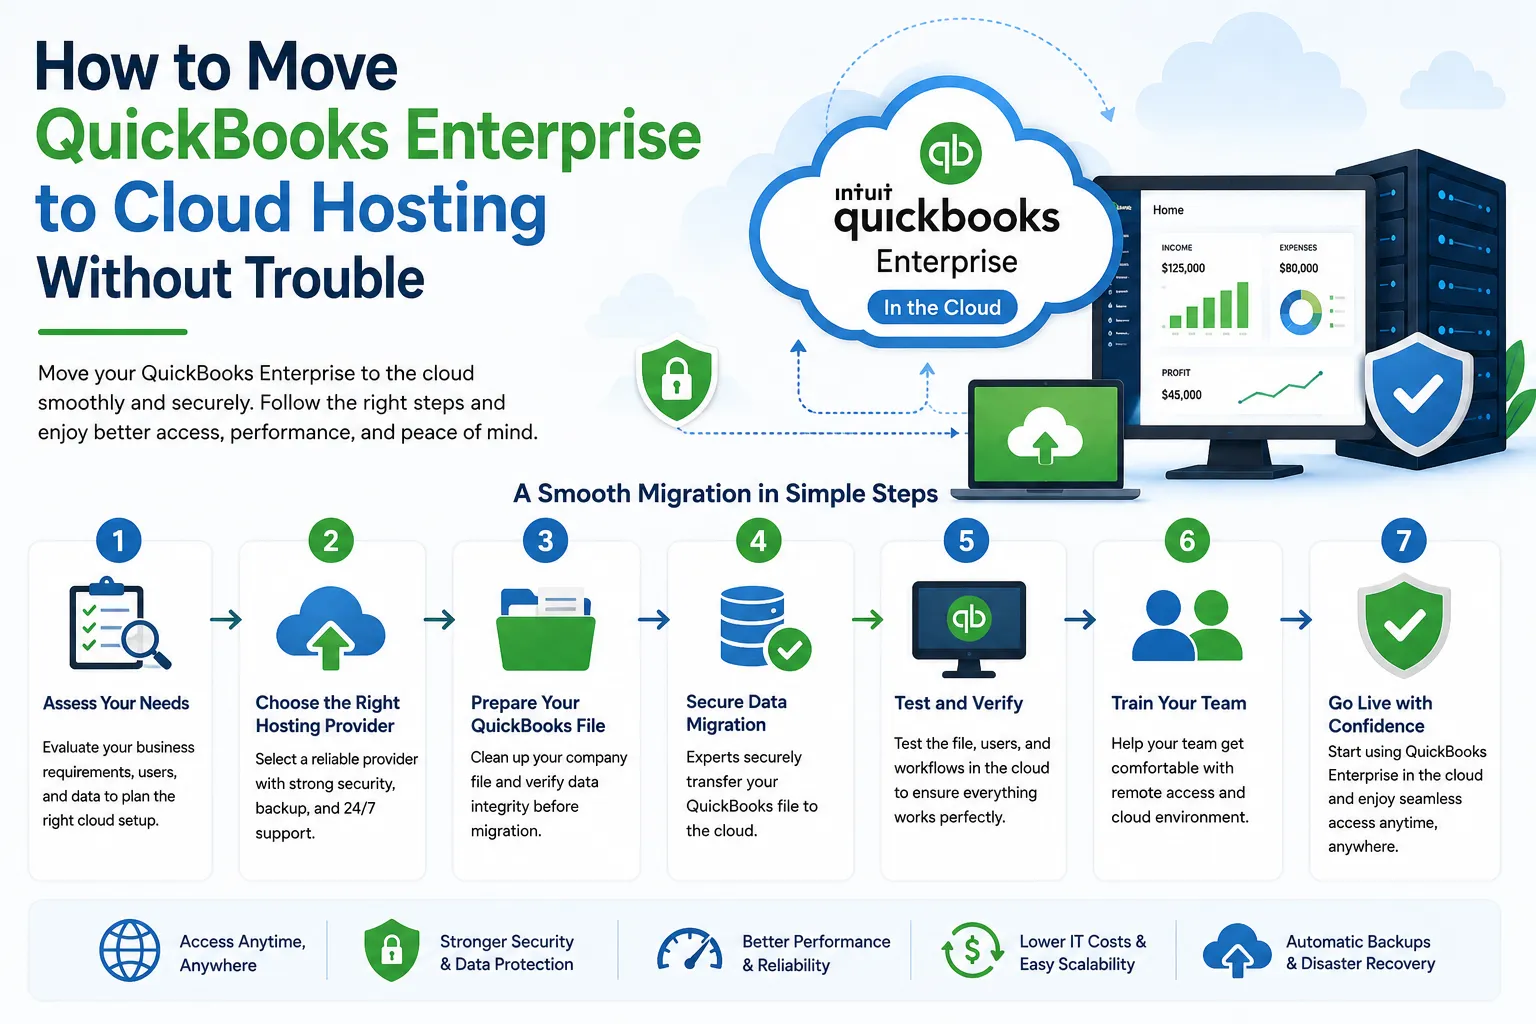
Why Move QuickBooks Enterprise to the Cloud?
Before diving into the steps, it helps to understand what you are gaining from the move.
Running QuickBooks Enterprise on a local server means your team is tied to a single location. If someone works remotely, travels, or needs after-hours access, they hit a wall. Cloud hosting eliminates that barrier entirely. Your team can log in from a PC, Mac, Chromebook, tablet, or smartphone from anywhere with an internet connection.
Beyond access, cloud hosting also means your data is stored in enterprise-grade, SOC 2 Type II certified data centers with daily automated backups, SSL encryption, and multi-factor authentication. That level of security is nearly impossible to replicate with an in-house server.
And from a cost perspective, moving to the cloud removes the burden of maintaining physical hardware, paying for IT support, and worrying about server failures during peak accounting season.
Step 1: Choose an Intuit-Authorized Hosting Provider
Not all hosting providers are equal. The first and most important step is selecting a provider that is officially authorized by Intuit. An Intuit-authorized host has been vetted for security, reliability, and compliance which means your QuickBooks license terms are fully honored in a cloud environment.
When comparing providers, look for these factors:
- SOC 2 Type II certified data centers
- 99.9% or higher uptime guarantee
- 24/7 customer support via phone, chat, and email
- SSD-powered infrastructure for faster performance
- No extra charges for third-party app integrations
- Flexible month-to-month pricing with no long-term contracts
A reliable quickbooks hosting provider will also offer dedicated plans that scale with your team size from single-user setups to teams of 30 or more users — so you only pay for what you need.
Step 2: Select the Right Hosting Plan
Cloud hosting plans for QuickBooks Enterprise typically come in two varieties: session-based and dedicated.
Session-based hosting is ideal for single users who primarily need QuickBooks and Microsoft Office. It runs on shared resources, keeping the cost low while delivering a smooth experience.
Dedicated hosting gives your team its own virtual machine with fixed RAM, vCPUs, and storage. This is the right choice if you have two or more users, run third-party apps like Bill.com, Expensify, or TSheets alongside QuickBooks, or need custom application installations.
For QuickBooks Enterprise specifically, dedicated hosting is almost always the better fit. Enterprise is a feature-rich, resource-intensive application especially when multiple users access it simultaneously. A dedicated environment ensures performance stays consistent even during busy periods like tax season or month-end closes.
Step 3: Back Up Your QuickBooks Company Files
Before making any move, back up everything. Open QuickBooks Enterprise on your current machine and create a full local backup of your company files. Store this backup in at least two locations an external drive and a cloud storage service like OneDrive or Google Drive.
This step protects you in the unlikely event that anything goes wrong during the migration. Think of it as your safety net.
Step 4: Migrate Your Data to the Cloud Desktop
Once your hosting plan is active, your provider will set up a cloud desktop environment for you. Most Intuit-authorized quickbooks hosting providers handle the migration on your behalf, typically completing it within 24 to 48 hours.
The process generally involves:
- Your provider provisions your virtual desktop
- QuickBooks Enterprise is installed on the cloud desktop
- Your company files are transferred and restored
- The provider tests everything before handing it over to you
If you prefer to migrate yourself, the process is straightforward. Install your QuickBooks Enterprise version on the virtual desktop just as you would on a physical machine, then restore your company files from the backup you created in Step 3.
Step 5: Set Up Users and Permissions
With QuickBooks Enterprise now live on the cloud, it is time to configure user access. Each team member will need their own individual login credentials — both for the cloud desktop itself and for QuickBooks. Make sure each user has a valid QuickBooks license for the version and edition they will be using.
Work with your hosting provider to enable multi-factor authentication for every account. This adds a critical layer of security, ensuring that even if login credentials are ever compromised, unauthorized access is blocked.
Step 6: Connect Your Third-Party Apps
One of the biggest advantages of moving to a cloud desktop for QuickBooks Enterprise is the ability to run your full software ecosystem in one place. Apps like Bill.com for accounts payable, Expensify for expense tracking, TSheets for time management, and Fishbowl for inventory all integrate seamlessly with QuickBooks on a cloud desktop.
Check with your quickbooks hosting provider whether they charge extra for hosting additional applications alongside QuickBooks. The best providers include third-party app support at no additional cost, which can represent significant savings over time.
Step 7: Train Your Team and Go Live
The final step is getting your team comfortable with the new setup. The good news is that a well-configured cloud desktop looks and feels exactly like a regular Windows desktop. Your team opens QuickBooks Enterprise the same way they always have the only difference is they can now do it from anywhere.
Run a short orientation session to walk team members through logging in, connecting local printers or devices, and knowing who to contact for support. Most users adapt within a day or two.
Common Concerns — Answered
Will I lose any QuickBooks features? No. Cloud hosting runs the full QuickBooks Enterprise desktop application. Every feature, report, and industry-specific edition works exactly as it does locally.
What internet speed do I need? A minimum of 4 Mbps per user is sufficient for standard work. For teams running large reports simultaneously, 10 Mbps or more per user keeps things running smoothly.
What happens to my data if I cancel? Your company files are yours. Before cancellation, you can download them directly from the cloud desktop to your local machine no exit fees, no delays.
Final Thoughts
Moving QuickBooks Enterprise to cloud hosting does not have to be complicated or disruptive. With the right Intuit-authorized provider, the transition can be completed in 24 to 48 hours with zero data loss and minimal downtime. What you gain in return remote access, enterprise-grade security, multi-user collaboration, and freedom from local server maintenance far outweighs the effort of making the switch.
If your business is ready to work smarter, more securely, and from anywhere in the world, cloud hosting for QuickBooks Enterprise is the logical next step.


Sign in to leave a comment.