
When it comes to a successful flooring project, preparation is key. Proper subfloor preparation ensures your laminate flooring looks great, lasts longer, and performs optimally. Whether you’re tackling a DIY project or hiring professionals, understanding how to prepare your subfloor is a critical step before installing laminate flooring.
Why Subfloor Preparation Matters
The subfloor is the foundation of your laminate flooring. If it’s uneven, damaged, or contaminated, your flooring may buckle, creak, or wear prematurely. Preparing the subfloor properly provides:
- Stability: Prevents movement or shifting of laminate planks.
- Longevity: Reduces wear and tear, extending the life of your flooring.
- Smooth Finish: Ensures a flat surface for a seamless installation.
- Moisture Protection: Helps prevent water damage and warping, especially in kitchens and bathrooms.
Step 1: Remove Existing Flooring
Before installing laminate flooring, remove any old flooring materials such as carpet, vinyl, or tile. This allows you to inspect the subfloor and ensure it’s clean and level.
Tips:
- Pull up carpet and underlayment carefully to avoid damaging the subfloor.
- Remove any nails, staples, or adhesives leftover from previous flooring.
- For tile or concrete floors, consider using a floor scraper to remove adhesives.
Step 2: Inspect the Subfloor
After clearing the area, inspect the subfloor for damage or imperfections. Look for:
- Cracks or Holes: Fill with a suitable patching compound.
- Uneven Areas: High or low spots can cause laminate planks to warp or buckle.
- Moisture Issues: Check for water stains, damp spots, or mold.
Tip: Use a long level or straightedge to identify uneven areas. The subfloor should be flat within 3/16 of an inch over a 10-foot span.
Step 3: Clean the Subfloor
A clean subfloor is essential for a smooth installation. Dirt, dust, or debris can create bumps or gaps under your laminate planks.
Steps:
- Sweep or vacuum thoroughly to remove dust and debris.
- Wipe the surface with a damp cloth if necessary.
- Allow the subfloor to dry completely before proceeding.
Step 4: Repair and Level the Subfloor
Uneven or damaged subfloors must be repaired before installing laminate flooring.
- Filling Gaps and Cracks: Use a floor patch or leveling compound for minor cracks or holes.
- Sanding High Spots: Sand down raised areas to ensure a flat surface.
- Self-Leveling Compound: For large dips or uneven areas, a self-leveling compound can provide a perfectly flat surface.
Tip: Follow the manufacturer’s instructions for drying times before proceeding with flooring installation.
Step 5: Address Moisture Concerns
Laminate flooring is sensitive to moisture. Preparing the subfloor with proper moisture protection can prevent warping or mold growth.
- Concrete Subfloors: Use a moisture barrier or vapor retarder before installing laminate.
- Wood Subfloors: Ensure no leaks or water damage exist and repair as needed.
- Basements or Moist Areas: Consider using a waterproof underlayment for added protection.
Step 6: Install Underlayment
Most laminate flooring requires an underlayment, which provides:
- Cushioning: Makes the floor more comfortable underfoot.
- Sound Reduction: Reduces noise when walking on laminate.
- Moisture Barrier: Protects against minor moisture issues.
Choose the underlayment recommended by your laminate flooring manufacturer. Roll it out smoothly and tape seams according to instructions.
Step 7: Acclimate the Laminate Flooring
Before installing laminate flooring, let the planks acclimate to the room’s temperature and humidity. This prevents expansion or contraction after installation.
Tips:
- Leave the planks in the room for 48 hours.
- Keep the room at normal living temperature during this period.
- Stack the planks flat to avoid warping.
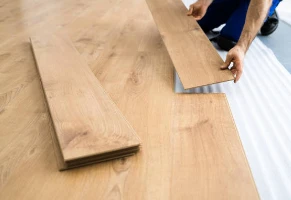
Step 8: Plan Your Layout
Proper layout planning ensures your flooring looks professional and minimizes waste.
- Measure the room to determine the number of rows and plank lengths needed.
- Plan to stagger the seams for a natural wood look and structural stability.
- Avoid having narrow planks at the edges; adjust row width as needed.
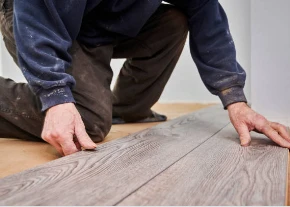
Step 9: Final Check
Before starting installation:
- Ensure the subfloor is clean, dry, and level.
- Confirm that underlayment is in place and seams are taped.
- Have all necessary tools ready: spacers, saw, measuring tape, tapping block, and pull bar.
With these steps completed, you’re ready to start installing laminate flooring confidently, knowing that your foundation is solid.
Conclusion
Properly preparing your subfloor is a crucial step for a successful laminate flooring project. From removing old flooring and cleaning the subfloor to leveling, moisture protection, and installing underlayment, each step ensures that your laminate flooring will perform beautifully for years to come.
For homeowners seeking expert guidance, high-quality laminate products, and professional advice, Honest And Affordable Flooring is a trusted resource. Their team can help you choose the right materials and provide tips to make installing laminate flooring in your home both efficient and effective.


Sign in to leave a comment.