In today's space-constrained environments from urban office buildings and compact meeting rooms to retail locations and residential installations maximizing every square foot has become essential for AV integrators delivering professional system deployments. A properly implemented wall mount Audio Visual (AV) rack combined with strategic cable management transforms challenging small space installations into efficient, organized, and highly functional AV systems that rival much larger deployments.
The critical challenge facing AV integrators in small spaces isn't simply fitting equipment into limited square footage it's creating accessible, maintainable, thermally efficient installations that don't sacrifice functionality for space savings. Knowing how to mount Audio Visual (AV) rack on wall correctly, while implementing professional cable management strategies, enables integrators to reclaim valuable floor space, improve system organization, enhance equipment accessibility, and deliver installations that meet demanding performance requirements despite spatial constraints.
This comprehensive guide explores how wall mount AV racks paired with effective cable management solve the unique challenges of small AV spaces—from compact conference rooms and huddle spaces to retail environments, residential theaters, and space-limited control rooms. Through proven design strategies, installation techniques, and modern planning tools, AV professionals can consistently deliver exceptional small space AV deployments that maximize efficiency without compromising quality.
Key Takeaways
- Wall mount AV racks eliminate floor footprint entirely, reclaiming valuable square footage for furniture, occupants, and circulation in space-constrained environments
- Strategic cable management is more critical in small spaces where disorganized wiring quickly overwhelms limited areas and creates maintenance nightmares
- Vertical space utilization through wall mounting provides equivalent equipment capacity to floor standing racks while freeing floor area for primary functions
- Small space installations require enhanced planning and design precision—mistakes are more costly when space doesn't allow workarounds
- Effective cable management infrastructure (vertical managers, horizontal organizers, entry/exit provisions) must be integrated from design phase, not added as afterthought
- Thermal management becomes more challenging in confined spaces, demanding careful equipment sequencing and ventilation planning
- Accessibility planning is critical—small spaces make equipment service difficult without proper rack positioning and cable organization
- Space-efficient design follows principles: consolidate equipment vertically, minimize cable routing distances, maintain organized wire pathways, plan maintenance access
- Modern AV design tools like XTEN-AV's X-DRAW accelerate small space planning through automated rack layouts optimized for spatial efficiency
- Pre-installation planning including detailed rack elevation diagrams and cable routing plans prevents costly errors when physical space doesn't allow corrections
- Small space success depends on integrating mechanical, electrical, and cable infrastructure seamlessly within limited dimensional constraints

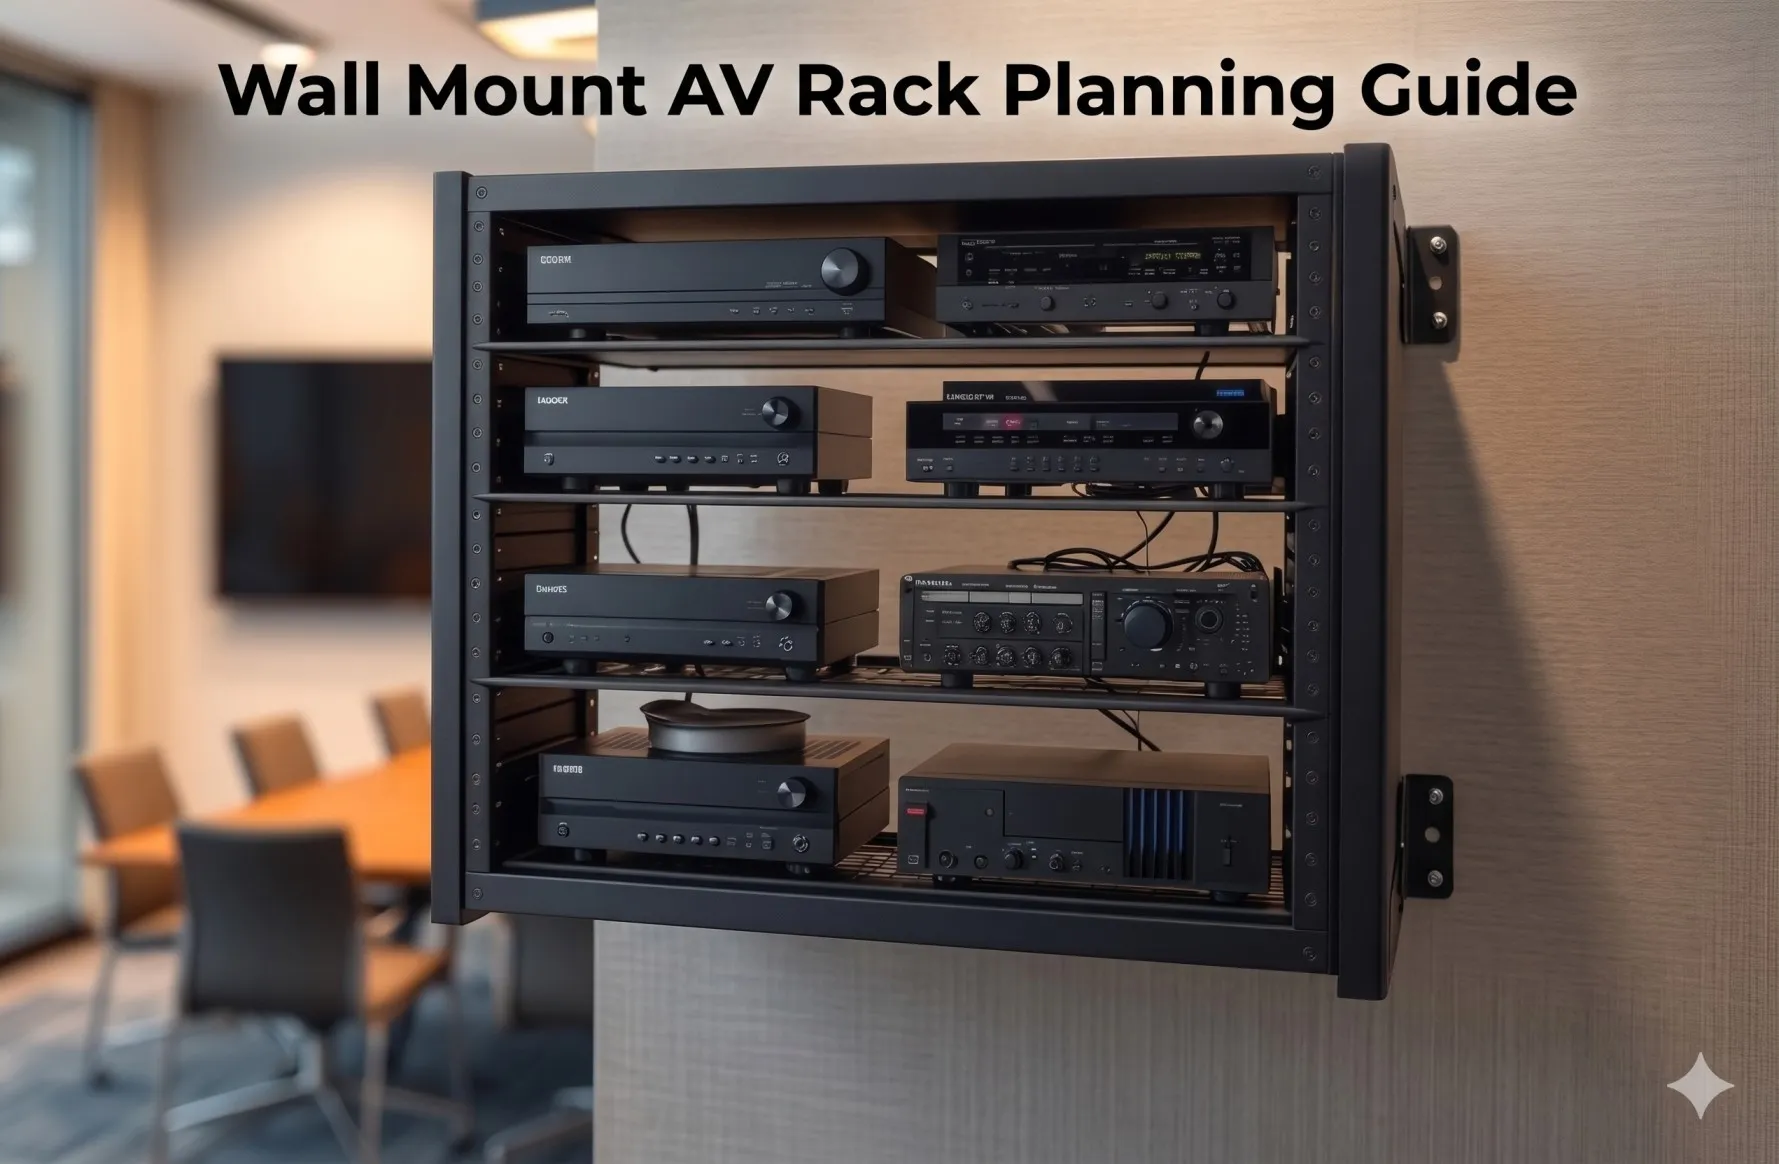
What Is a Wall Mount AV Rack?
A wall mount AV rack is a vertical equipment enclosure or mounting framework that securely attaches to wall surfaces, providing standardized mounting positions for rack-mountable equipment while eliminating the floor footprint required by traditional free-standing racks.
Technical Definition and Standards
Wall mount racks adhere to universal industry standards:
- Rack Unit (RU/U) measurement: 1.75 inches (44.45mm) vertical spacing per unit
- EIA-310-D or IEC 60297 compliance: Standardized mounting hole patterns ensuring universal equipment compatibility
- 19-inch width: Standard distance between mounting rails accommodating most professional AV equipment
- Typical capacities: 6U-22U for wall-mounted applications (larger capacities typically become floor standing solutions)
- Depth variations: 12-24 inches accommodating different equipment dimensions and cable management needs
Space-Saving Architecture
The fundamental space advantage of wall mount racks:
Floor Space Elimination:
- Zero floor footprint: Entire equipment mass mounted vertically on wall
- No physical obstruction: Floor remains clear for furniture, occupants, circulation
- Maximized usable area: Small rooms maintain full functional square footage
- Flexible room layout: Equipment location doesn't constrain furniture placement
Vertical Space Utilization:
- Leverages typically underutilized wall surfaces
- Positions equipment at optimal working heights
- Accommodates same equipment capacity as floor rack in minimal space
- Enables distributed equipment placement across facility
Components for Small Space Applications
Essential elements optimized for confined installations:
- Compact mounting rails: Minimal projection from wall surface
- Integrated cable management: Built-in vertical managers and horizontal organizers
- Ventilation design: Perforated panels and fan provisions for thermal management
- Secure enclosures: Lockable doors protecting equipment in accessible locations
- Depth optimization: Shallow to standard depths (12-20") minimizing spatial intrusion
- Modular accessories: Shelves, drawers, and brackets for non-rack equipment
Why Small AV Spaces Need Better Equipment Organization
Space-constrained environments amplify both the challenges and importance of professional equipment organization and cable management.
The Small Space Challenge
1. Limited Physical Dimensions
Small AV spaces present immediate spatial constraints:
Common Small Space Scenarios:
- Huddle rooms: 100-200 sq ft meeting spaces
- Executive offices: 150-300 sq ft with AV presentation capabilities
- Retail back-of-house: Limited equipment closets in commercial spaces
- Residential media rooms: 200-400 sq ft home theaters
- Small conference rooms: 300-500 sq ft meeting spaces
- Control nooks: Dedicated equipment alcoves in larger facilities
Spatial Limitations:
- Every square foot serves critical function—no space for bulky equipment racks
- Ceiling heights often lower in small rooms (8-9 feet typical)
- Wall space competed for by doors, windows, architectural features
- HVAC and electrical infrastructure consume already-limited space
2. Equipment Density vs. Space Availability
Modern AV systems require substantial equipment regardless of room size:
Typical Small Space AV Equipment:
- Video switching and distribution (2-4U)
- Audio processing and amplification (2-4U)
- Control systems and interfaces (1-2U)
- Network infrastructure (1-2U)
- Power management (1-2U)
- Cable management and blank panels (2-3U)
Total: 9-17U of equipment requiring organized housing in space-challenged environment.
3. Cable Management Complexity
Small spaces exponentially complicate cable routing:
Cable Challenges:
- Limited pathways: Fewer routing options between equipment and destinations
- Visible runs: Exposed cables more noticeable in compact spaces
- Access constraints: Difficult reaching behind equipment in tight spaces
- Volume concentration: All system cabling converges in small area
- Future modifications: Adding/changing cables in congested small spaces extremely difficult
4. Thermal Management Concerns
Heat dissipation becomes critical in confined environments:
Thermal Challenges:
- Limited air volume: Small rooms have less air mass for heat absorption
- Restricted airflow: Tight spaces impede natural convection currents
- HVAC limitations: Small spaces may have inadequate cooling capacity
- Heat accumulation: Equipment heat concentrates in limited volume
- Compounding effects: Multiple heat sources (occupants, lighting, AV equipment) in small space
5. Maintenance Accessibility
Service access becomes more challenging in compact installations:
Access Issues:
- Physical constraints: Limited working space around equipment
- Obstruction concerns: Furniture, fixtures blocking equipment access
- Ladder requirements: Ceiling-mounted equipment difficult to service
- Cable tracing: Disorganized cabling in tight spaces impedes troubleshooting
- Equipment removal: Difficult extracting devices in constrained areas
Why Organization Matters More in Small Spaces
Efficiency Amplification
Good organization provides disproportionate benefits in small spaces:
- Space recovery: Every inch of floor space preserved has greater relative value
- Visual impact: Clean installations dramatically improve small room aesthetics
- Functional preservation: Proper equipment placement maintains room functionality
- Cost optimization: Avoiding space expansion by maximizing existing square footage
Error Magnification
Conversely, poor organization creates amplified problems:
- Space consumption: Inefficient equipment placement wastes precious square footage
- Cable chaos: Disorganized wiring quickly overwhelms small spaces
- Maintenance difficulty: Access problems more severe in constrained environments
- Professional appearance: Installation quality issues more visible in intimate spaces
How Wall Mount AV Racks Maximize Small AV Spaces
Wall-mounted rack solutions employ multiple strategies to optimize space utilization while maintaining system functionality.
1. Complete Floor Space Reclamation
The primary space advantage of wall mounting:
Floor Footprint Elimination:
Traditional Floor Standing Rack:
- Physical footprint: 24" wide × 30" deep = 5 square feet
- Safety clearance: Additional 36" in front = 12+ square feet total
- Small room impact: Consumes 5-10% of huddle room floor area
Wall Mount Rack:
- Floor footprint: Zero square feet
- Wall projection: 12-20" from wall surface (typically unused space)
- Room impact: Preserves 100% functional floor area
Space Recovery Applications:
- Meeting rooms: Additional seating capacity (2-3 extra chairs in huddle space)
- Retail: More product display area or customer circulation
- Residential: Furniture flexibility and room openness
- Offices: Desk placement options without equipment obstruction
2. Vertical Space Optimization
Leveraging underutilized wall surfaces:
Vertical Capacity:
- Equipment stacking: 6-18U vertically = equivalent to floor rack capacity
- Height utilization: Positions equipment 4-7 feet from floor (optimal working zone)
- Wall surface: Converts previously unused wall area into functional equipment space
- Ceiling clearance: Maintains clearance unlike tall floor racks in low-ceiling rooms
Vertical Advantages:
- Natural cable routing following gravity
- Equipment at ergonomic service heights
- Multiple racks possible on different walls for distributed equipment
- Preserves sight lines across room (doesn't bisect space like floor rack)
3. Strategic Equipment Positioning
Wall mounting enables optimal equipment placement:
Location Flexibility:
- Position near signal sources: Minimize cable runs from cameras, computers
- Adjacent to connectivity: Near wall plates and user connection points
- Proximity to power: Close to electrical outlets reducing power cord lengths
- Thermal considerations: Away from heat sources (windows, HVAC discharge)
- Accessibility: Positioned for technician access without disturbing room function
Multi-Location Strategy:
- Primary rack: Main AV processing equipment on equipment wall
- Secondary rack: Distributed equipment near specific system zones
- Room perimeter: Equipment on multiple walls avoiding single congestion point
4. Integrated Cable Management
Wall racks facilitate organized cable routing in small spaces:
Cable Path Optimization:
- Short routing distances: Equipment positioned near cable destinations
- Vertical organization: Natural cable drop from rack to wall outlets
- Hidden pathways: Cables run behind furniture, along wall bases, through architectural features
- Entry/exit planning: Strategic cable ingress/egress from rack to minimize visible runs
Cable Volume Concentration:
- All system cabling organized within rack cable managers
- Cable bundles routed through single conduit or pathway to rack
- Eliminates random cable runs crossing floor or hanging on walls
- Service loops stored within rack rather than consuming room space
5. Thermal Efficiency in Small Volumes
Wall mounting supports better thermal management:
Heat Dissipation:
- Equipment mounted on exterior walls: Natural heat transfer to adjacent space
- Ventilated enclosures: Perforated doors/panels enabling airflow
- Fan integration: Top-mounted exhaust fans removing heat from rack
- Clearance maintenance: Adequate space around rack for air circulation
Small Room Cooling:
- Wall position: Locates heat source at room perimeter vs. center
- HVAC coordination: Position rack near air return or supply registers
- Load distribution: Spreads heat generation vertically rather than concentrated floor area
6. Modular Scalability
Wall racks enable phased system growth in small spaces:
Expansion Approach:
- Initial installation: Deploy appropriately-sized rack with growth capacity
- Future additions: Add equipment to reserved rack space without room modification
- Distributed expansion: Install additional wall racks on different walls as system grows
- Technology upgrades: Replace equipment within existing rack footprint
Growth Without Space Penalty:
- System expansion doesn't consume additional floor space
- Multiple smaller racks more flexible than single large floor rack
- Phased installation matches budget cycles and evolving needs
7. Professional Aesthetics in Intimate Spaces
Clean installations critical in small, visible environments:
Visual Integration:
- Enclosed racks: Match room décor (black, white, custom finishes)
- Concealed equipment: Lockable doors hiding equipment from view
- Cable concealment: All wiring organized within rack and concealed pathways
- Architectural coordination: Rack positioned considering room design and sight lines
Client Perception:
- Professional installation demonstrates attention to detail
- Clean organization suggests system reliability
- Space efficiency shows respect for client's room functionality
- Aesthetic integration indicates design sophistication
8. Cost-Effective Space Solutions
Wall mounting provides economic advantages:
Avoided Costs:
- Room expansion: No need to enlarge space for equipment accommodation
- Equipment room: Eliminates requirement for separate AV closet or technical space
- Architectural modifications: Avoids building equipment alcoves or technical niches
- Furniture adjustments: Preserves room layout without furniture reconfiguration
Value Delivery:
- Small space projects become viable where equipment rooms cost-prohibitive
- Installation in existing spaces without construction
- Budget focused on AV functionality rather than spatial modifications
The Role of Effective Cable Management in AV Rack Design
In small AV spaces, professional cable management transforms from desirable practice to absolute necessity.
Why Cable Management Matters More in Small Spaces
1. Visual Impact Amplification
Cable visibility disproportionately affects small spaces:
Visual Clutter Effect:
- Small rooms: Every cable more noticeable due to proximity and sight lines
- Professional perception: Disorganized cabling severely damages credibility
- Client satisfaction: Cable chaos creates negative impression regardless of system performance
- Spatial psychology: Wire clutter makes small spaces feel even more cramped and chaotic
2. Functional Space Consumption
Disorganized cables consume limited physical space:
Space Impact:
- Cable masses: Unmanaged wiring occupies significant volume within racks and pathways
- Access obstruction: Cable congestion blocks equipment access in tight quarters
- Airflow restriction: Cable bundles impede ventilation in confined racks
- Routing paths: Random cable runs consume wall space, floor areas, ceiling zones
3. Maintenance Complexity
Cable organization directly determines service efficiency:
Troubleshooting in Small Spaces:
- Cable tracing: Disorganized wiring makes signal path identification difficult
- Physical access: Tight spaces make working with tangled cables extremely frustrating
- Service time: Poor cable management doubles or triples maintenance duration
- Error risk: Rushed work in cramped conditions increases mis-wiring mistakes
4. System Reliability
Cable management affects technical performance:
Reliability Factors:
- Cable stress: Unorganized routing creates strain at connection points causing failures
- Signal integrity: Improperly routed cables near interference sources degrade signal quality
- Accidental disconnection: Loose cables more prone to unintended removal
- Documentation accuracy: Disorganized installations harder to document, leading to maintenance errors
Cable Management Principles for Small Spaces
Principle 1: Plan Before Install
Pre-installation planning essential in space-constrained environments:
Planning Activities:
- Map all cable pathways from sources through rack to destinations
- Calculate cable lengths including routing paths and service loops
- Design cable management infrastructure before equipment mounting
- Create cable labeling scheme ensuring consistency
- Document cable routing plan in design drawings
Space-Specific Considerations:
- Identify concealed routing paths (behind baseboards, in ceiling spaces, through architectural features)
- Minimize visible cable runs through strategic equipment positioning
- Plan entry/exit points at rack for organized cable ingress/egress
- Coordinate cable pathways with furniture placement and room layout
Principle 2: Infrastructure First, Equipment Second
Install cable management before equipment mounting:
Installation Sequence:
- Mount rack on wall
- Install vertical cable managers on rack sides
- Position horizontal cable organizers at planned locations
- Mount cable entry/exit panels at rack top/bottom
- Install equipment following rack elevation diagram
- Route cables as equipment is installed
Benefits:
- Cable infrastructure optimally positioned without equipment obstruction
- Routing planned around equipment rather than improvised after installation
- Clean cable pathways established from project beginning
- Professional installation quality from start
Principle 3: Segregate by Cable Type
Organize cables by function and characteristics:
Cable Groups:
- Power cables: Separate routing path in vertical managers
- Video cables: Center or dedicated section of cable managers
- Network/data cables: Separate from power to minimize interference
- Audio cables: Isolated from power and high-frequency signals
- Control cables: Can route with data but kept organized
Segregation Benefits:
- Reduces electromagnetic interference between cable types
- Simplifies cable tracing and troubleshooting
- Enables organized service loops by cable type
- Professional appearance with distinct cable groups
Principle 4: Minimize Cable Lengths
Short cables essential in small space efficiency:
Length Optimization:
- Position equipment near signal sources/destinations reducing cable runs
- Calculate exact cable lengths needed (actual routing path + service loop + margin)
- Avoid excessive cable creating management challenges
- Use custom-length cables versus standard lengths when beneficial
Benefits:
- Less cable volume in confined spaces
- Reduced signal loss and interference
- Easier cable routing and organization
- Lower material costs
Principle 5: Label Everything
Comprehensive labeling accelerates maintenance:
Labeling Strategy:
- Label both ends of every cable
- Use consistent naming convention: "SOURCE-DEVICE-PORT > DEST-DEVICE-PORT"
- Apply labels within 6" of connectors
- Create label legend in system documentation
- Use durable, professional label printer
Small Space Labeling Importance:
- Tight spaces make cable tracing physically difficult
- Quick identification reduces service time in confined areas
- Multiple technicians can work efficiently with clear labels
Principle 6: Create Service Loops
Maintenance flexibility through cable slack:
Service Loop Guidelines:
- Provide 12-18" excess cable for equipment removal
- Store loops in vertical cable managers near equipment
- Coil loops neatly, secure with velcro
- Position loops for easy access during service
Small Space Benefits:
- Enable equipment servicing without cable disconnection
- Accommodate equipment position adjustments in tight spaces
- Provide flexibility for future system modifications
Best Cable Management Practices for Wall Mount AV Racks
Specific techniques optimized for wall-mounted installations in small spaces.
Infrastructure Components
1. Vertical Cable Managers
Essential for organized cable routing:
Specifications:
- Depth: 2-4 inches accommodating cable volume
- Mounting: Attach to rack side rails (both sides)
- Capacity: Sized for total cable count plus 30-50% growth
- Features: D-rings, tie-down points, cable fingers
Installation:
- Position before equipment mounting
- Ensure adequate depth for cable bundles without equipment interference
- Verify cable manager doesn't block equipment mounting holes
- Install both sides for balanced cable routing
2. Horizontal Cable Organizers
Organized equipment interconnections:
Types:
- 1U horizontal organizers: Positioned between equipment groups
- Patch panels with integrated cable management
- Horizontal lacing bars: Simple cable support
Placement Strategy:
- Between equipment requiring many interconnections
- Below/above high-density connection points
- Every 3-4U of equipment as general guideline
- At power distribution locations for power cord organization
3. Cable Entry/Exit Provisions
Organized cable ingress/egress:
Options:
- Brush panels: Flexible cable passage, dust protection
- Grommet panels: Individual cable routes through rubber grommets
- Open slots: Simple openings (less dust protection)
Positioning:
- Top exit: For cables routing to ceiling, upper wall areas
- Bottom exit: For cables to floor outlets, lower wall areas
- Rear openings: For cables to behind-rack pathways
Cable Routing Techniques
Step 1: Route Power Cables First
Establish electrical infrastructure:
- Route PDU power cord from electrical outlet to PDU
- Route equipment power cords from devices to PDU
- Use dedicated section of vertical cable manager for power cables
- Maintain 6" minimum separation from signal cables
- Bundle power cords together with velcro wraps
- Create service loops for equipment removal
Step 2: Install Video Cables
Route high-bandwidth connections:
- Map video signal paths from sources through processing to destinations
- Route HDMI, DisplayPort, or HDBaseT cables following planned paths
- Use center section of vertical cable managers
- Maintain proper bend radius (typically 10x cable diameter)
- Dress cables through horizontal organizers at equipment levels
- Create service loops near video equipment
Step 3: Install Network and Data Cables
Route networking infrastructure:
- Route Cat6/Cat6A cables from network equipment to destinations
- Use separate vertical cable manager section from power
- Maintain bend radius requirements for Cat6 (4x cable diameter minimum)
- Bundle network cables together by destination or function
- Label cables clearly at both ends
- Create service loops for future network modifications
Step 4: Route Audio Cables
Install audio connections:
- Route balanced audio cables (XLR, TRS) from sources/processors
- Keep audio cables separated from power cables (6" minimum)
- Use vertical cable manager section separate from power
- Avoid cable routing near power supplies or transformers (interference sources)
- Bundle audio cables together with velcro
Step 5: Install Control Cables
Final low-voltage control connections:
- Route RS-232, RS-485, IR, relay, GPIO cables
- Can share vertical manager space with data cables
- Keep organized and bundled by control system zone
- Label all control cables for troubleshooting
Cable Dressing and Finishing
Professional Bundling
Create neat cable bundles:
Technique:
- Group 4-8 related cables together
- Align cables parallel without twisting
- Secure with velcro hook-and-loop wraps every 6-12 inches
- Leave slight slack (don't over-tighten)
- Route bundles through cable managers maintaining organization
Velcro vs. Zip Ties:
- Velcro: Reusable, adjustable, doesn't damage cables (recommended)
- Zip ties: Permanent, can damage cables if over-tightened (avoid or use loosely)
Service Loop Storage
Organize cable slack:
- After connecting cable ends, determine excess length
- Form neat coil with 4-6" diameter
- Secure coil with velcro wrap
- Store in vertical cable manager near equipment
- Position for easy access during service
- Ensure loops don't block airflow or equipment access
Cable Combing
Final appearance refinement:
- Adjust individual cables within bundles for parallel alignment
- Space cables evenly
- Ensure labels visible and properly oriented
- Verify no cable stress or excessive bending
- Check velcro wrap positions for neat appearance
How to Design an Efficient Wall Mount AV Rack Layout
Strategic design prevents problems before installation begins.
Pre-Design Assessment
1. Space Analysis
Evaluate installation environment:
Physical Measurements:
- Room dimensions: Length, width, height
- Available wall space: Unobstructed wall areas
- Architectural features: Windows, doors, HVAC registers, electrical panels
- Furniture placement: Desk, tables, seating positions
- User access areas: Where people need to move/work
Environmental Factors:
- Ambient temperature: HVAC capacity and temperature control
- Lighting conditions: Natural/artificial light affecting displays
- Noise sensitivity: Acceptable fan noise levels
- Security requirements: Equipment protection needs
2. Equipment Inventory
Document all system components:
Essential Data:
- Device name and model
- Rack units (RU) required
- Depth (for rack selection)
- Weight (for load calculations)
- Power consumption (for electrical planning)
- Heat generation (for thermal management)
- Connection types and quantities
- Maintenance frequency
3. Cable Requirements
Map cabling needs:
Cable Inventory:
- Video cables: Type, quantity, length, sources/destinations
- Audio cables: Type, quantity, routing
- Network cables: Quantity, destinations
- Control cables: Type, devices controlled
- Power cables: Equipment to PDU requirements
Routing Analysis:
- Pathway identification: How cables reach rack from various locations
- Concealment opportunities: Hidden routing paths available
- Distance calculations: Actual cable lengths needed
Rack Selection for Small Spaces
Size Optimization
Choose appropriate rack capacity:
Capacity Calculation:
- Sum equipment RU requirements
- Add cable management (2-3U)
- Add blank panels for spacing (1-2U)
- Add future expansion (20-30% of total)
Small Space Guidelines:
- Huddle rooms: 6-9U typical
- Small conference rooms: 12-15U typical
- Retail/residential: 9-12U typical
- Avoid oversizing (rack proportional to room size)
Depth Selection
Match rack depth to equipment and space:
Depth Options:
- 12-15": Shallow racks for network equipment, minimal cable management
- 18-20": Standard depth accommodating most AV equipment
- 24"+: Deep racks for servers or extensive rear cable management
Small Space Consideration:
- Minimize rack projection from wall to preserve room depth
- Verify adequate clearance for doors, furniture
- Consider room scale (large rack disproportionate in tiny room)
Enclosure Type
Select appropriate enclosure:
Options:
- Open frame: Maximum cooling, minimal cost (secure rooms only)
- Vented enclosure: Balanced security/cooling (recommended for most small spaces)
- Solid enclosure: Maximum security/dust protection (requires active cooling)
Small Space Factors:
- Security needs in accessible locations
- Cooling requirements in confined spaces
- Aesthetic integration with room design
- Noise control in occupied spaces
Equipment Organization Strategy
Vertical Sequencing
Organize equipment by multiple factors:
Priority 1 - Weight Distribution:
- Heaviest equipment at bottom (structural load management)
- Medium weight in middle
- Lightest at top
Priority 2 - Thermal Management:
- High-heat equipment in lower sections (heat rises)
- Minimum 1U spacing between heat-generating devices
- Low-heat equipment at top
Priority 3 - Signal Flow:
- Organize equipment following logical signal path when possible
- Minimize cable crossings and complexity
Priority 4 - Access Requirements:
- Frequently serviced equipment at 48-72" height (comfortable working zone)
- Rarely accessed devices at extremes
Cable Management Integration
Plan cable infrastructure positions:
Vertical Managers:
- Both sides of rack for balanced routing
- Adequate depth for cable volume
Horizontal Organizers:
- Between high-connectivity equipment groups
- Every 3-4U as general guideline
- At PDU location for power cord organization
Entry/Exit Panels:
- Top for cables to ceiling/upper walls
- Bottom for cables to floor outlets/lower areas
Documentation Creation
Rack Elevation Diagram
Create detailed equipment layout:
Diagram Elements:
- RU numbering (bottom to top)
- Equipment names and models at each position
- Blank panels for spacing
- Cable management components
- PDU location and type
- Ventilation provisions (fans, spacing)
Tools:
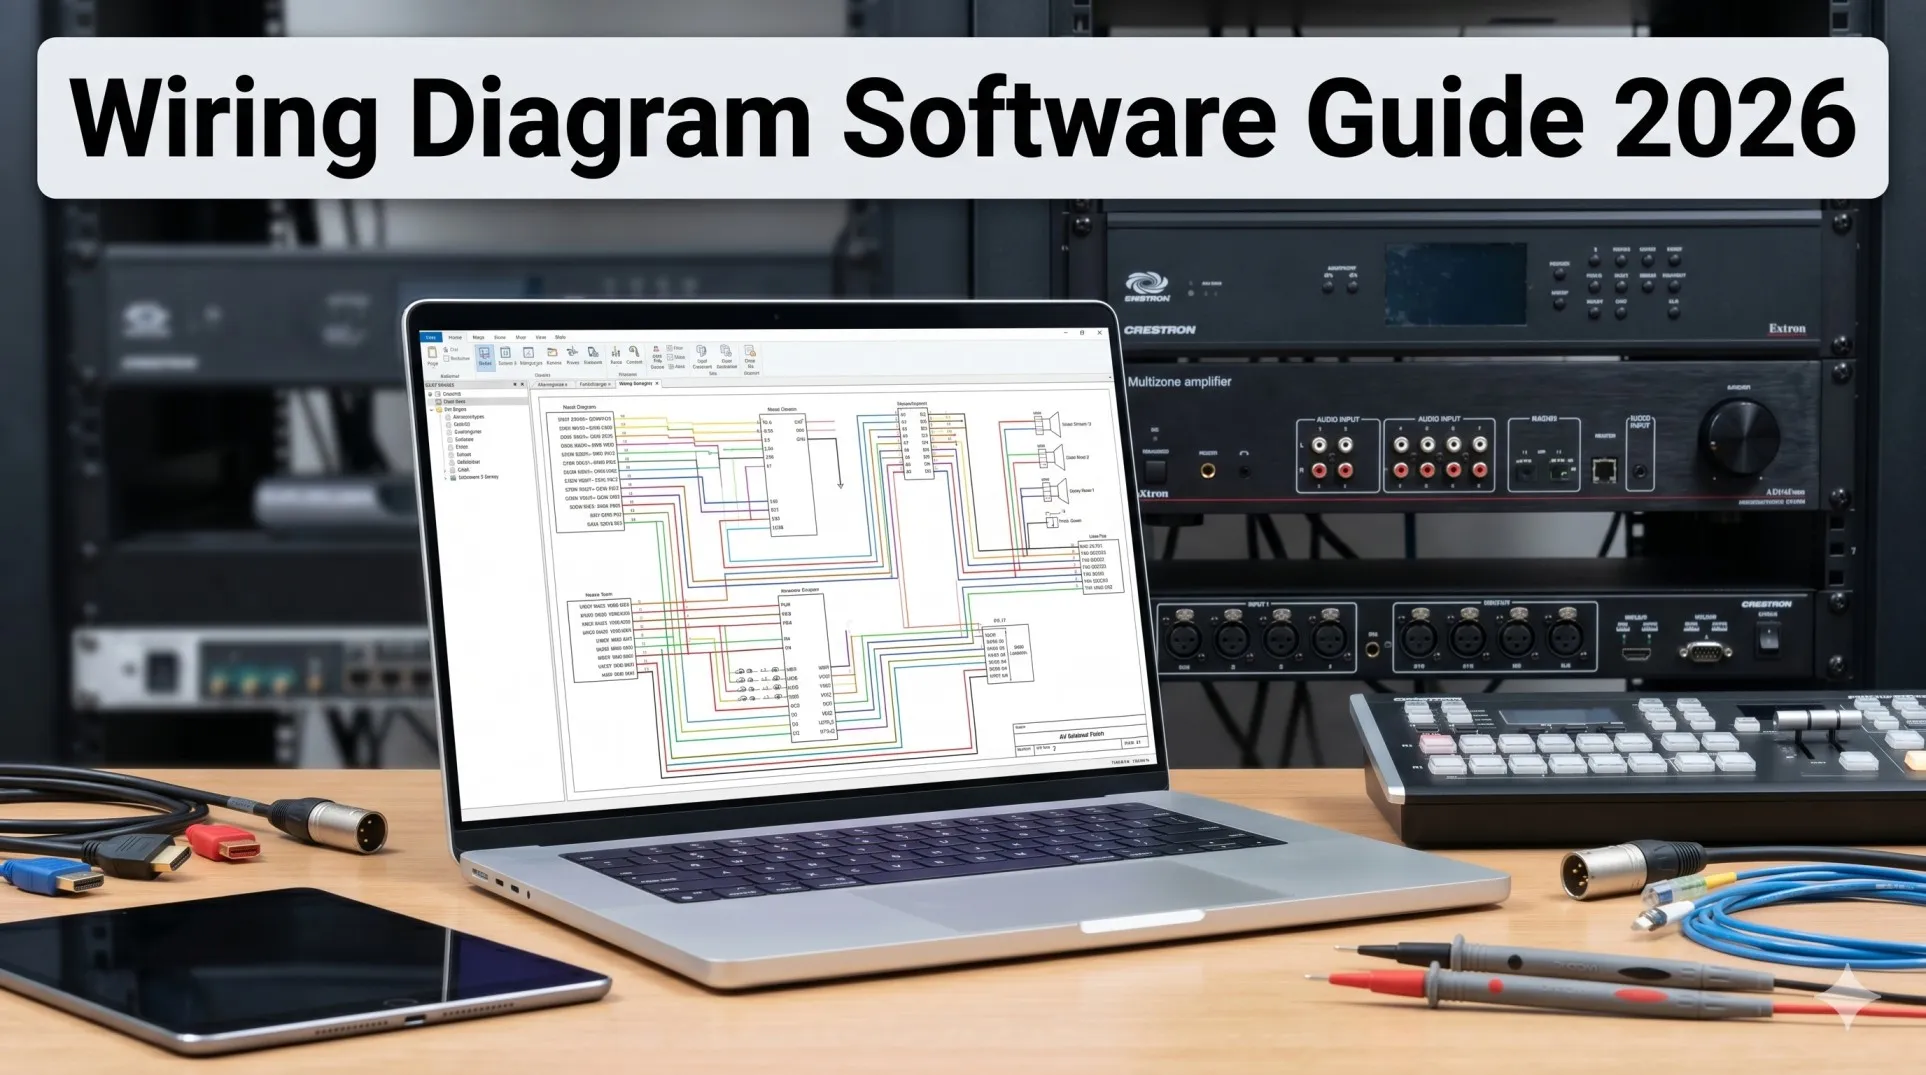
- Professional AV design software (XTEN-AV X-DRAW, Visio, AutoCAD)
- Rack planning templates
- Spreadsheet-based rack calculators
Cable Routing Plan
Document cabling strategy:
Plan Components:
- Cable paths from sources through rack to destinations
- Cable entry/exit points at rack
- Cable groupings and bundle organization
- Labeling scheme for system cables
- Service loop locations and sizes
Validation Checklist
Verify design before installation:
Design Validation:
- ☐ Total RU count fits within rack capacity (including cable management, blanks, expansion)
- ☐ Weight distribution: Heaviest equipment at bottom
- ☐ Thermal management: Adequate spacing between high-heat devices
- ☐ Signal flow logic: Equipment sequence minimizes cable complexity
- ☐ Maintenance access: Frequently serviced equipment at accessible heights
- ☐ Cable management: Adequate infrastructure for planned cable volume
- ☐ Power distribution: PDU capacity sufficient, outlet quantity adequate
- ☐ Space fit: Rack dimensions appropriate for room size and wall location
- ☐ Clearances: Adequate space around rack for access, airflow
- ☐ Documentation: Complete rack elevation and cable routing drawings
Common Mistakes to Avoid When Installing a Wall Mount AV Rack
Small space installations amplify consequences of errors.
1. Inadequate Space Planning
Mistake: Installing rack without considering room function and clearances.
Consequences:
- Rack interferes with furniture placement or circulation
- Insufficient working space for equipment service
- Doors or drawers blocked by rack projection
- Equipment positioned where users bump into it
Prevention:
- Map room layout including furniture before rack positioning
- Verify minimum 36" front clearance for technician access
- Check door swing radius for enclosed racks
- Consider sight lines and user traffic patterns
- Coordinate with interior designer or facility manager
2. Underestimating Cable Volume
Mistake: Insufficient cable management infrastructure for actual cabling needs.
Consequences:
- Cable congestion overwhelming vertical managers
- Disorganized cabling unable to fit in planned pathways
- Cables blocking equipment access and airflow
- Unprofessional installation appearance
Prevention:
- Calculate total cable count including all system cables
- Size vertical cable managers for cable volume plus 30-50% growth
- Plan multiple cable entry/exit points distributing cable load
- Allocate 2-3U of rack space for horizontal cable management
- Consider service loops in capacity planning
3. Ignoring Thermal Requirements
Mistake: Inadequate ventilation planning for equipment heat load in small space.
Consequences:
- Equipment overheating and thermal shutdowns
- Accelerated component degradation and failures
- Uncomfortable room temperature for occupants
- System unreliability and frequent service calls
Prevention:
- Calculate total equipment power consumption
- Specify vented enclosures for loads >200W
- Plan fan installation for high-heat configurations
- Position rack near HVAC air return or supply
- Maintain 1U spacing between heat-generating devices
- Avoid rack installation near heat sources (windows, HVAC discharge)
4. Poor Wall Structure Assessment
Mistake: Installing rack on inadequate load-bearing surface.
Consequences:
- Rack failure causing equipment damage and potential injury
- Wall damage requiring costly repairs
- Safety hazards and liability exposure
- Project delays for structural reinforcement
Prevention:
- Assess wall construction before rack specification (concrete, wood studs, steel studs, drywall)
- Calculate total equipment weight including safety factor
- Install backing boards for drywall or weak walls
- Use appropriate anchors for wall type (lag bolts, concrete anchors, toggle bolts)
- Consult structural engineer for loads >200 lbs
5. Neglecting Future Access
Mistake: Equipment positioned without considering maintenance requirements.
Consequences:
- Difficult equipment service requiring extensive disassembly
- Extended downtime during maintenance
- Higher service costs due to access difficulty
- Risk of cable disconnection when moving equipment for access
Prevention:
- Position frequently accessed equipment at 48-72" height
- Ensure rear access possible for cable connections
- Maintain adequate clearance for equipment extraction
- Plan cable routing allowing equipment removal with service loops
- Document maintenance procedures considering physical access
6. Insufficient Documentation
Mistake: Poor or missing installation documentation.
Consequences:
- Difficult troubleshooting and maintenance
- System modifications challenging without clear documentation
- Knowledge loss when original installer unavailable
- Inefficient service calls requiring system investigation
Prevention:
- Create detailed rack elevation diagrams matching actual installation
- Document all cable labels and connection paths
- Photograph installation from multiple angles
- Record equipment serial numbers
- Provide complete documentation package to client
- Maintain digital documentation archives
7. Overlooking Cable Labeling
Mistake: Failing to label cables during installation.
Consequences:
- Time-consuming cable tracing during troubleshooting
- Higher risk of accidental disconnection during service
- Difficult system modifications without cable identification
- Unprofessional installation quality
Prevention:
- Label every cable at both ends during installation
- Use consistent labeling scheme across entire project
- Apply professional printed labels with durable adhesive
- Document labeling system in as-built drawings
- Create label legend for complex installations
8. Improper Equipment Sequencing
Mistake: Illogical equipment organization creating cable chaos.
Consequences:
- Complex cable routing with excessive crossings
- Difficult signal path understanding
- Inefficient troubleshooting workflows
- Poor installation appearance
Prevention:
- Organize equipment following signal flow when possible
- Position heavy equipment at bottom regardless of signal flow
- Maintain thermal management priorities (spacing heat-generating devices)
- Use design software to visualize and optimize equipment sequence
- Balance multiple organization priorities (weight, thermal, signal, access)
How XTEN-AV's X-DRAW Simplifies Wall Mount AV Rack Planning
Small space installations demand precision planning that modern AV design automation tools facilitate effectively.
Introduction to X-DRAW for Small Space Design
XTEN-AV's X-DRAW is a cloud-based AV design software specifically engineered for AV integrators, offering specialized capabilities for wall mount rack planning in space-constrained environments. Unlike generic CAD platforms requiring extensive manual drafting, X-DRAW automates rack layout generation, equipment optimization, and cable management planning while incorporating space efficiency best practices.
For small AV space projects, X-DRAW helps integrators maximize limited square footage by generating optimized rack layouts that balance equipment capacity, thermal management, cable organization, and maintenance accessibility—all critical factors when working within tight spatial constraints.
Key Features for Small Space Optimization
1. Automated Rack Layout Generation
X-DRAW automatically creates rack layouts based on equipment added to the project BOM (Bill of Materials), significantly reducing manual drafting time and minimizing design errors. Integrators can generate organized rack elevations with just a few clicks, receiving:
- Optimized equipment sequencing considering weight, thermal, and signal flow
- Proper spacing for cooling in confined installations
- Cable management component positioning
- Space-efficient configurations maximizing rack capacity
This automation is particularly valuable in small space projects where design precision prevents costly installation errors in unforgiving environments.
2. Intelligent Rack Elevation Diagrams
The platform generates detailed rack elevation drawings that help AV designers visualize equipment placement, spacing, airflow considerations, and installation requirements before deployment. These diagrams enable:
- Spatial visualization: How rack fits within small room context
- Equipment fit verification: Confirming all devices fit within rack capacity
- Clearance checking: Identifying potential access or clearance issues
- Client approval: Professional drawings demonstrating space efficiency
Small space benefit: Designers can evaluate multiple rack sizes and configurations rapidly, selecting optimal solution before committing to equipment purchases.
3. Integrated BOM-to-Rack Workflow
Equipment added to the bill of materials can automatically populate rack layouts, ensuring consistency between procurement, documentation, and installation plans while reducing duplicate work. This integration provides:
- Automatic equipment specification import (dimensions, weight, power, thermal)
- Rack organization updates when BOM changes
- Space utilization calculations (% rack filled, available RU for growth)
- Total system characteristics (combined weight, power, heat)
Small space benefit: Design changes propagate automatically, ensuring installers always work from accurate documentation matching procured equipment.
4. AV-Specific Design Automation
Unlike generic CAD platforms, X-DRAW is built specifically for AV integrators and includes AV-focused automation for rack layouts, signal flow diagrams, line schematics, and front elevation designs. The platform incorporates:
- Space optimization rules prioritizing vertical utilization
- Thermal management algorithms for small enclosed spaces
- Cable management best practices for organized routing
- Weight distribution logic preventing top-heavy configurations
- Signal flow optimization minimizing cable complexity
Small space benefit: Automated design rules ensure small space installations follow proven integration methodologies without requiring extensive designer experience.
5. Front Elevation and Rack Documentation
Users can generate automated front elevation diagrams alongside rack layouts, making it easier for installers and technicians to understand equipment positioning inside wall-mounted racks. Front elevations show:
- Equipment appearance and identification
- User interaction points (buttons, displays, media slots)
- Status indicators for monitoring
- Physical relationships between devices
- Professional installation presentation for client review
Small space benefit: Visual equipment presentation helps clients understand how AV system integrates into their limited space without overwhelming the room.
6. Extensive Product Library
X-DRAW provides access to a large manufacturer product database, allowing designers to quickly drag, drop, and configure AV devices inside rack designs without creating components manually. The library includes:
- Accurate equipment dimensions critical for space planning
- Weight data for load calculations
- Power/thermal specifications for cooling planning
- Mounting requirements for installation accuracy
Small space benefit: Accurate equipment data prevents specification errors that become critical problems in space-constrained installations where retrofits are extremely difficult.
7. Customizable Device Blocks and Connectors
Designers can customize device blocks, connector settings, port colors, labels, and symbols, helping create cleaner and more installation-ready wall mount rack diagrams. Customization enables:
- Project-specific labeling standards
- Color-coded equipment by function or system
- Highlighted installation notes and warnings
- Client-preferred documentation styles
Small space benefit: Clear, customized documentation reduces installer confusion in tight spaces where work conditions make reference to drawings more difficult.
8. Automatic Cable Labeling and Signal Management
The software automates cable labeling and signal-flow documentation, making wall mount rack planning more accurate and reducing confusion during installation and maintenance. Automated labeling provides:
- Pre-generated cable identification for all connections
- Cable routing visualization through rack
- Cable management requirements based on equipment connectivity
- Installation instructions for cable organization
Small space benefit: Pre-planned cable management prevents cable chaos that quickly overwhelms small space installations where corrective work is extremely difficult.
9. Export to Multiple Formats
Rack layouts can be exported in formats such as PDF, PNG, SVG, Visio, AutoCAD, XML, and HTML, simplifying collaboration with consultants, contractors, and clients. This flexibility supports:
- PDF exports for installer field documentation on mobile devices
- PNG images for client proposals and approvals
- AutoCAD integration for architectural coordination
- HTML views for web-based project documentation
Small space benefit: Multiple export formats enable effective collaboration with architects and interior designers who need to coordinate AV equipment placement within overall space design.
10. Cloud-Based Collaboration
Because X-DRAW operates on a cloud platform, multiple stakeholders can review, update, and manage rack designs from anywhere, improving project coordination and version control. Cloud collaboration enables:
- Real-time design review with clients, architects, interior designers
- Mobile access to rack diagrams during site surveys and installations
- Centralized documentation accessible to entire project team
- Automatic version history preventing documentation conflicts
Small space benefit: Cloud access enables rapid design iterations during site visits when spatial constraints require design adjustments—common in small space projects.
11. AI-Assisted Drawing Capabilities
The platform includes AI-powered drawing features that can automate design modifications, cable adjustments, and layout refinements, helping AV teams accelerate rack planning workflows. AI assistance in small space design includes:
- Intelligent space optimization maximizing equipment capacity within rack
- Equipment sequencing recommendations balancing weight, thermal, signal flow
- Cable routing complexity assessment
- Design optimization suggestions for space efficiency
- Alternative layout generation for design exploration
Small space benefit: AI-powered optimization helps designers identify most space-efficient rack configurations that might not be obvious through manual planning.
12. Faster Revisions and Project Updates
When project requirements change, designers can quickly update rack layouts and synchronize documentation, avoiding the lengthy redraw process common in traditional CAD-based workflows. This agility supports small space projects through:
- Rapid equipment substitutions when space requires different devices
- Quick design iterations exploring alternative rack sizes or configurations
- Instant recalculation of space utilization, weight, power, thermal characteristics
- Automatic documentation updates across all deliverables
Small space benefit: Design flexibility critical when small space constraints require multiple design iterations to find optimal solution.
Pros of X-DRAW for Small Space Projects
Advantages for space-constrained installations:
- Space optimization: Automated layouts maximize equipment capacity within minimal footprint
- Precision planning: Detailed visualization prevents installation errors in unforgiving spaces
- Time savings: Rapid design iterations exploring space solutions
- Professional presentation: High-quality documentation demonstrating space efficiency to clients
- Error prevention: Equipment fit verification before procurement prevents costly mistakes
- Collaboration efficiency: Cloud platform enables coordination with architects, designers
- Knowledge capture: Best practices for small space design encoded in software
- Consistent quality: Every small space project benefits from optimized design automation
Cons and Considerations
Potential limitations:
- Learning investment: Team requires training on platform
- Subscription model: Ongoing cost for software access
- Internet dependency: Cloud platform requires connectivity
- AV-specific focus: Not suitable for general architectural work
Best For
X-DRAW is ideally suited for:
- AV integration firms specializing in small space installations
- System designers working with huddle rooms, residential, retail projects
- Organizations seeking design consistency across small space portfolio
- Teams prioritizing client-facing documentation quality
- Integrators pursuing design automation and workflow efficiency
- Firms differentiating through space optimization expertise
EXPLORE XTEN-AV 15 DAYS FREE TRIAL
Frequently Asked Questions
What size wall mount rack do I need for a small huddle room?
Most huddle rooms require 6-9U wall mount racks accommodating typical equipment: video switcher (1-2U), control processor (1U), network switch (1U), power distribution (1-2U), cable management (2-3U), providing room for future expansion without oversizing for the space.
How much floor space does a wall mount rack save compared to a floor standing rack?
Wall mount racks eliminate floor footprint entirely (zero square feet) versus floor standing racks requiring 5+ square feet for rack itself plus 10-15 square feet for safe clearances—saving 15-20 square feet total, representing 15-20% of a typical 100 sq ft huddle room.
What's the best wall location for an AV rack in a small conference room?
Position rack on rear wall (opposite displays) near cable entry points, avoiding door swing areas, maintaining 36" front clearance, close to electrical outlets, away from HVAC discharge, and considering sight lines so equipment doesn't distract from presentations.
How do I prevent cable chaos in a small space AV installation?
Install vertical cable managers before equipment mounting, route cables as each device is installed (not after), separate cable types (power, video, data), create organized service loops, label every cable at both ends, and use velcro wraps (not zip ties) for flexible cable management.
Do wall mount racks need cooling fans in small rooms?
Fan requirements depend on total equipment power: <200-300W can use passive ventilation (perforated doors), >300W or solid enclosures require active cooling fans. Calculate equipment power consumption and consider room HVAC capacity when planning thermal management.
Can I install multiple wall mount racks in a small space?
Yes, multiple smaller racks on different walls can be more space-efficient than single large rack, enabling equipment positioning near signal sources, distributing heat generation, and providing system modularity for phased installations or zone-based architecture.
What cable management accessories are essential for small space racks?
Essential cable management includes vertical cable managers (both rack sides), horizontal organizers (between equipment groups every 3-4U), cable entry/exit panels (top/bottom), velcro straps for bundling, and professional label printer for cable identification—plan 2-3U rack space for horizontal management.
How do I calculate if my wall can support a wall mount rack?
Sum equipment weights plus rack weight plus 20% safety factor. Concrete/masonry walls support 200-300+ lbs with proper anchors. Wood stud walls handle 150-200 lbs with lag bolts. Drywall requires backing boards spanning multiple studs for loads >50 lbs. Consult structural engineer for loads >200 lbs.
What's the best way to hide cables in a small AV space?
Route cables through in-wall conduits to rack, use baseboard or crown molding cable raceways, coordinate cable pathways with furniture placement to hide runs, employ wireless technologies where possible (wireless presentation, HDBaseT reducing cable counts), and use matching cable covers when exposed runs unavoidable.
How much expansion space should I plan in a small space rack?
Reserve 20-30% rack capacity for future growth despite small space constraints—system expansion more cost-effective than rack replacement requiring complete reinstallation. Position reserved space strategically near related equipment and install blank panels maintaining professional appearance and airflow control.
Conclusion
Wall mount Audio Visual (AV) racks combined with professional cable management represent the optimal solution for space-constrained AV installations, enabling integrators to deliver full-featured AV systems in environments where traditional floor standing racks would consume unacceptable floor area or compromise room functionality. Through strategic vertical space utilization, organized equipment placement, and systematic cable organization, wall-mounted solutions transform challenging small space deployments into efficient, maintainable, professional installations that rival much larger systems.
The key to small space success lies in meticulous pre-installation planning—thoroughly assessing spatial constraints, precisely calculating equipment requirements, strategically positioning racks for optimal cable routing and access, and designing comprehensive cable management infrastructure before beginning physical installation. In small spaces, planning errors that might be correctable in spacious equipment rooms become costly problems requiring extensive rework when physical dimensions offer no flexibility.
Cable management elevates from recommended practice to absolute necessity in small AV spaces, where disorganized wiring quickly overwhelms limited physical volumes, creates maintenance nightmares, and produces unprofessional installations that damage integrator credibility. By implementing structured cable routing, comprehensive labeling systems, adequate cable management infrastructure, and organized service loops, integrators transform potential cable chaos into clean, maintainable installations that function reliably over years of operation.
Modern AV design automation tools like XTEN-AV's X-DRAW platform have become invaluable for small space projects, providing intelligent design automation, space optimization algorithms, cable management planning, and professional documentation that ensure installation teams execute complex small space deployments with precision and consistency. These design platforms encode industry best practices and space efficiency principles, enabling even less experienced designers to produce optimized small space solutions while accelerating planning workflows and improving documentation quality.
Common small space mistakes—inadequate spatial planning, underestimated cable volumes, insufficient thermal management, poor wall structure assessment, and incomplete documentation—create expensive service callbacks, system failures, and client dissatisfaction that damage integrator reputations. Conversely, well-planned small space installations featuring optimized wall mount racks and professional cable management reduce installation time, maximize system capacity, ensure reliable operation, and create impressive presentations that generate client satisfaction and referrals.
As urban real estate costs continue rising, office spaces shrink, and flexible room designs proliferate, expertise in small space AV installations becomes an increasingly valuable competitive differentiator for AV integration firms. Integrators who master wall mount rack deployment, space optimization, and cable management in constrained environments position themselves for success in the growing market of space-challenged installations where traditional approaches simply don't fit.
Whether you're an experienced system designer refining small space methodologies, an installation technician seeking to improve deployment quality in tight quarters, or an AV integration firm establishing company-wide standards for space-constrained projects, applying the systematic approaches, design principles, and professional techniques outlined in this comprehensive guide ensures your wall mount AV rack installations deliver the space efficiency, technical excellence, and professional craftsmanship that define industry-leading small space AV integration services.


Sign in to leave a comment.