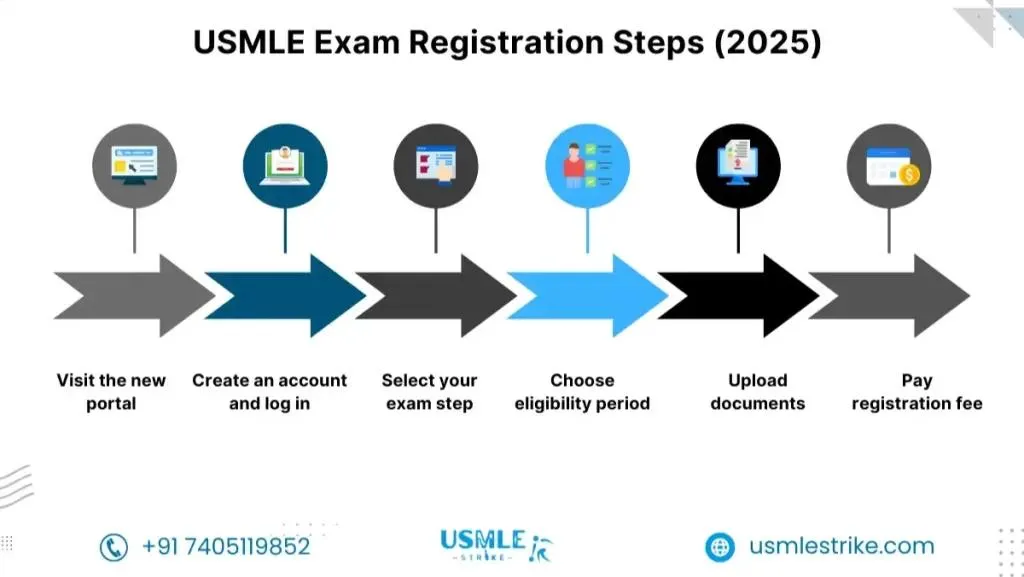

The United States Medical Licensing Examination (USMLE) remains one of the most important milestones for medical students and international medical graduates (IMGs) who wish to pursue residency and medical practice in the United States. In recent years, the registration process has undergone significant changes, and many applicants are now required to use the new USMLE Exam registration portal for exam applications and related services.
If you are planning to take USMLE Step 1 or Step 2 CK in 2026, understanding how the new registration system works can save you time, reduce application errors, and help ensure a smooth testing experience.
This guide explains everything you need to know about the New USMLE Registration Portal Guide 2026, including account creation, eligibility verification, document submission, fee payment, scheduling your exam, and troubleshooting common issues.
Why Was the USMLE Registration Portal Updated?
The registration process for USMLE applicants has evolved to improve efficiency, security, and user experience. The updated portal aims to:
- Simplify the application process
- Improve document management
- Enhance identity verification
- Reduce application processing delays
- Provide better tracking of application status
- Improve communication between applicants and registration authorities
The new system allows applicants to manage multiple aspects of their USMLE journey through a centralized platform.
Who Uses the New USMLE Registration Portal?
The portal is primarily used by:
- International Medical Graduates (IMGs)
- Medical students studying outside the United States and Canada
- Graduates of international medical schools
- Applicants seeking ECFMG certification
- Candidates registering for USMLE Step 1
- Candidates registering for USMLE Step 2 CK
Depending on your medical school and eligibility pathway, specific registration requirements may vary.
Step 1: Create Your Online Account
The first step in the registration process is creating an account within the new portal.
During registration, you will typically provide:
- Full legal name
- Date of birth
- Email address
- Contact information
- Citizenship information
- Medical school details
Important Tip
Ensure that your name exactly matches the name shown on your passport and identification documents.
Even minor differences can lead to delays or issues during exam scheduling and test-day verification.
Step 2: Verify Your Identity
Identity verification is a critical part of the registration process.
Applicants may need to submit:
- Passport information
- Government-issued identification
- Recent photograph
- Personal information verification
The information provided must be accurate and consistent across all documents.
Failure to provide matching details may delay application approval.
Step 3: Enter Medical School Information
After creating your account, you will be required to enter information about your medical education.
This typically includes:
- Medical school name
- Country of education
- Graduation status
- Enrollment dates
- Expected graduation date (if applicable)
Applicants should carefully review all information before submission.
Incorrect educational information can affect eligibility verification.
Step 4: Complete Eligibility Verification
Eligibility verification confirms that you meet the requirements to sit for the USMLE examination.
Depending on your status, verification may involve:
- Medical school confirmation
- Educational credential review
- Enrollment verification
- Graduation verification
Processing times can vary based on the institution and documentation requirements.
Applicants should begin this process well in advance of their preferred exam date.
Step 5: Select Your USMLE Examination
The new portal allows candidates to apply for specific examinations.
Common options include:
USMLE Step 1
Focuses on foundational medical sciences and basic clinical concepts.
USMLE Step 2 CK
Assesses clinical knowledge and application of medical principles in patient care.
Candidates should carefully select the appropriate examination before proceeding with payment.
Step 6: Choose Your Eligibility Period
During registration, applicants typically select an eligibility period.
The eligibility period represents the timeframe during which you may schedule and take your examination.
For example:
- January–March
- April–June
- July–September
- October–December
Choose a period that aligns with your preparation schedule.
Avoid selecting an early testing window if you are not adequately prepared.
Step 7: Upload Required Documents
The new portal provides a dedicated section for document uploads.
Common documents may include:
- Passport copy
- Identification documents
- Medical school credentials
- Graduation certificates
- Supporting verification forms
Document Submission Tips
- Upload clear, high-resolution files
- Use approved file formats
- Ensure all text is readable
- Verify that documents are complete
- Check expiration dates where applicable
Incomplete submissions may result in delays.
Step 8: Pay Registration Fees
After completing the application, applicants must pay the required examination fees.
Costs generally include:
- Examination registration fee
- International testing fees (if applicable)
- Administrative processing fees
Accepted payment methods may include:
- Credit cards
- Debit cards
- Approved online payment systems
Always keep copies of payment confirmations for future reference.
Step 9: Receive Your Scheduling Permit
Once your application is approved, you will receive a scheduling permit.
The scheduling permit contains important information such as:
- Candidate identification details
- Eligibility period
- Scheduling authorization
- Exam registration information
Do not attempt to schedule your exam before receiving this permit.
Step 10: Schedule Your Examination
After receiving authorization, you can schedule your exam appointment.
When selecting a testing date, consider:
- Study readiness
- Travel arrangements
- Availability of testing centers
- Personal commitments
Popular testing dates often fill quickly, especially during peak application seasons.
Scheduling early provides more flexibility.
Managing Your Application Through the Portal
One of the major benefits of the updated registration system is the ability to monitor your application status in real time.
Applicants can typically:
- Track document processing
- View application updates
- Download scheduling permits
- Update contact information
- Receive notifications
- Monitor examination records
Regularly checking your account can help identify issues before they become major problems.
Common Registration Mistakes to Avoid
Many applicants experience delays because of avoidable errors.
Name Mismatches
Your registration information must exactly match your identification documents.
Incorrect Email Address
An incorrect email can prevent you from receiving important notifications.
Low-Quality Document Uploads
Blurry or incomplete documents may be rejected.
Missing Deadlines
Late submissions can delay eligibility verification and scheduling.
Choosing the Wrong Eligibility Period
Selecting a testing window before you are fully prepared may create unnecessary stress.
How Long Does Registration Take?
Processing times vary depending on:
- Verification requirements
- Medical school response times
- Document completeness
- Application volume
Many applicants receive approval within several weeks, but some cases may take longer.
Starting the process early is strongly recommended.
Tips for a Smooth Registration Experience
To avoid delays and complications:
- Create your account early
- Use accurate personal information
- Verify all educational details
- Submit clear documents
- Monitor application status regularly
- Save copies of confirmations and receipts
- Schedule your exam as soon as you receive authorization
Proper planning can make the entire registration process much easier.
Frequently Asked Questions
Can I edit my information after submission?
Certain information may be updated, while other details may require formal correction requests.
Do I need a passport to register?
Most international applicants use a valid passport for identification purposes.
How early should I register?
Many candidates begin the process several months before their intended examination date.
Can I reschedule my exam?
Rescheduling options are generally available, though fees and deadlines may apply.
Conclusion
The updated registration system has streamlined many aspects of the USMLE application process, but careful attention to detail remains essential. By understanding how the new portal works and preparing your documents in advance, you can avoid common mistakes and move confidently toward your examination goals.
Whether you are preparing for USMLE Step 1 or Step 2 CK, following this New USMLE Registration Portal Guide 2026 will help ensure a smoother registration experience. Start early, verify your information carefully, and keep track of all application updates to stay on course toward your future medical career in the United States.





























Sign in to leave a comment.