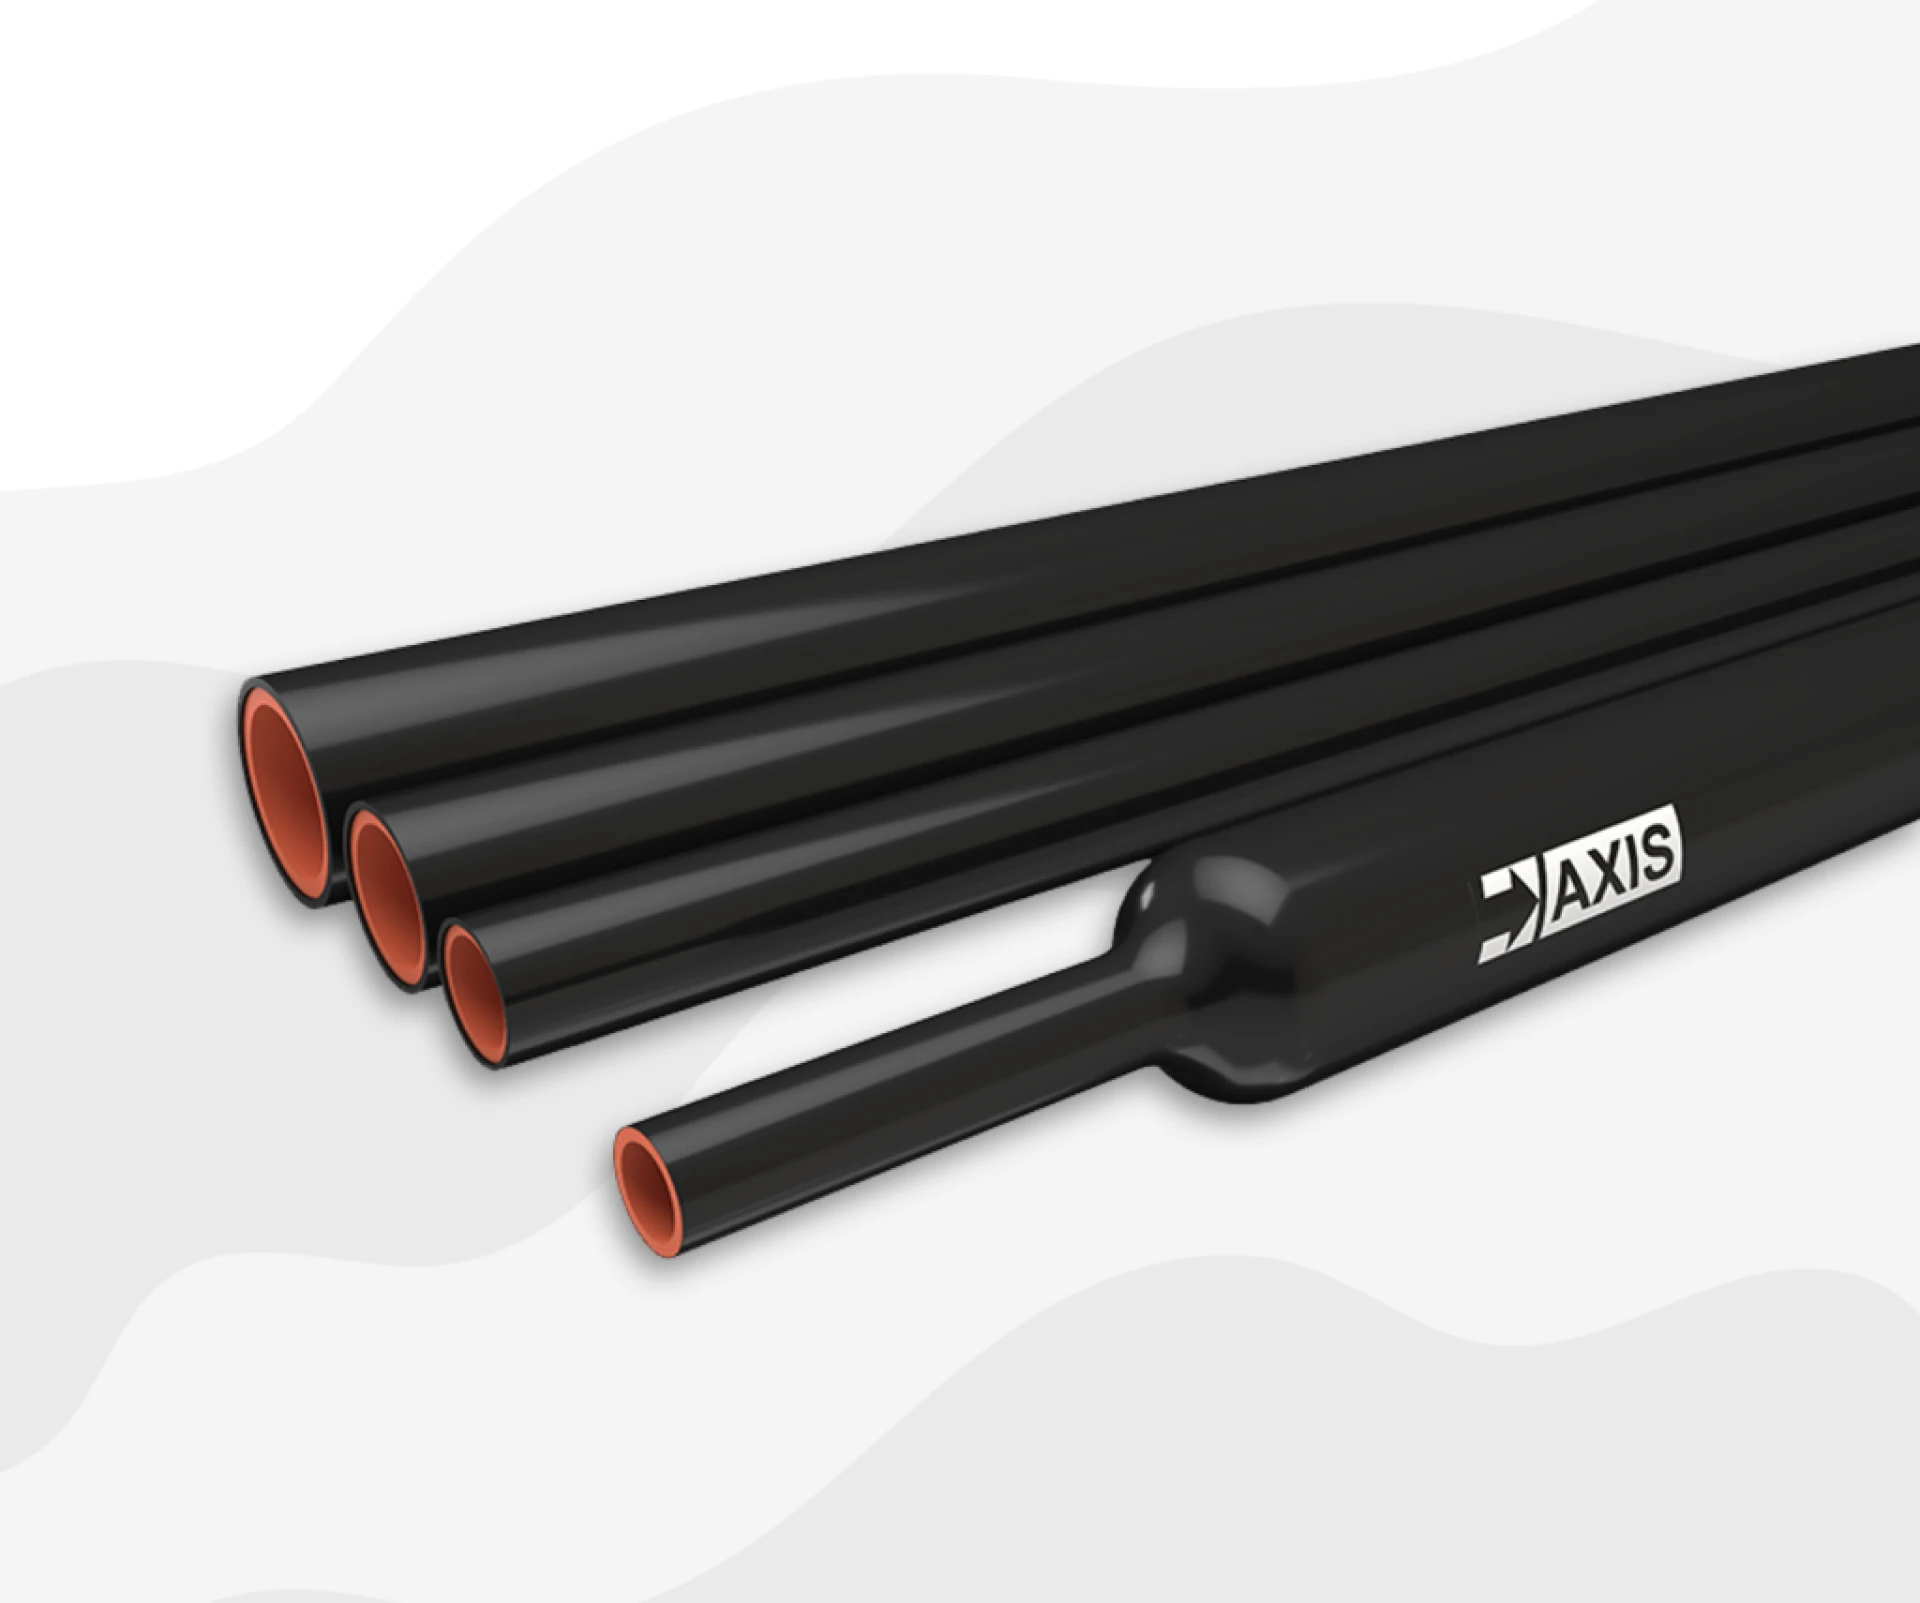
Installing a cable joint does not have to be complicated or time-consuming. When the work is planned properly and each step is handled calmly, the installation can be completed quickly and safely. The key is to focus on preparation, correct handling of the cable, and proper finishing of the joint.
Prepare the work area first
Before starting, make sure the power supply is completely switched off. The area where you are working should be clean, dry, and easy to move around in. Check the cable carefully for cuts, moisture, or corrosion. Fixing these issues early saves time and avoids future faults.
Keep tools and materials ready
Having everything ready before you begin makes the job much faster. You don’t want to stop halfway to look for tools. Normally, you will need:
- Cable stripping tools
- A sharp cutting knife
- Approved connectors
- A heat source for shrinking insulation
- A clean, lint-free cloth
When tools are placed nearby, the work flows smoothly from one step to the next.
Measure and mark the cable properly
Take a moment to measure the cable ends and mark them according to the joint size. Correct marking helps you remove only the required amount of insulation. This avoids mistakes and prevents unnecessary rework.
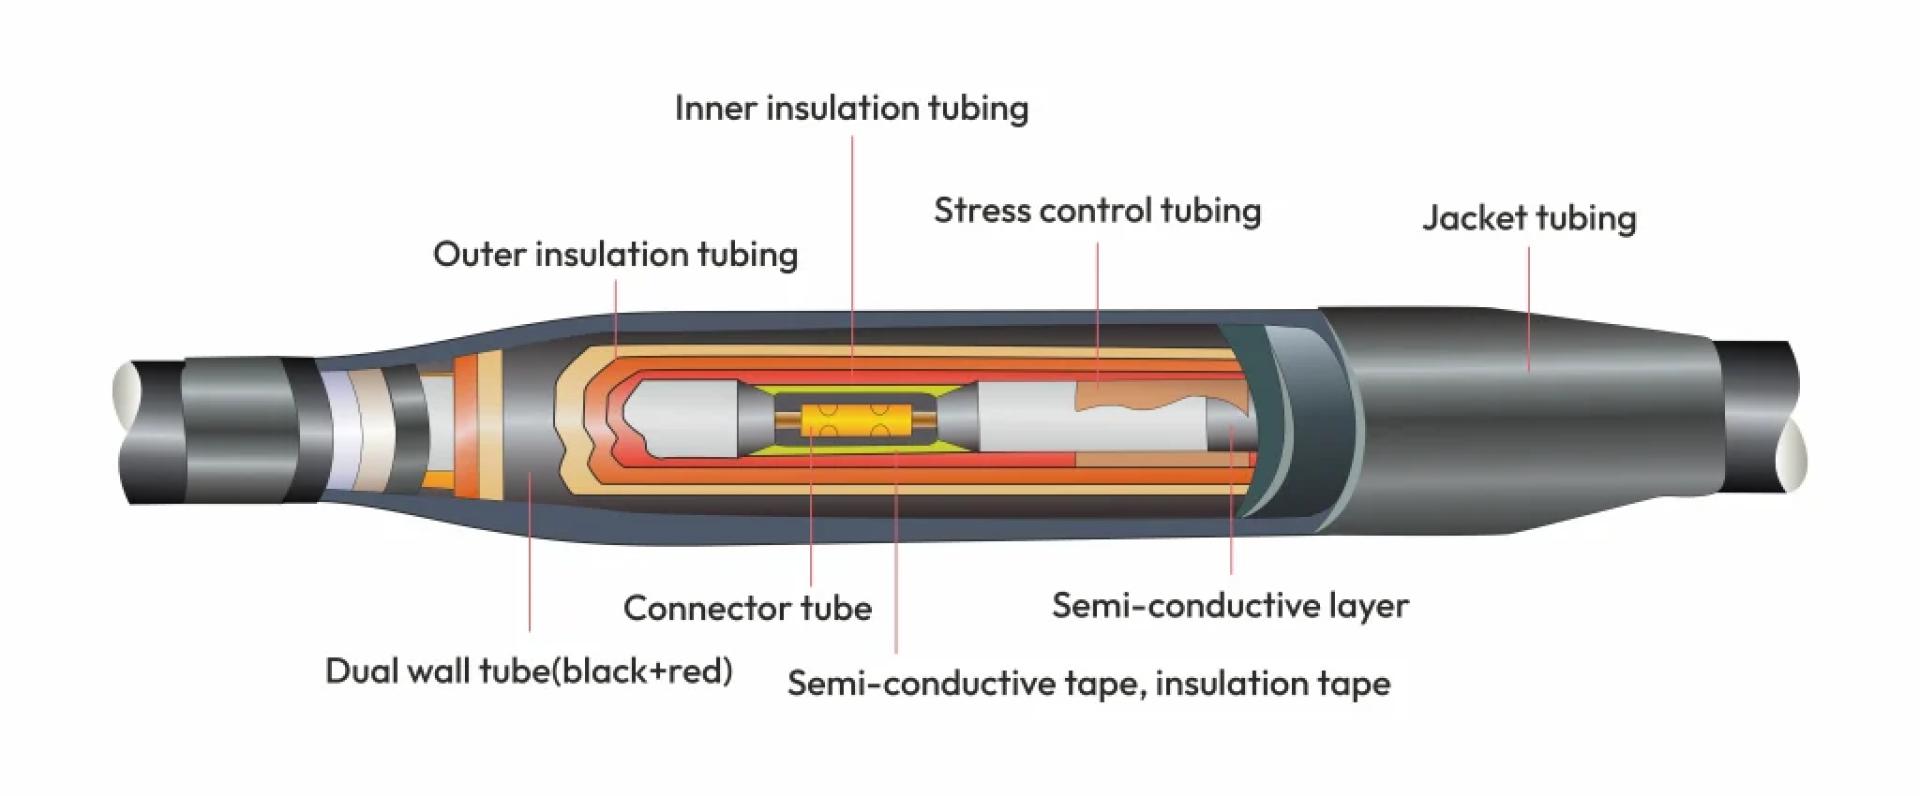
Strip insulation and clean the conductors
Strip the outer sheath and insulation slowly and carefully. Avoid damaging the conductor, as even small cuts can weaken the connection. After stripping, clean the conductor surface well. Removing dust and oxidation helps create a strong and stable electrical connection.
Connect and align the conductors
Align the conductors neatly and secure them using the connectors provided in the straight through joint kit. Tighten the connectors evenly so the joint stays firm without putting stress on the cable. Good alignment improves performance and increases joint life.
Restore insulation and seal the joint
Place the insulation components over the joint and apply heat evenly. Move the heat source slowly so the insulation shrinks properly around the joint. A well-sealed joint protects against moisture, dust, and environmental damage.
Allow cooling and stabilization
After heating, let the joint cool naturally. This step is important for long-term strength. Rushing the cooling process can weaken the insulation seal.
Final check and power restoration
Once the joint has cooled, inspect it visually. Make sure there are no exposed conductors or gaps. If required, perform basic electrical tests. After everything looks good, restore the power safely and note down the installation details for future reference.


Sign in to leave a comment.