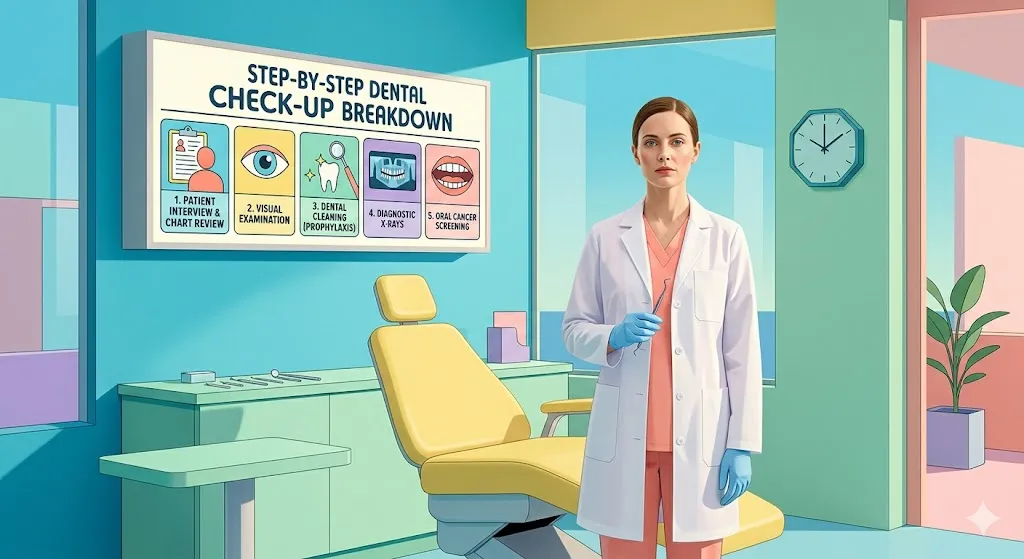

Introduction
The dental office smell hits you first—that distinct blend of mint, antiseptic, and something vaguely mechanical. Then the chair. Reclining, vulnerable, with a bright light aimed at your face like an interrogation room spotlight.
If dental visits make you anxious, you're not alone. Nearly 36% of adults experience some degree of dental anxiety, and 12% have extreme fear. Much of that anxiety stems from uncertainty. What exactly are they doing in there? Why does that tool make that sound? Is this going to hurt?
I've had patients cancel appointments for years because they couldn't face the unknown. Once I walked them through exactly what would happen—step by step, tool by tool, sensation by sensation—their anxiety dropped dramatically. Knowledge disarms fear.
This guide pulls back the curtain on routine dental check-ups. Whether you're a nervous first-timer, returning after a long absence, or simply curious about what that hygienist is actually doing back there, you'll find clarity here. No surprises, no mysteries—just a straightforward walkthrough of what to expect, why each step matters, and how to make the experience as comfortable as possible.
Before You Arrive: Setting Yourself Up for Success
A great dental visit starts before you walk through the door.
Update your medical history. Dental health and overall health are intimately connected. Diabetes, heart conditions, pregnancy, and medications all affect dental treatment. That blood thinner you're taking? Your dentist needs to know before any procedure that might cause bleeding.
List your concerns. That occasional sensitivity, the chip you noticed, the jaw clicking—write them down. Anxiety makes you forget once you're in the chair. A list ensures nothing gets overlooked.
Brush and floss beforehand. Yes, they'll clean your teeth anyway. But arriving with food visibly lodged between molars is embarrassing and makes their job harder. It's like washing dishes before the dishwasher—courtesy, not necessity.
Arrive early. Rushing elevates cortisol, which elevates anxiety. Give yourself ten minutes to settle, fill out paperwork, and mentally transition. If you're looking for professional care, Parramatta Green Dental offers the best dental treatment at an affordable budget, and you can visit their website for more details.
Step 1: The Initial Examination (5-10 minutes)
Your dentist or hygienist begins with a visual scan of your entire oral cavity. They're not just looking at teeth—they're assessing the whole system.
What they're checking:
- Face and neck – Swelling, asymmetry, lymph node enlargement
- Lips and corners of mouth – Cracking, lesions, signs of vitamin deficiency
- Gums – Color (healthy pink vs. red/inflamed), texture, bleeding points
- Soft tissues – Tongue, cheeks, palate, throat for abnormalities
- Teeth – Visible decay, wear patterns, cracks, existing restoration condition
- Jaw function – Opening range, joint sounds, muscle tenderness
The oral cancer screening: This quick, non-invasive check saves lives. Your dentist feels along your jaw and neck, examines your tongue and throat, and looks for any suspicious lesions. Early oral cancer detection dramatically improves survival rates.
What you should do: Relax your jaw, follow instructions to open wide or move your tongue, and mention any areas of sensitivity or concern.
Step 2: Dental X-Rays (5-15 minutes)
X-rays reveal what eyes cannot—between teeth, under existing fillings, and within jawbone structure. They're diagnostic tools, not routine torture.
Types of dental X-rays you might receive:
Table
| Type | What It Shows | Frequency | Radiation Exposure |
|---|---|---|---|
| Bitewing | Crown portions, between teeth, bone levels | Every 1-2 years | Very low (0.005 mSv) |
| Periapical | Entire tooth, root, surrounding bone | As needed for specific teeth | Very low (0.005 mSv) |
| Panoramic | Full mouth, jaw joints, sinuses | Every 3-5 years, or as needed | Low (0.007 mSv) |
| CBCT (3D) | Detailed 3D structure | Specific procedures (implants, complex extractions) | Low-moderate |
For perspective: A single dental bitewing exposes you to roughly the same radiation as one day of natural background radiation. Flying cross-country gives you more exposure. Modern digital X-rays reduce exposure by 80-90% compared to film.
The process: You'll wear a lead apron and thyroid collar. The hygienist positions a small sensor or film in your mouth (uncomfortable but not painful). You hold still for a few seconds while the machine beeps. That's it.
If you're pregnant: Tell your dentist. While dental X-rays are generally safe with proper shielding, they may be postponed for non-urgent situations depending on trimester.
Step 3: The Cleaning (30-45 minutes)
This is where the magic happens—or where your anxiety peaks, depending on your perspective. Understanding the process transforms it from mysterious to mechanical.
Scaling: Removing the Hard Stuff
Your hygienist uses a metal instrument called a scaler to remove plaque and tartar (calculus) from tooth surfaces and below the gumline.
The sensations: You'll feel pressure and scraping. It sounds loud because bone conducts sound directly to your inner ear. It's not actually as loud as it seems.
The water spray: An ultrasonic scaler vibrates at high frequency, breaking tartar apart while water cools the tip and washes away debris. The vibration can feel ticklish or slightly sensitive on lower front teeth (where enamel is thinnest).
Below the gumline: If you have significant buildup or gum disease, scaling extends under the gum tissue. This causes more sensation—pressure, scraping, occasional sharpness if gums are inflamed. Local anesthetic is available if needed.
Polishing: The Smooth Finish
After scaling, your hygienist uses a rubber cup with abrasive paste to polish tooth surfaces.
Why polish? Smooth surfaces resist plaque accumulation better than rough ones. It's like waxing a car—smooth surfaces stay cleaner longer.
The taste: Prophy paste comes in flavors (mint, cherry, bubblegum, even cookie dough). It's gritty but not unpleasant.
The sensation: Vibration, mild pressure, occasional splatter. You'll rinse afterward.
Flossing: The Professional Touch
Your hygienist flosses between every contact, checking for tight spots and removing any remaining paste or debris. They may use this opportunity to demonstrate proper technique—pay attention.
Fluoride Treatment: The Protective Shield
Depending on your cavity risk, you may receive a fluoride treatment:
- Foam or gel in trays held for 1-4 minutes
- Varnish painted on teeth, hardening on contact
- Rinse swished for 30-60 seconds
Aftercare: Avoid eating, drinking, or rinsing for 30 minutes to allow fluoride absorption. Varnish may feel slightly tacky but wears off with normal brushing.
Step 4: The Dentist's Examination (10-15 minutes)
After cleaning, your dentist performs a detailed examination using the now-clean surfaces and X-ray images.
What they're evaluating:
- X-ray findings – Decay between teeth, bone levels, root health, abscesses
- Each tooth individually – Probed for soft spots (decay), checked for mobility, examined for cracks
- Bite alignment – How upper and lower teeth meet; signs of grinding or clenching
- Existing restorations – Fillings, crowns, bridges for wear, leakage, or failure
- Gum health – Periodontal probing measures pocket depths around each tooth
The periodontal probe: A blunt instrument gently inserted between tooth and gum. Depths of 1-3mm are healthy; 4mm+ suggests gum disease. It feels like pressure, not pain, in healthy tissue. Inflamed gums may feel sharp.
The "explorer" tool: Your dentist touches each tooth surface, feeling for sticky or soft areas indicating decay. That scraping sound is normal.
Step 5: Treatment Planning and Discussion (10-15 minutes)
This is your time. The dentist explains findings, shows X-rays if helpful, and recommends next steps.
Questions to ask:
- "Can you show me what you're seeing on the X-ray?"
- "How urgent is this treatment? What happens if I wait?"
- "Are there alternative approaches?"
- "What's the cost, and what will insurance cover?"
- "How can I prevent this from worsening?"
A good dentist welcomes questions. They explain in terms you understand, respects your budget and timeline, and partners with you rather than dictating to you.
Treatment priorities: Your dentist should help you categorize recommendations:
- Urgent – Active decay, infection, pain (address within weeks)
- Preventive – Early-stage issues, maintenance (address within months)
- Elective – Cosmetic, optional (address when convenient)
Step 6: Scheduling and Checkout (5 minutes)
Before leaving, schedule your next appointment. Six months is standard for healthy patients; three to four months if you have gum disease or high cavity risk.
Insurance and payment: Understand your coverage. Many plans cover two cleanings annually at 100%. Know your deductible, copay, and annual maximum.
Take-home materials: Your dentist may provide:
- Personalized brushing and flossing instructions
- Samples of recommended products
- Written treatment plan with cost estimates
- Educational materials about your specific conditions
Comparative Analysis: Standard Check-Up vs. Deep Cleaning (Scaling and Root Planing)
Table
| Aspect | Routine Prophylaxis (Standard Cleaning) | Scaling and Root Planing (Deep Cleaning) |
|---|---|---|
| Indication | Healthy gums, mild gingivitis | Periodontal disease (4mm+ pockets, bone loss) |
| Anesthesia | Usually unnecessary | Local anesthetic typically required |
| Duration | 30-45 minutes | 60-120 minutes, often split into quadrants |
| Below gumline | Minimal | Extensive, to root surfaces |
| Recovery | Immediate | Soreness for 24-48 hours, sensitivity possible |
| Frequency | Every 6 months | Every 3-4 months after initial treatment |
| Cost | $75-200 (often covered by insurance) | $200-400 per quadrant |
If you're told you need a deep cleaning, it's not an upsell—it's a diagnosis. Gum disease is progressive and linked to heart disease, diabetes, and pregnancy complications. Take it seriously.
Managing Dental Anxiety: Practical Strategies
If reading this guide still leaves you uneasy, these evidence-based strategies help:
Communication: Tell your dentist you're anxious. They can adjust pacing, explain each step, or establish a "stop" signal (like raising your hand).
Distraction: Headphones with music or podcasts. Some offices offer virtual reality goggles or ceiling-mounted TVs.
Mindfulness: Focus on your breathing—slow inhales through the nose, longer exhales. Progressive muscle relaxation starting with toes and working upward.
Sedation options:
- Nitrous oxide (laughing gas) – Mild relaxation, wears off quickly
- Oral sedation – Prescription anti-anxiety medication taken before arrival
- IV sedation – Deep relaxation for severe anxiety or extensive work
Timing: Schedule morning appointments when cortisol is naturally higher (you're more resilient) and you're less likely to have built up anxiety all day.
Conclusion
A routine dental check-up isn't a mystery or a punishment. It's a systematic, evidence-based health assessment that prevents small problems from becoming expensive, painful emergencies. Every step serves a purpose, every tool has a function, and every minute invested saves you hours of future treatment.
The key is consistency. Skipping appointments because "nothing hurts" is like skipping oil changes because your car still runs. By the time symptoms appear, damage is often extensive and expensive.
Find a dental team you trust. Ask questions. Understand your own mouth. And remember that modern dentistry prioritizes comfort and prevention in ways that would astonish previous generations.

























Sign in to leave a comment.