
Creating accurate rack elevations for professional AV systems requires precise understanding of Audio Visual (AV) rack dimensions – the standardized 19-inch width, 1.75-inch rack unit (RU) height increments, and specific depth measurements (typically 24-36 inches) that govern how equipment mounting and spatial planning translate into professional installation drawings. These technical drawings serve as the blueprint for equipment installation, ensuring field technicians mount devices in correct positions while maintaining proper thermal spacing, cable management, and service accessibility.
Knowing Audio Visual (AV) rack dimensions is fundamental because rack elevation drawings without accurate RU calculations lead to installation failures, equipment conflicts, thermal management problems, and costly field modifications that can delay projects by weeks and damage integrator credibility. In 2026, as AV systems grow increasingly complex with network integration, AV-over-IP, and unified communications platforms, rack elevations have evolved from simple equipment lists to comprehensive technical documents that communicate mounting positions, cable routing, power distribution, and thermal management strategies to diverse stakeholders.
To create accurate rack elevations, calculate each device's RU height from manufacturer specifications, sum equipment totals, add thermal spacing based on heat output, allocate cable management (15-20% of space), include expansion reserve (25-30%), then create scaled drawings showing front and rear views with exact vertical positioning in rack unit increments.
Key Takeaways
- Rack elevations are scaled technical drawings showing exact equipment positions within standardized racks measured in rack units (1U = 1.75 inches)
- Audio Visual (AV) rack dimensions follow EIA-310-D standard: 19 inches width, 1.75-inch RU height, variable depth
- Accurate RU calculations prevent 95% of installation errors and equipment mounting conflicts
- Professional rack elevations include front and rear views, RU numbering, equipment labels, cable routing, and thermal spacing
- Common mistakes include forgetting thermal gaps, ignoring equipment depth, and miscounting RU positions
- Manual rack elevation creation takes 3-5 hours per rack; AI-powered software reduces this to 15-20 minutes
- Modern elevation tools provide 3D visualization, collision detection, automatic calculations, and client-ready presentations
- Professional elevation drawings reduce installation time by 40% and field errors by 85%
What Is a Rack Elevation in AV System Design?
A rack elevation is a scaled technical drawing that depicts the vertical arrangement of equipment within a standardized equipment rack, showing exact mounting positions, device heights, and spatial relationships using rack unit measurements as the reference system.
Purpose and Function
Rack elevations serve multiple critical purposes:
Installation Guidance:
- Provides field technicians with exact mounting instructions
- Eliminates guesswork about equipment placement
- Ensures proper sequencing during installation
- Specifies mounting hardware requirements
Design Communication:
- Communicates design intent to clients and stakeholders
- Enables design review before equipment procurement
- Facilitates team coordination across designers, installers, and project managers
- Serves as contractual documentation of system design
System Documentation:
- Creates permanent as-built records for facility management
- Supports future maintenance and troubleshooting
- Enables system upgrades without complete redesign
- Provides training materials for facility staff
Key Components of Professional Rack Elevations
Essential elements included in complete rack elevations:
Front Elevation View:
- Vertical scale showing RU positions (numbered 1-42, 1-45, etc.)
- Equipment outlines at correct RU heights
- Device labels with model numbers
- Mounting hardware indicators
- Blank panels and cable managers positioned accurately
- Visual indicators for high-heat equipment
Rear Elevation View:
- Rear-mounted equipment (PDUs, patch panels, some switches)
- Cable connection points and connector types
- Power distribution layout
- Cable management routing
- Service access requirements
Supplementary Information:
- Equipment schedule listing all devices
- Rack specifications (height, depth, type)
- Weight calculations and center of gravity
- Power consumption totals
- Thermal output (BTU/hr) calculations
- Network connectivity diagrams
Understanding Rack Units (U) Before Creating Rack Elevations
Rack units are the fundamental measurement system that makes rack elevations possible and universally understood.
The Rack Unit Standard
One rack unit (1U) precisely equals:
- Height: 1.75 inches (44.45 millimeters)
- Mounting hole spacing: Three holes per RU at 0.625-inch intervals
- Standard: Defined by EIA-310-D specification
- Universal application: Worldwide consistency across manufacturers
Rack Unit Numbering Convention
Professional convention numbers RU positions from bottom to top:
Standard numbering:
- Bottom position: RU #1
- Top position: RU #42 (in 42U rack), RU #45 (in 45U rack)
- Direction: Ascending from floor upward
- Labeling: Some racks have physical RU markers on rails
Example positioning:
- "Mount amplifier at RU 5-6" means bottom of device aligns with RU 5 marking
- Device occupies positions 5 and 6 (2U device)
- Next available position above is RU 7
Common Rack Unit Heights
Standard rack sizes in AV installations:
| Rack Height | Total RU | Physical Height | Common Application |
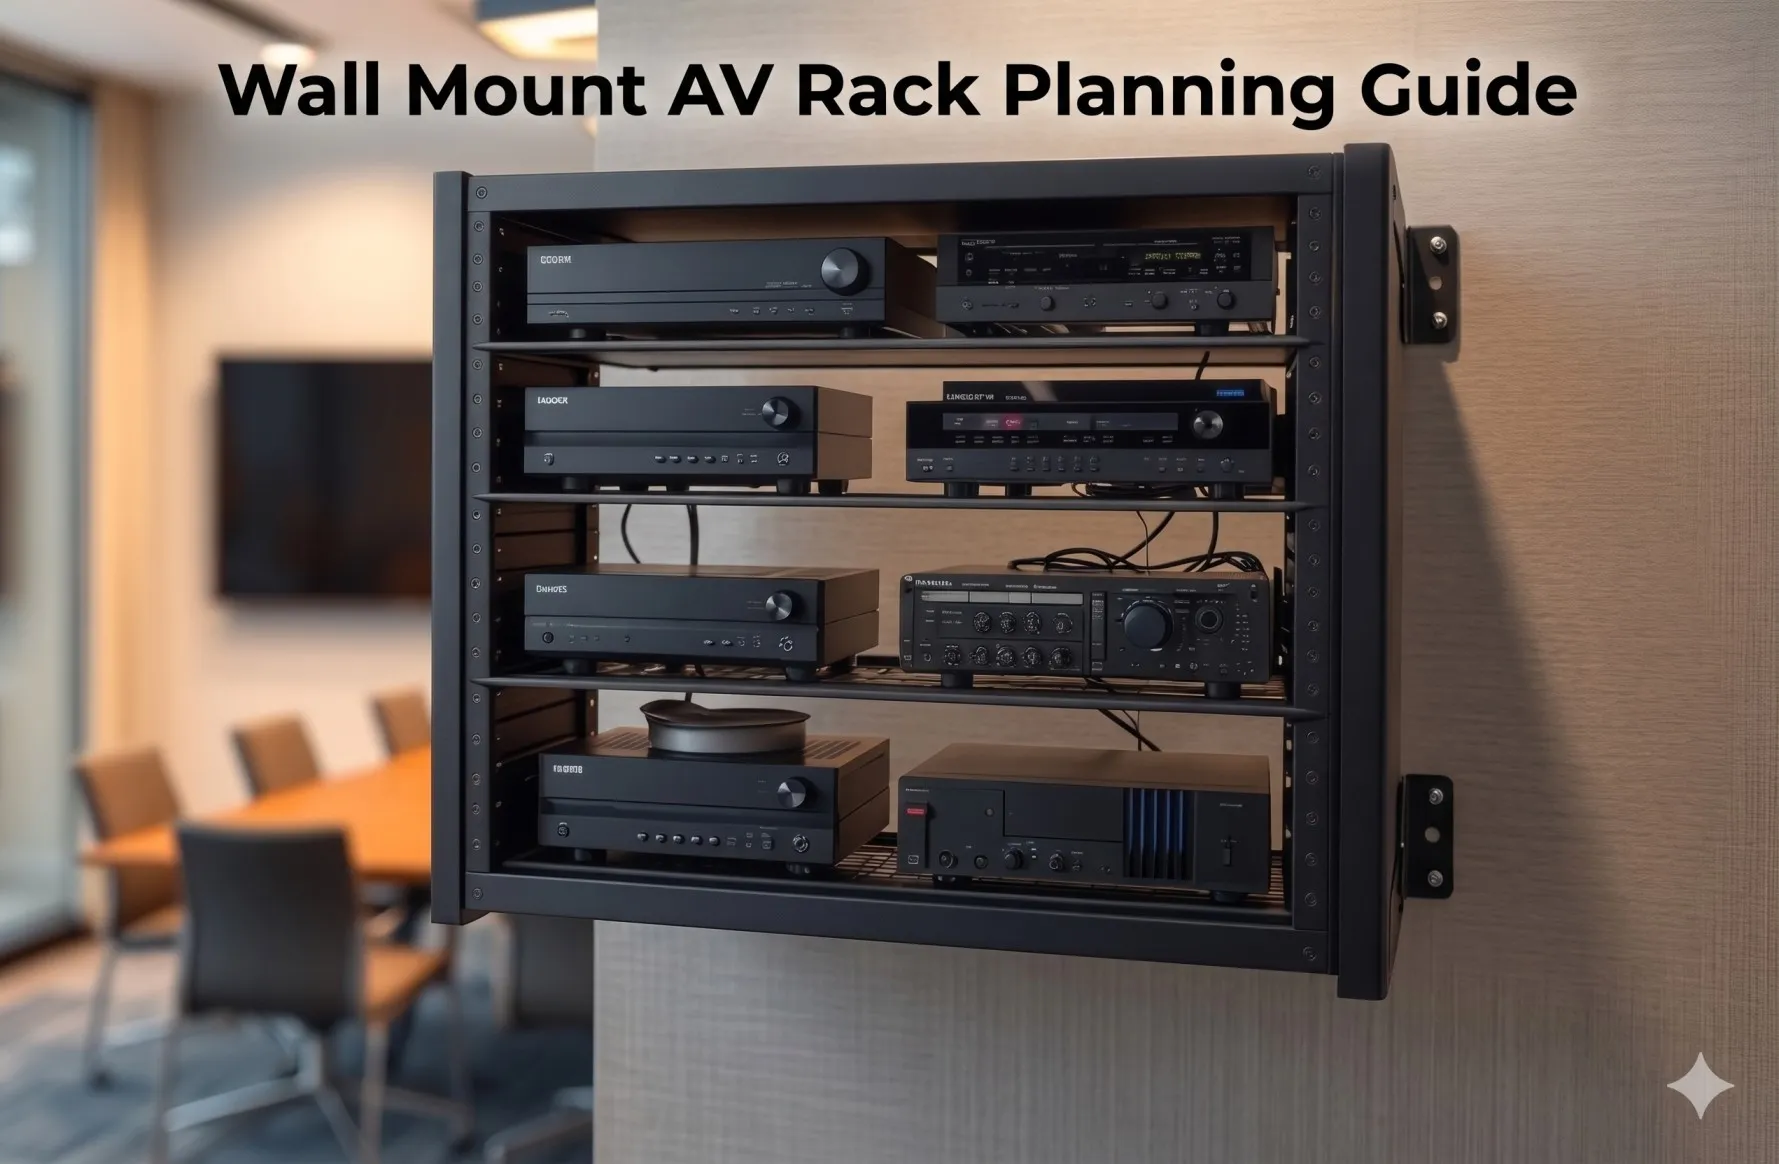
| 12U | 12 | 21 inches | Small meeting rooms, wall-mount |
| 16U | 16 | 28 inches | Standard conference rooms |
| 24U | 24 | 42 inches | Medium boardrooms |
| 42U | 42 | 73.5 inches | Equipment rooms, standard full-height |
| 45U | 45 | 78.75 inches | Maximum height racks |
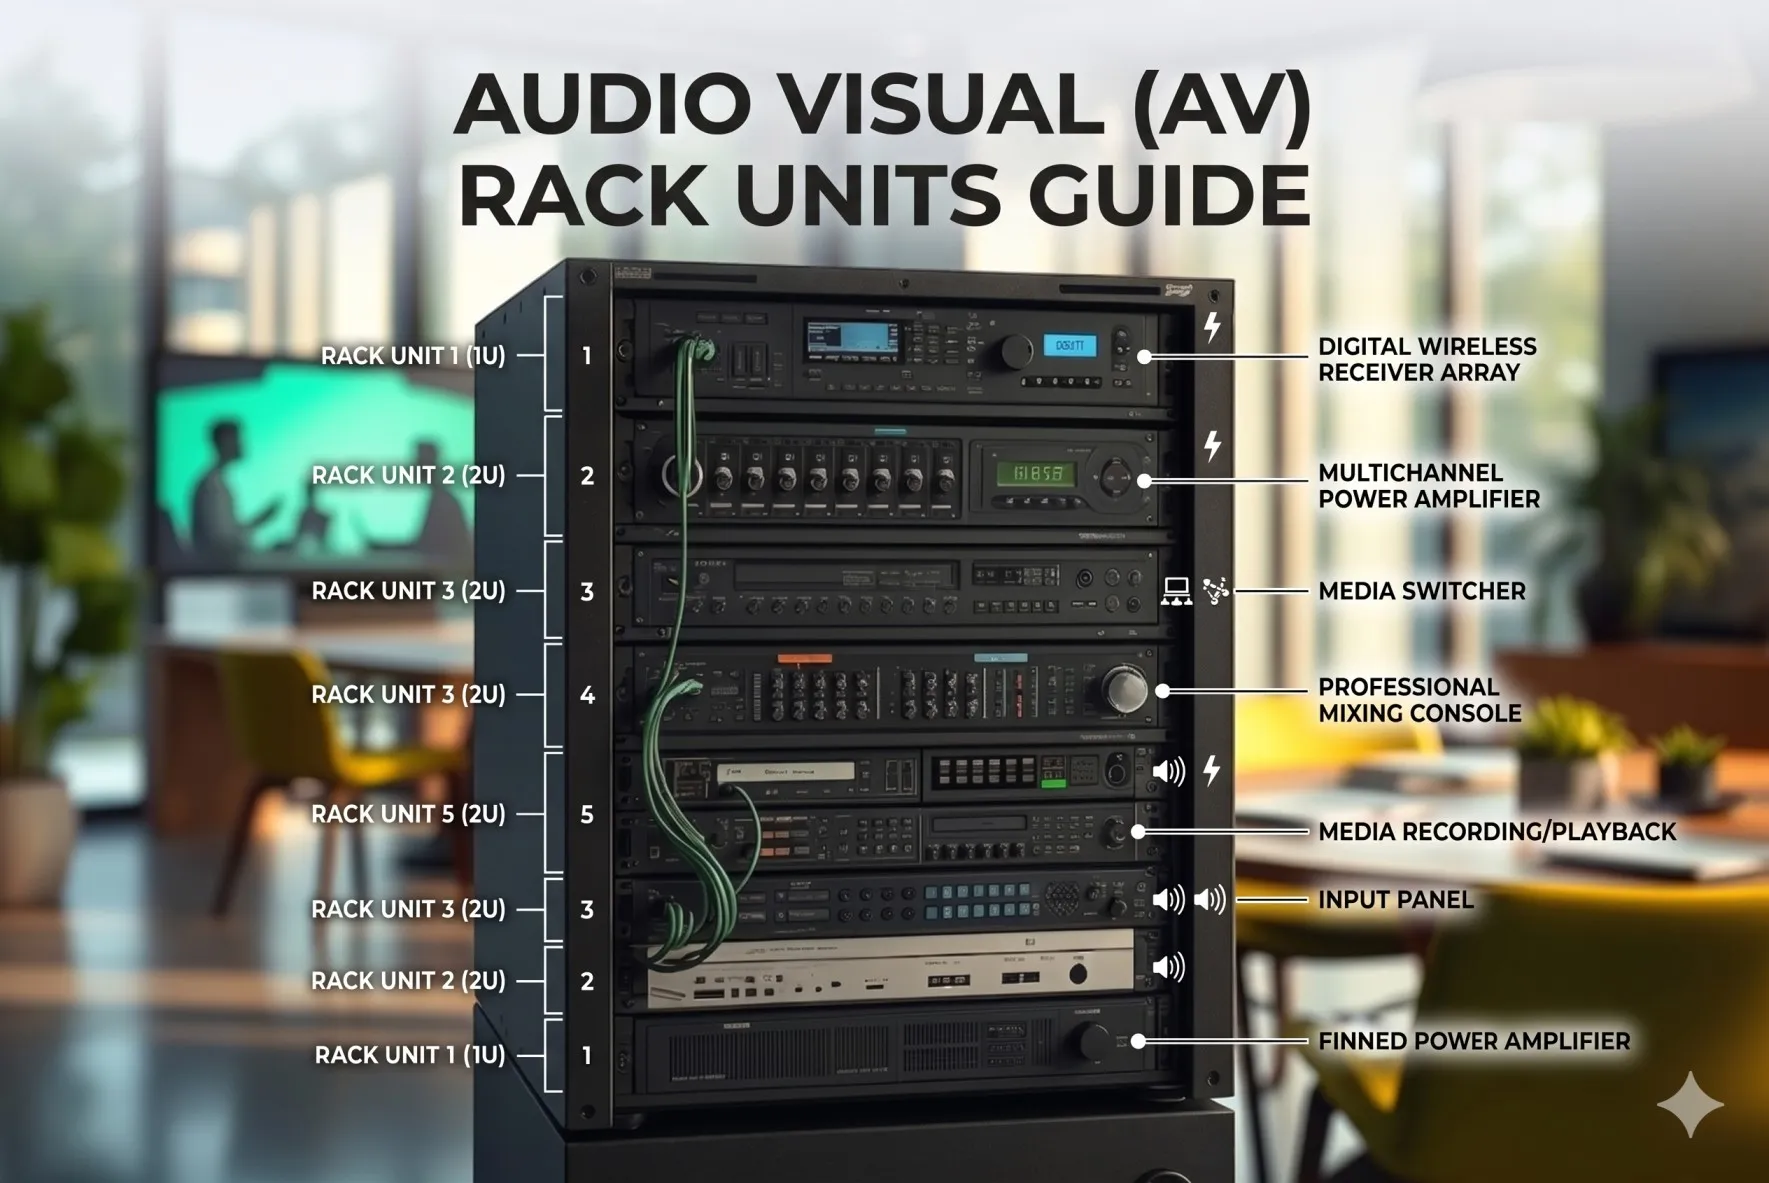
Equipment Rack Unit Specifications
Typical RU heights for common AV equipment:
Video Equipment:
- Small switchers: 1-2U
- Video matrices: 3-6U
- Scalers/processors: 1-3U
Audio Equipment:
- DSP processors: 1-2U
- Power amplifiers: 2-4U
- Audio interfaces: 1U
Network Equipment:
- Switches (24-48 port): 1-2U
- Routers: 1U
- PoE injectors: 1-2U
Supporting Infrastructure:
- PDUs: 1-2U (horizontal) or 0U (vertical)
- UPS systems: 2-6U
- Patch panels: 1-2U
- Cable managers: 1-2U
Why Accurate AV Rack Unit Calculations Are Important
Precision in RU calculations directly impacts project success and installation efficiency.
Installation Impact
Accurate calculations prevent common field problems:
Equipment Fit Issues:
- Incorrect RU totals lead to equipment that doesn't fit
- Field technicians discover problems after equipment delivery
- Replacement racks cost $800-$3,500 plus installation delays
- Change orders average $5,000-$12,000 per rack
Mounting Conflicts:
- Front and rear equipment colliding due to depth miscalculations
- Cable connectors interfering with adjacent devices
- Service access blocked by poor positioning
Thermal Problems:
- Insufficient spacing causes overheating
- Equipment failures within 6-12 months
- Warranty claims denied for improper installation
Professional Credibility
Quality elevation drawings demonstrate integrator competence:
Client Perception:
- Professional drawings improve client confidence by 60%
- Detailed elevations differentiate from competitors
- Clear documentation reduces client questions and change requests
Team Coordination:
- Installers work faster with clear directions (40% time reduction)
- Project managers can track progress accurately
- Support teams troubleshoot more efficiently
Financial Impact
Accurate RU calculations deliver measurable cost benefits:
Error Prevention:
- Eliminates wrong rack sizes (saves $800-$3,500 per rack)
- Prevents equipment returns (saves $500-$2,000 per incident)
- Reduces installation rework (saves 8-16 labor hours)
Efficiency Gains:
- Faster installations (40% reduction in labor time)
- Fewer site visits (eliminates troubleshooting trips)
- Better resource planning (accurate material estimates)
Step-by-Step Guide to Calculating Rack Units for AV Equipment
Follow this systematic process to ensure accurate RU calculations for rack elevations.
Step 1: Create Complete Equipment Inventory
Document every rack-mounted component:
Information to Capture:
- Equipment name and description
- Manufacturer and exact model number
- Rack unit height (from specification sheet)
- Mounting type (front-mount, rear-mount, shelf-mount)
- Equipment depth including rear connectors
- Weight per device
- Power consumption (watts)
- Heat output (BTU/hr if available)
Example Inventory Template:
| Equipment | Model | RU | Mount | Depth | Weight | BTU/hr |
| Video Matrix | Crestron DM-MD16X16 | 3U | Front | 16" | 28 lbs | 512 |
| DSP | QSC Core 110f | 1U | Front | 14" | 11 lbs | 205 |
| Amplifier | Crown DCi 4-300 | 2U | Front | 14" | 21 lbs | 1,800 |
Step 2: Verify Manufacturer Specifications
Always confirm RU heights from official sources:
Reliable Sources:
- Product specification sheets (PDF downloads)
- Manufacturer technical documentation
- Official product pages with dimensional drawings
- Installation manuals with mounting diagrams
Common Mistakes to Avoid:
- Don't assume heights based on similar products
- Don't trust third-party retailers for specs
- Don't use outdated specification sheets
- Verify mounting hardware doesn't add height
Step 3: Calculate Base Equipment Total
Sum all equipment RU requirements:
Example Calculation (Medium Conference Room):
Video Equipment:
- Video matrix: 3U
- Video scaler: 2U
- Distribution amp: 1U
- Video subtotal: 6U
Audio Equipment:
- DSP: 1U
- Power amplifier: 2U
- Wireless receivers (2): 2U
- Audio subtotal: 5U
Network Infrastructure:
- 48-port PoE switch: 2U
- Network router: 1U
- Network subtotal: 3U
Supporting Equipment:
- Control processor: 1U
- Video patch panel: 1U
- Audio patch panel: 1U
- Network patch panel: 1U
- PDU (horizontal): 1U
- UPS: 3U
- Support subtotal: 8U
Base Equipment Total: 6U + 5U + 3U + 8U = 22U
Step 4: Add Thermal Spacing
Calculate ventilation requirements:
Heat Classification Rules:
- Low (<200 BTU/hr): 0U spacing needed
- Moderate (200-500 BTU/hr): 1U above
- High (500-1000 BTU/hr): 1U above, 1U below
- Very High (1000+ BTU/hr): 2U above, 1U below
Applying to Example:
- Power amplifier (1,800 BTU/hr): 3U spacing
- PoE switch (estimated 1,200 BTU/hr): 3U spacing
- Video matrix (512 BTU/hr): 2U spacing
- DSP (205 BTU/hr): 1U spacing
- UPS (350 BTU/hr): 1U spacing
Total Thermal Spacing: 10U
Step 5: Allocate Cable Management
Calculate cable management space:
Formula: (Equipment + Thermal) × 0.15 to 0.20
(22U + 10U) × 0.18 = 5.76U → Round to 6U
Cable Management Components:
- 3× Horizontal cable managers (1U each): 3U
- Patch panel clearances: 2U
- Additional routing space: 1U
- Total: 6U
Step 6: Add Expansion Reserve
Calculate future capacity:
Current Requirement: 22U + 10U + 6U = 38U
Expansion Percentage (standard commercial): 25% 38U × 0.25 = 9.5U → Round to 10U
Total with Expansion: 38U + 10U = 48U
Step 7: Select Rack Size
Available standard sizes:
- 42U: Too small
- 45U: Still insufficient
- 48U: Custom size, perfect fit
- 50U or 52U: Would require custom order
Practical Decision: Order 45U rack and optimize design slightly, or use 42U + 12U wall-mount for less critical equipment.
Optimization Path (to fit 45U):
- Reduce some thermal spacing where possible: -2U
- Use vertical PDU instead of horizontal: -1U
- Slightly reduce expansion reserve: -2U
- Optimized total: 43U (fits 45U rack comfortably)
How to Create a Rack Elevation Drawing Using Rack Unit Calculations
With RU calculations complete, create professional elevation drawings.
Manual Drawing Method
Tools required:
- CAD software (AutoCAD, Visio, etc.) or dedicated rack design tools
- Equipment dimensions and specifications
- RU calculation results from previous steps
Drawing Steps:
1. Create Rack Outline:
- Draw vertical rectangle representing rack
- Add scale (typically 1:10 or 1:20)
- Mark RU positions along vertical axis
- Label top (RU 45) and bottom (RU 1)
2. Add Equipment Blocks:
- Draw rectangles for each device at correct RU height (1U = 1.75" at scale)
- Position equipment at correct starting RU
- Ensure blocks span correct number of RU positions
- Add equipment labels inside or beside blocks
3. Include Spacing Elements:
- Add blank panel blocks for thermal spacing
- Show cable managers at correct positions
- Indicate expansion reserve areas
- Mark high-heat equipment with special notation
4. Add Details and Labels:
- Equipment names and model numbers
- RU positions (e.g., "RU 10-12")
- Mounting notes (front/rear/shelf)
- Power requirements or connection notes
5. Create Rear View:
- Duplicate rack outline
- Add rear-mounted equipment (PDUs, patch panels)
- Show cable connection points
- Indicate power distribution
Software-Assisted Drawing Method
Modern rack design software automates most manual work:
Process with Professional Tools:
1. Select Equipment from Library:
- Search equipment database by manufacturer/model
- Drag devices into rack area
- Software automatically shows correct RU height
2. Auto-Arrange or Manual Position:
- Software can auto-optimize equipment placement
- Or manually drag equipment to desired positions
- Real-time RU count updates
3. Apply Design Rules:
- Software suggests or enforces thermal spacing
- Highlights mounting conflicts automatically
- Validates weight distribution
4. Generate Elevations:
- One-click generation of front/rear elevations
- Professional formatting with title blocks
- Automated scaling and dimensions
- Export to PDF, DWG, or image formats
Elevation Drawing Best Practices
Professional standards for rack elevations:
Visual Clarity:
- Use consistent color coding (e.g., video equipment = blue, audio = green)
- Bold labels for easy reading
- Adequate whitespace around text
- Clear scale indication
Technical Accuracy:
- Verify RU positions match calculations
- Double-check equipment heights against specs
- Include all mounting hardware in drawings
- Note any special requirements
Documentation Completeness:
- Title block with project info, date, revision
- Equipment legend explaining symbols/colors
- Notes section for installation instructions
- Revision history for design changes
Common Rack Elevation Mistakes to Avoid
Learn from frequent elevation drawing errors that cause installation problems.
Mistake 1: Incorrect RU Counting
The Error: Starting RU count at 0 instead of 1, or counting top-to-bottom instead of bottom-to-top.
The Consequence: Equipment mounted in wrong positions, entire rack layout shifted, installation rework required.
The Fix: Always number RU positions from 1 (bottom) to 42/45 (top). Use physical rack RU markers as reference during design.
Mistake 2: Forgetting Thermal Spacing
The Error: Creating elevations showing equipment mounted consecutively without ventilation gaps.
The Consequence: Field installers follow drawing exactly, leading to thermal failures months later.
The Fix: Visually indicate thermal spacing with blank panels or hatched areas on elevations. Add notes explaining spacing rationale.
Mistake 3: Ignoring Equipment Depth
The Error: Creating front elevation only without verifying rear clearances and depth conflicts.
The Consequence: Deep equipment doesn't fit, rear connectors blocked, doors won't close.
The Fix: Always create both front and rear elevations. Note equipment depths in specifications. Verify deepest device + connectors < rack depth.
Mistake 4: Inaccurate RU Heights
The Error: Using estimated heights or outdated specifications instead of verifying current models.
The Consequence: Equipment doesn't fit spaces shown, entire elevation invalid, redesign required in field.
The Fix: Verify every device height from current manufacturer specs. Don't trust memory or assumptions. Update drawings when equipment changes.
Mistake 5: Poor Labeling
The Error: Using vague labels ("Switch 1") or no labels at all.
The Consequence: Field confusion about which equipment goes where, installation delays, mounting errors.
The Fix: Use specific labels with manufacturer and model (e.g., "Cisco C9300-48P PoE Switch"). Include RU positions in labels.
Mistake 6: No Scale or Dimensions
The Error: Creating unscaled drawings or omitting dimensional information.
The Consequence: Drawing appears professional but provides no actual installation value.
The Fix: Always include scale notation (1:10, 1:20) and dimensional callouts for critical measurements.
Mistake 7: Missing Accessories
The Error: Showing only active equipment, omitting patch panels, cable managers, blank panels.
The Consequence: Incomplete Bill of Materials, installation surprises, unprofessional appearance.
The Fix: Document every item consuming rack space, including all accessories and mounting hardware.
Using AV Rack Design Software to Automate Rack Elevations
Professional software platforms dramatically accelerate rack elevation creation while improving accuracy.
Manual vs. Software Comparison
| Aspect | Manual CAD Method | Dedicated Rack Software |
| Equipment library | Build custom blocks | 80,000+ pre-loaded devices |
| RU calculations | Manual arithmetic | Automatic real-time totals |
| Thermal analysis | Manual research/notes | Automated BTU calculations |
| Elevation generation | 3-5 hours drawing | 15-20 minutes |
| Revisions | Redraw significantly | Update in minutes |
| Error rate | 15-25% | 2-5% |
| Visualization | 2D only | 3D with collision detection |
Key Software Capabilities
Modern rack design platforms provide:
Equipment Intelligence:
- Verified equipment databases with accurate specifications
- Automatic RU height assignment when selecting devices
- 3D equipment models for realistic visualization
- Manufacturer updates keeping database current
Automated Calculations:
- Real-time RU totals as equipment added/removed
- Automatic thermal spacing suggestions based on BTU data
- Weight distribution calculations
- Power consumption summaries
Visual Design Tools:
- Drag-and-drop equipment positioning
- Front and rear views simultaneously
- Collision detection for mounting conflicts
- Color-coded thermal zones
- 3D rack visualization for client presentations
Documentation Automation:
- One-click elevation generation
- Professional formatting with title blocks
- Equipment schedules automatically generated
- Bill of Materials with specifications
- Multiple export formats (PDF, DWG, PNG)
Time and Cost Savings
ROI analysis for professional rack design software:
Time Savings (per rack):
- Manual method: 4-5 hours
- Software method: 20-30 minutes
- Improvement: 85-90% faster
Error Reduction:
- Manual error rate: 20%
- Software error rate: 3%
- Improvement: 85% fewer errors
Financial Impact (firm designing 50 racks/year):
- Time saved: 200+ hours @ $75/hr = $15,000
- Errors prevented: 8.5 errors @ $6,000 avg = $51,000
- Total annual benefit: $66,000
- Software cost: $4,000-$6,000/year
- Net ROI: 1,000-1,550%
Top Features to Look for in Rack Elevation Software
Evaluating rack design platforms for elevation creation:
Essential Features
1. Comprehensive Equipment Library:
- Minimum 50,000+ devices from major manufacturers
- Regular updates (weekly or monthly)
- Accurate RU heights and specifications
- 3D models for visualization
- Custom equipment creation capability
2. Intelligent Auto-Layout:
- AI-powered suggestions for optimal placement
- Thermal spacing automation
- Weight distribution optimization
- Signal flow consideration in arrangement
3. Professional Drawing Output:
- High-resolution elevations suitable for printing
- Customizable title blocks with company branding
- Automatic scaling and dimensions
- Multiple export formats (PDF, DWG, DXF, PNG)
4. Real-Time Validation:
- RU capacity warnings when exceeding rack size
- Thermal alerts for high-heat concentrations
- Weight warnings for excessive loads
- Depth conflict detection
5. Collaboration Tools:
- Cloud-based access for team members
- Version control with revision tracking
- Comment threads for design discussions
- Client review portals for approvals
Advanced Features
6. Integration Capabilities:
- CAD export for construction documents
- Project management software connections
- BOM integration with procurement systems
- Asset management database synchronization
7. Mobile Field Apps:
- Tablet/phone apps for installation verification
- Photo documentation linked to elevations
- As-built updates from field
- Offline mode for sites without connectivity
8. Analytics and Reporting:
- Equipment usage statistics across projects
- Standard configurations identification
- Cost analysis by rack/project
- Time tracking for design tasks
How AI Is Transforming Rack Elevation Design
Artificial intelligence is revolutionizing rack elevation creation in 2026.
AI-Powered Design Assistance
Current AI capabilities in professional rack design platforms:
Intelligent Equipment Suggestions:
- Natural language input: "I need a 16×16 4K video matrix" → AI suggests appropriate models
- Requirements-based recommendations: Specify room size, user count → AI proposes complete equipment list
- Compatibility checking: AI ensures selected devices work together
- Alternative suggestions: When primary choice unavailable, AI recommends equivalents
Automated Layout Optimization:
- AI analyzes room requirements, equipment list, constraints
- Generates multiple layout options optimized for different priorities (cost, thermal, accessibility)
- Learns from thousands of successful installations in database
- Adapts recommendations based on user feedback and preferences
Predictive Problem Detection:
- Thermal modeling: AI predicts hotspots before installation
- Cable congestion warnings: Flags areas likely to have routing problems
- Service access analysis: Identifies equipment that will be difficult to maintain
- Failure prediction: Warns about configurations known to cause issues
Machine Learning Benefits
AI systems improve over time through machine learning:
Pattern Recognition:
- Learns optimal equipment spacing from successful projects
- Identifies common mistakes from failed installations
- Recognizes room types and applies appropriate standards
- Understands equipment relationships (what devices typically work together)
Continuous Improvement:
- Accuracy increases as more projects added to training data
- Recommendations refine based on user selections
- Error prevention improves from documented mistakes
- Efficiency gains compound over time
Future AI Trends
Emerging AI capabilities in rack elevation design:
Conversational Design:
- Voice-controlled design creation
- Natural language revision requests ("Move the amplifier higher to reduce thermal issues")
- AI chatbot assistance for specification questions
Augmented Reality Integration:
- AR visualization of rack elevations in actual equipment rooms
- Mobile device overlay showing proposed equipment placement
- Virtual installation for training and verification
Generative Design:
- AI generates completely new rack configurations based only on constraints
- Explores design possibilities humans might miss
- Optimizes for multiple objectives simultaneously
Predictive Maintenance:
- AI analyzes equipment placement for long-term reliability
- Predicts component failures based on thermal stress
- Suggests preventive maintenance schedules
Frequently Asked Questions
Q: How long does it take to create a rack elevation drawing?
Manual creation takes 3-5 hours per rack using CAD software. Professional rack design software reduces this to 15-20 minutes through automation and equipment libraries.
Q: What information do I need before creating a rack elevation?
You need a complete equipment list with exact model numbers, RU heights from manufacturer specs, mounting types, power requirements, and thermal output (BTU/hr) for each device.
Q: Should rack elevations show front view, rear view, or both?
Professional elevations include both front and rear views to show all equipment, including rear-mounted devices like PDUs and patch panels, and to verify connector clearances.
Q: How do I number rack units correctly in elevation drawings?
Number RU positions from bottom to top, with RU 1 at the bottom and RU 42/45 at the top. Equipment is referenced by its starting RU position (e.g., "amplifier at RU 8-9" means bottom of device starts at RU 8).
Q: What scale should I use for rack elevation drawings?
Common scales are 1:10 (1 inch on drawing = 10 inches actual) or 1:20 for larger racks. Include scale notation clearly on all drawings.
Q: Do I need specialized software to create rack elevations?
While possible with generic CAD tools, dedicated rack design software reduces creation time by 80-90%, eliminates calculation errors, and provides 3D visualization and automatic documentation.
Q: How do I account for thermal spacing in rack elevations?
Research heat output (BTU/hr) for each device. Show blank panels or spacing gaps on elevations above high-heat equipment (1-3U depending on thermal output). Add notes explaining spacing requirements.
Conclusion
Creating accurate rack elevations using precise Audio Visual (AV) rack unit calculations is a foundational skill for professional AV integrators that directly impacts installation success, project timelines, and client satisfaction. Understanding Audio Visual (AV) rack dimensions – the 19-inch width standard, 1.75-inch RU height increments, and depth specifications – provides the framework, but transforming RU calculations into comprehensive technical drawings requires systematic methodology, attention to detail, and increasingly, professional software tools that automate tedious processes while preventing costly errors.
In 2026, as AV systems grow more complex with network integration, AV-over-IP, and unified communications, rack elevations have evolved from simple equipment lists to sophisticated technical documents incorporating thermal analysis, power distribution, cable management strategies, and 3D visualization. Professional integrators who master both manual calculation techniques and AI-powered design software position themselves to deliver flawless installations that exceed client expectations while protecting project profitability through efficient workflows and error prevention.
The investment in professional rack elevation practices – whether through training in systematic RU calculation methods, adoption of dedicated design software, or embracing AI-assisted tools – generates immediate returns through reduced installation time (40% typical reduction), eliminated field errors (85% fewer mistakes), and enhanced professional credibility that wins repeat business and referrals in the competitive commercial AV marketplace.


Sign in to leave a comment.