Outdoor shutters can be a brilliant upgrade when you want real control over heat, glare, privacy, and breeze, without turning your alfresco into a dark box.
The catch is that what works inside doesn’t automatically work outside.
Plantation-inspired styling is a look, but outdoors it’s also a set of practical choices about exposure, movement, fixings, and finishes.
Get those right and the shutters feel effortless; get them wrong and you notice them every day.
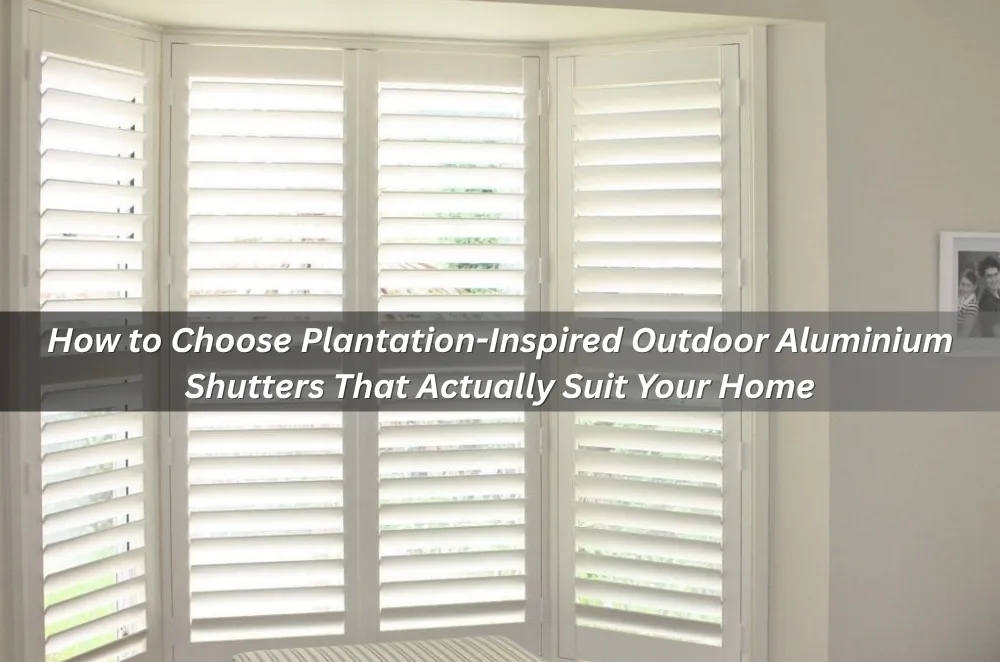
What “plantation-inspired” means outdoors (and what changes)
When people say “plantation-inspired”, they’re usually talking about louvred panels with wider blades, a crisp frame, and a tidy, architectural rhythm.
With plantation inspired outdoor shutters in aluminium, the indoor look is only half the story, outside, those blades and frames have to cope with sun hammering a surface for hours, gusts that arrive sideways, rain that finds weird paths, and hardware that has to keep working when things aren’t perfectly clean.
So the job becomes less “make it match the interior style” and more “make it behave nicely in a messy, changeable environment”.
That’s why it helps to think about your shutters like an outdoor system, not just an outdoor decoration.
Why aluminium is a common choice outside
Aluminium is popular for external shutters because it stays stable through heat and humidity swings, and it doesn’t swell or warp the way some materials can when they cop weather.
It also holds sharp lines, which suits that plantation-inspired, straight-edged look.
In Sydney, where you can have a blazing afternoon followed by a storm front, stability is part comfort and part longevity.
But aluminium isn’t magic.
The finish, the hardware quality, and the installation approach matter just as much as the base material, especially when the shutters are exposed to wind and grime.
Decision factors that matter in Sydney (sun, salt, wind, privacy)
If you start by choosing a style from a photo, you’ll often end up forcing the space to fit the product.
Start with the space, then pick the configuration that fits.
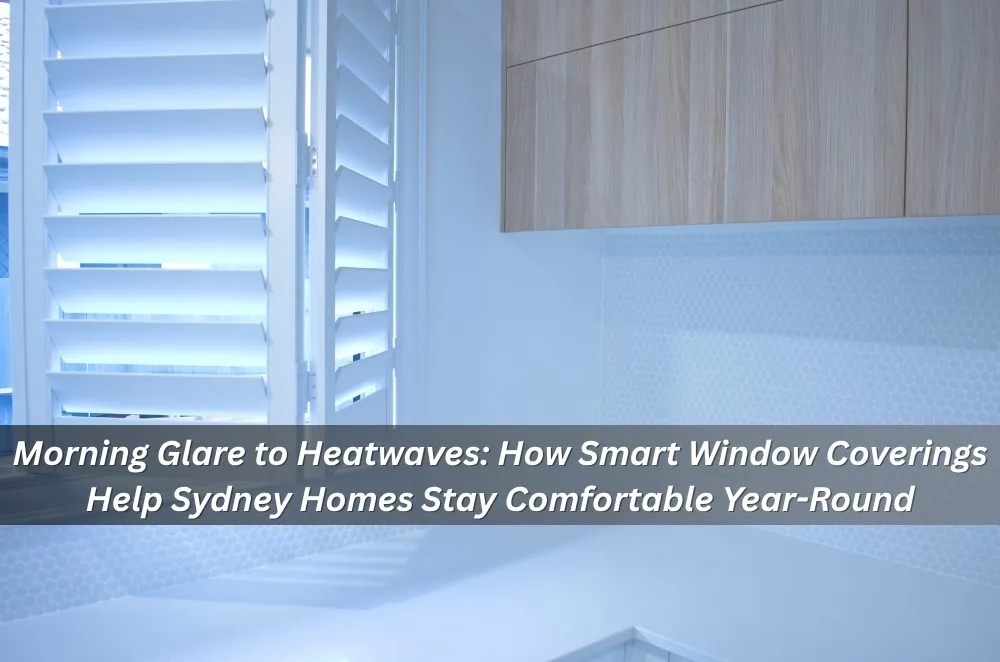
1) Sun direction and reflected heat
Sydney sun is intense, but the sneaky part is reflected heat, light paving, pale walls, or nearby glass can bounce heat back onto the shutters.
North- and west-facing areas tend to be the hardest working zones, especially late afternoon when people actually want to use the outdoor area.
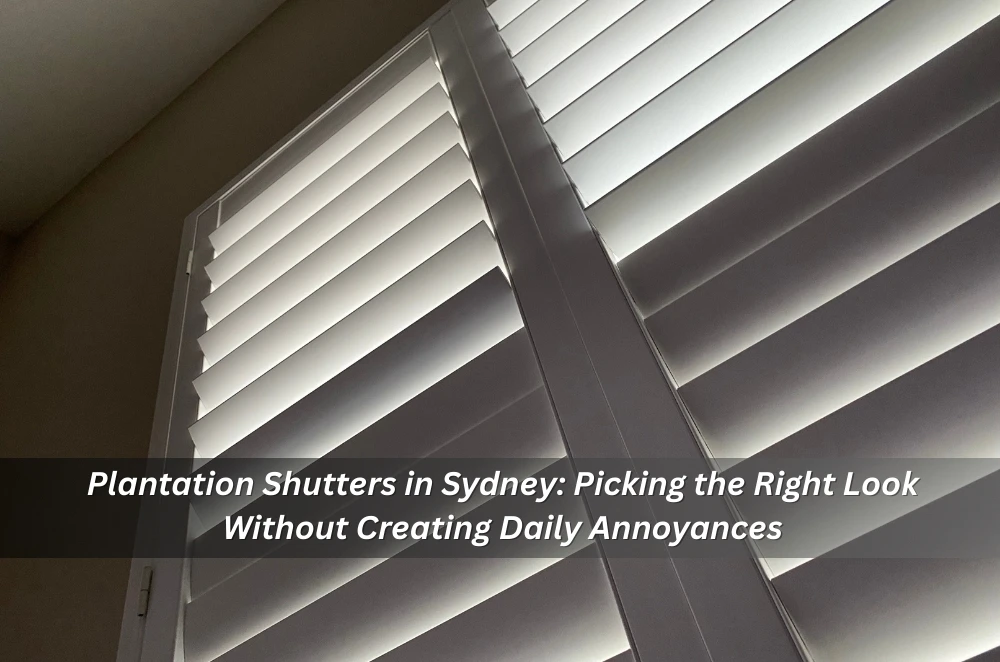
If glare is the main pain point, focus on how precisely the louvres can be angled, not just whether the shutter “closes”.
A shutter that gives you fine control usually feels more comfortable than one that’s either wide open or fully shut.
2) Wind behaviour (the part everyone underestimates)
Wind doesn’t arrive politely.
It funnels around corners, rushes down side paths, and changes direction when a storm line hits.
That’s where rattles and chatter start, usually not because the idea of shutters is flawed, but because the system wasn’t specified or fixed for the actual wind behaviour of that spot.
Look at how panels are held in position, how they latch, and what happens when the louvres are partially open.
If you’re comparing options and want a simple way to map openings, finishes, and operation choices before you lock anything in, the Shutters Australia outdoor shutter guide can help you sanity-check the shortlist without turning it into a big, drawn-out project.
3) Coastal air and corrosion risk
Even if you’re not on the beach, pockets of Sydney get salty air, especially on days the wind pushes it inland.
Aluminium can be well-suited to outdoor use, but hardware is often the weak link: hinges, pins, fasteners, and moving joints.
Ask what the hardware is made from, how it’s protected, and what the care routine looks like in higher-exposure areas.
A system can look identical on day one and still age very differently if the hardware isn’t up to the environment.
4) Privacy versus airflow: decide your “default”
Here’s a simple question that saves a lot of second-guessing: how will these sit 80% of the time?
If the answer is “mostly for privacy”, you’ll likely keep louvres closer and rely on angled light.
If the answer is “mostly for airflow”, you’ll want a geometry that stays comfortable while still feeling sheltered.
Plantation-inspired shutters can do both, but you have to be honest about your default mode, otherwise you end up with something that looks right and feels wrong.
5) Fixed, sliding, hinged, or bi-fold: match movement to the space
The best operating style is the one that won’t annoy you.
Hinged panels can be clean and simple if there’s space to swing without knocking furniture or blocking a path.
Sliding systems can be great for wide openings, but you need a plan for where panels stack and how tracks handle dirt and leaf litter.
Bi-fold options can look fantastic, but they introduce more moving parts, more alignment, more fixings, more chances for “that one panel” to drift out over time.
If your outdoor area gets used daily, convenience beats cleverness.
Practical Opinions (exactly 3 lines)
Choose based on everyday use, not the one extreme day each summer.
Spend on stronger hardware before adding features you’ll rarely touch.
If the opening is awkward, do the planning properly upfront.
Common mistakes people make with exterior shutters
Most headaches show up later, but the cause is almost always early.
Mistake 1: Buying the look and hoping the rest works out
Plantation-inspired shutters are visually confident, which makes it easy to fall for the style first.
Then the reality arrives: the panels block a gate, clip a handrail, or fight the way people actually move through the area.
A quick “walk the path” check, where you carry plates, where kids run, where the dog barrels through, often changes the best option.
Mistake 2: Assuming outdoor openings are square and consistent
External openings can be slightly out, especially on older homes, renovated brickwork, or areas that were never meant to be perfectly finished.
If you measure once and assume it’s uniform, you can end up with rubbing, gaps, or a shutter that doesn’t close cleanly.
Outdoor tolerances are less forgiving because wind and grit amplify little misalignments.
Mistake 3: Forgetting water paths and drainage
Storm rain doesn’t behave like a garden hose.
It blows sideways, pools where you didn’t expect, and runs along edges you assumed were “safe”.
If placement and detailing ignore water paths, moisture can sit around frames, tracks, or fixings, exactly where you don’t want it.
Mistake 4: Treating the space as static
Outdoor areas change.
Plants grow, storage appears, a new BBQ gets shoved into a corner, kids’ gear multiplies, and furniture gets rearranged.
If the shutter system only works when the zone stays pristine, it won’t work for long.
Mistake 5: Leaving approvals until after you’ve decided
In many Sydney settings, townhouses, villas, apartments, mixed-use buildings, external changes can trigger strata approval or landlord sign-off.
If you order first and ask permission later, you risk delays, redesign, and awkward conversations.
It’s not the fun part, but it’s often the part that protects your timeline.
An operator experience moment
I’ve seen perfectly decent products feel “average” because the opening was treated like an indoor window and the wind was treated like a minor detail.
Once you account for clearances, real movement patterns, and the way gusts hit that specific corner of the house, the right configuration usually becomes obvious.
The smoothest projects are the ones where someone does one deliberate planning pass, then stops tinkering.
A simple first-actions plan for the next 7–14 days
You don’t need a massive process to get this right, just a short, structured run-up.
Days 1–2: Define the job in plain language
Write one sentence that says what success looks like.
Example: “We want to cut afternoon glare and feel less exposed, without blocking airflow or making the walkway tight.”
Days 2–4: Map exposure and real use
Note sun direction, when the area is used (breakfast, late arvo, evenings), and where privacy lines actually are (neighbour windows, street sightlines, shared driveways).
Stand in the space at the time you care about most.
That’s usually when the “obvious” option stops being obvious.
Days 4–6: Measure properly and capture context
Measure width and height at multiple points, not just once.
Photograph corners, eaves, posts, and anything that could interfere with swing or stacking.
Also note what’s fixed (downpipes, taps, lights) versus what’s movable (furniture, pots).
Days 6–9: Choose operation type and your default setting
Pick the operating style that fits the space, then decide what “normal” looks like: mostly angled, mostly open, or mostly closed.
This is where the shutters become a daily comfort tool instead of a once-in-a-while feature.
Days 9–12: Confirm finish and hardware assumptions
Ask direct questions about external-grade hardware, expected care, and what changes in harsher microclimates.
If you’re near the coast or a busy road, assume you’ll want a simple cleaning routine and hardware that won’t punish you for being realistic.
Days 12–14: Check approvals and lock in the plan
If strata, landlord, or council is relevant, get clarity in writing.
Then you can move forward without the “what if we have to redo it?” feeling hanging over the project.
Local SMB mini-walkthrough (Sydney, NSW)
A café in Sydney’s Inner West wants more privacy for afternoon trade without turning the footpath-facing alfresco into a closed box.
They identify western sun and street sightlines as the real problems, not “lack of shade” in general.
They choose a plantation-inspired look to suit the façade, but prioritise durable hardware because staff wipe surfaces constantly.
They plan panel movement so nothing swings into customer paths or clashes with tables at peak times.
They check how the finish will handle reflected heat from concrete and regular cleaning products.
They confirm landlord/council requirements early so the project doesn’t stall mid-way through approvals.
Key Takeaways
- Plantation-inspired outdoor shutters succeed when the practical spec matches the exposure, not when the look matches a mood board.
- In Sydney, sun direction and gusty wind behaviour often decide what feels “good” day to day.
- Hardware and installation details can matter more than the base material once the shutters are in service.
- A short 7–14 day planning run-up prevents most of the common regrets.
Common questions we hear from Australian businesses
Q1) Are outdoor aluminium shutters “better” than other shade options?
Usually, they’re a strong option when you want privacy plus airflow control and a clean, built-in finish, rather than a purely fabric-based shade.
A practical next step is to list your top two issues (glare, heat, privacy, wind) and decide which one matters more on a normal trading day.
In Sydney, west-facing afternoon sun is often the deciding factor for comfort, especially for alfresco areas that are busiest late in the day.
Q2) How do we pick between hinged, sliding, and bi-fold panels?
It depends on clearances and how often the opening needs to change state (open, closed, partly angled) during the week.
A practical next step is to mark the movement zone with tape and do a quick “service run” through the area, carrying plates, pushing a pram, moving a chair, so you can see what will get annoying fast.
In many NSW hospitality and retail settings, keeping access routes clear beats maximising the open span.
Q3) What maintenance should we expect outdoors?
In most cases, it’s straightforward: occasional rinsing/cleaning and periodic checks of moving parts, with more attention in dusty, coastal, or high-traffic areas.
A practical next step is to set a quarterly reminder to clean, inspect hinges/latches, and address stiffness early rather than waiting for it to become a bigger issue.
Around Sydney, microclimates vary a lot, even suburbs a few kilometres apart can experience different salt exposure and wind patterns.
Q4) Do we need strata or landlord approval for external shutters?
Usually, yes if the installation changes the external appearance, involves fixings into common property, or affects building elements like balustrades and façades.
A practical next step is to email strata management or the landlord with photos and a simple description of the proposed change before you order.
In Sydney, this step can save weeks of back-and-forth, especially in mixed-use buildings and townhouse complexes.


Sign in to leave a comment.