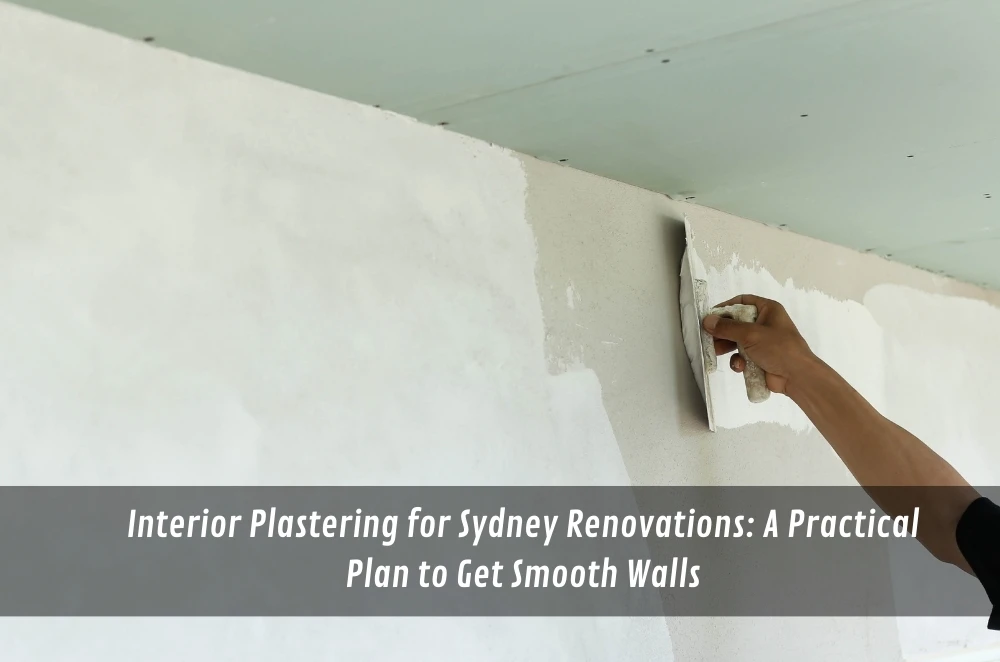
Renovations look “finished” only when the walls do, and interior plastering is where small shortcuts turn into big visual problems. It’s also where timelines drift, because drying, sanding and access to rooms can gate every trade that follows.
This guide helps renovation teams pick the right plastering approach, brief it clearly, and avoid the “it looked fine until we painted it” surprise.
Why plastering decides the final result
Paint, cabinetry and modern lighting exaggerate surface flaws, so wall flatness matters more than most people expect. Downlights and big windows create raking light that reveals patch borders, ridges and waves.
Plastering also controls sequencing: dust management, drying time and room access can block painters, installers and final fit-off. In Sydney homes and tenancies, work often happens around people, stock or furniture, so containment becomes part of the quality outcome.
Common mistakes that cause rework
Treating everything as a patch. Renovation changes (new openings, removed nib walls, relocated switches) often need broader blending than a hole-fix.
Ignoring the cause of cracks. If movement or moisture is still active, the line will usually come back after the “repair” is painted.
Briefing the job with “make it nice”. Without defining priority walls, sightlines and paint sheen, expectations split and quotes become hard to compare.
Booking trades back-to-back. Plastering needs drying, sanding and cleanup; compressing that window forces rushed painting and visible defects.
Decision factors: patch, re-sheet, or skim?
Use the method that matches the wall’s condition and the room’s lighting, not just what looks cheapest today.
Patch when…
Damage is localised, the surrounding wall is stable, and you can feather repairs well beyond the visible zone (especially under downlights).
Re-sheet when…
Walls are heavily damaged, moisture affected, or full of old repairs and service cut-outs where patch-on-patch will telegraph later.
Skim/level when…
Surfaces are mostly sound but visually inconsistent (old texture, uneven repairs, multiple minor defects) and you need a uniform finish under strong light.
Decision tip: if a wall is getting a feature colour, higher sheen, or new directional lighting, treat it as “high scrutiny” and plan for broader blending than you think you need.
If you want a simple way to describe finish level and repair boundaries before you lock in dates, use the Sydney wide interior plastering for renovations.
Briefing and scheduling that protects the timeline
Describe outcomes, not tasks: “flat under downlights on the hallway wall” is clearer than “patch and sand”. Call out the highest-scrutiny areas (entry, living, hallway) and the paint sheen planned, because higher sheen shows more.
Agree on protection and containment early if the site is occupied, including which rooms stay usable and where mixing/wash-up happens. It’s also worth confirming who handles wipe-downs before painting, because fine dust loves to reappear at the worst moment.
To make quotes comparable, ask each provider to spell out: prep method, approximate blending area, sanding level, cleanup, and whether a touch-up visit is included. When those assumptions are hidden, the “cheaper” quote often becomes the expensive one.
Build a buffer between plastering and painting for drying and a possible second pass, then do a quick pre-paint inspection under the lighting the room will actually have.
Operator Experience Moment
Walls often look fine until the first coat goes on, then downlights reveal patch borders and ridges that weren’t obvious in ambient light. The fix is rarely complex, but it can force re-sanding, re-priming and repainting after other trades have already started. Aligning on lighting and finish level up front prevents that expensive “paint made it worse” moment.
Local SMB mini-walkthrough: Sydney make-good + refresh
A café owner in the Inner West is refreshing a tenancy before a new menu launch.
Downlights are being added and walls are going low-sheen to hide fingerprints.
The handover date is fixed, so they mark “priority walls” where customers queue.
They choose skim/level in the front room, patch-only in the back office.
They schedule plastering before new joinery arrives and allow a drying buffer.
They set dust zones so prep can continue without contaminating equipment.
Practical Opinions
Prioritise the walls that get harsh light and daily attention.
Sequence for drying and cleanup, not just the fastest calendar date.
A clear “ready for paint” standard prevents the most painful rework.
Next 7–14 days: simple first-actions plan
Days 1–2: Walk the site, list changed walls/ceilings, and note any moisture staining or recurring cracks to investigate.
Days 3–5: Group areas into patch / re-sheet / skim and decide which walls are “must be perfect” based on light and sightlines.
Days 6–8: Write a short scope note: rooms, finish expectations, paint sheen, access hours, protection needs, and photos of problem areas.
Days 9–11: Get quotes that state prep, blending area, sanding level, cleanup, and whether a touch-up visit is included.
Days 12–14: Lock the sequence with buffers, then do a pre-paint walkthrough to confirm surfaces are truly ready.
Key Takeaways
- Strong lighting reveals everything, so plan higher finish standards in high-visibility areas.
- Choose patch, re-sheet or skim based on wall condition and consistency, not habit.
- Brief “outcomes + priority walls” so quotes and expectations align.
- Protect the schedule with drying and re-entry buffers before painting.
Common questions we hear from Australian businesses
How do we tell if a crack is cosmetic?
Usually hairline cracking that doesn’t change is cosmetic, but widening lines or repeated returns suggest movement or moisture. A practical next step is to photograph and measure the crack weekly for a month before final finishing. In Sydney’s older building stock, seasonal humidity can make borderline cracks cycle, so tracking change matters.
Should we skim coat or just patch for a refresh?
It depends on how inconsistent the current surface is and whether new lighting will create raking light. A practical next step is to shine a torch along the wall at night and mark what you can see from standing height. In most cases, Sydney fit-outs with new downlights need broader blending in customer-facing zones.
What belongs in a plastering quote for a tenancy handover?
In most cases, the key differences are prep, feathering/blending area, sanding level, and cleanup, not the headline price. A practical next step is to ask for a written “ready for paint” definition and what protection is included. In Sydney, tight booking calendars make clarity important because rework can push trades out weeks.


Sign in to leave a comment.