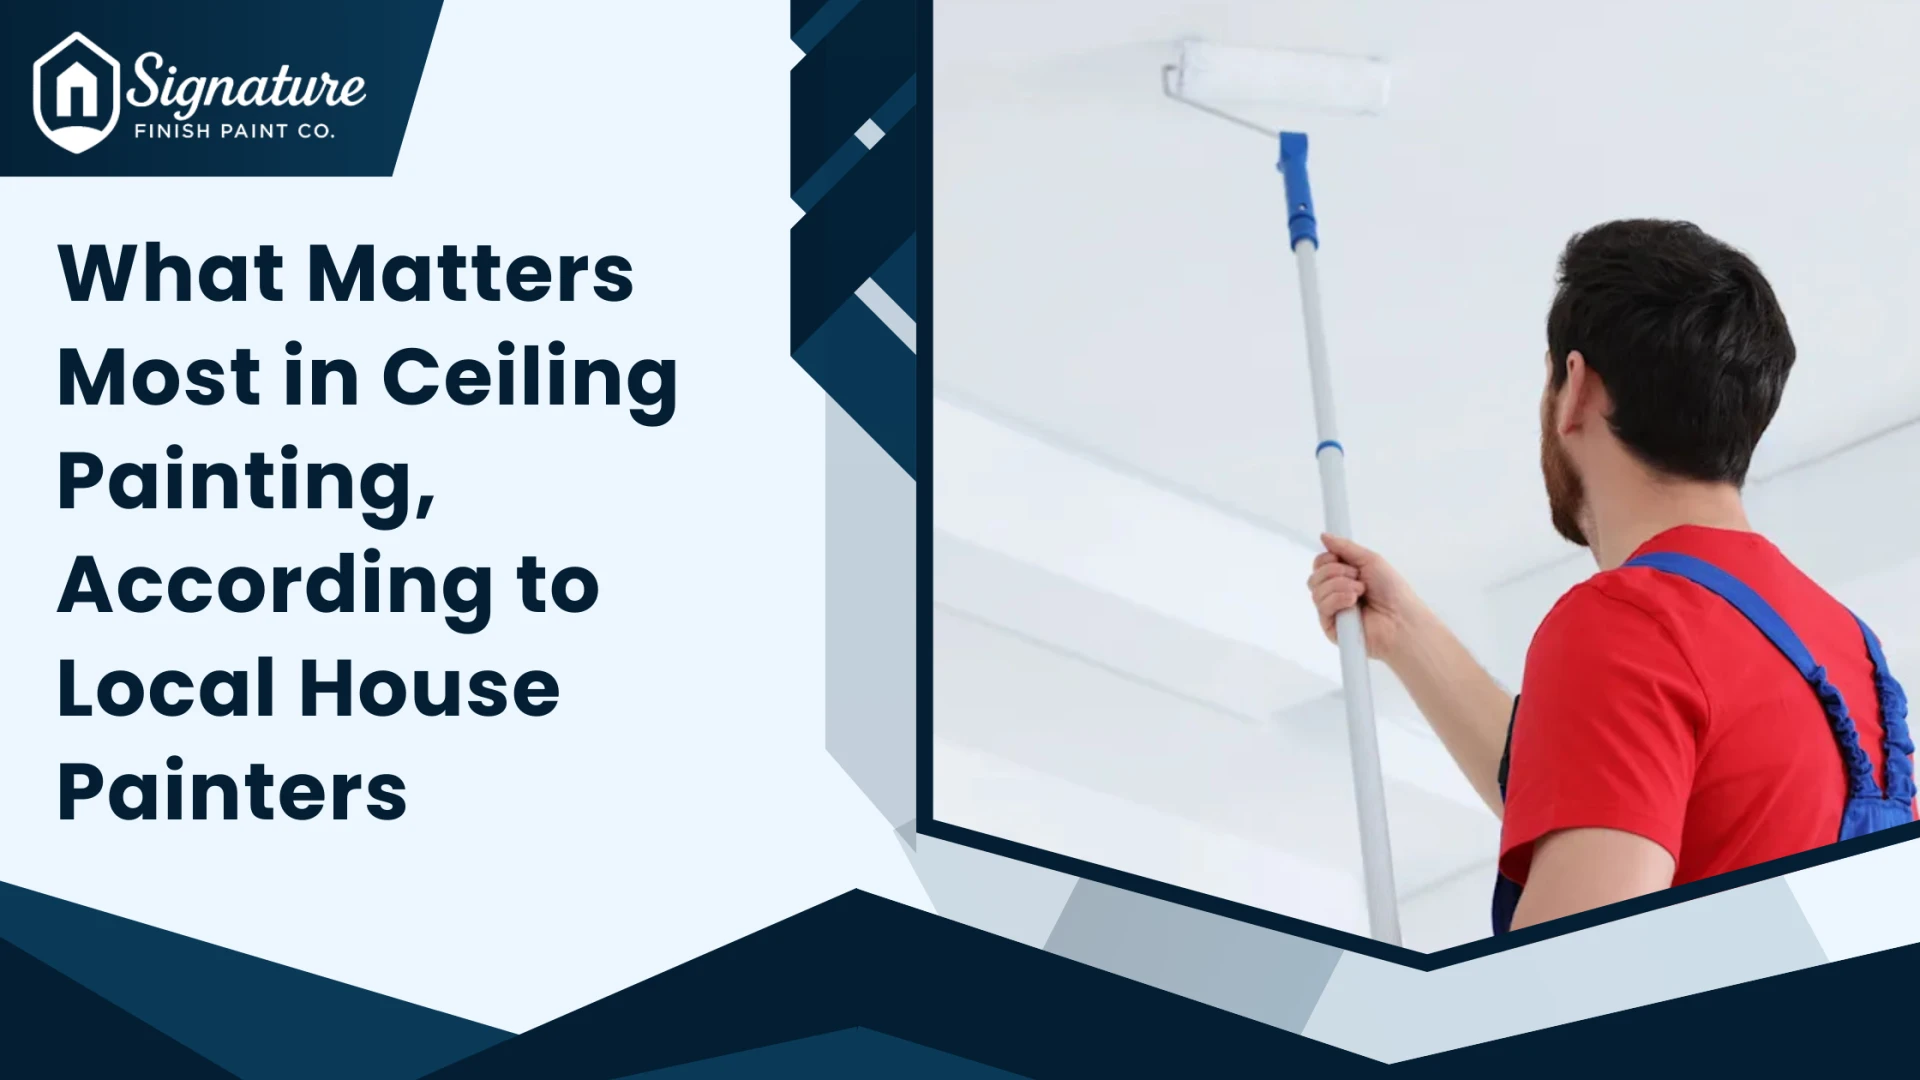
When you're planning an interior painting project, chances are you're focused on wall colors, maybe that accent wall you saw on Pinterest, or which shade of white looks best on your trim. The ceiling? Yeah, that's probably not even on your radar.
But talk to anyone who's actually tried painting one, and they'll tell you it's easily the most challenging part of refreshing a room. We spent time chatting with local house painters who do this for a living, and honestly, what they shared completely changed how I look at that big flat surface over our heads.
Why Your Ceiling Looks Tired
You know how your ceiling just doesn't look as crisp as it used to? There's science behind that. Heat rises constantly in your home, all your light fixtures point straight up, and air circulates across that surface way more than you'd think. Put it all together, and your ceiling is basically getting hit from all sides. It fades faster than walls do.
In kitchens and bathrooms, you've got moisture sneaking in and leaving these subtle watermarks that slowly spread. And if you've had any work done, electricians running new wires, someone patching a leak, basic repairs, those spots eventually show through like a neon sign. Even if they were painted over initially, they somehow stop matching everything else. One fresh coat brings it all together and makes your whole room feel complete instead of half-finished.
Prep Work Is Boring But Non-Negotiable
Every painter emphasizes this first: preparation matters more than any other step. You could use expensive paint and perfect technique, but skimping on prep guarantees disappointment.
Start by thoroughly cleaning the ceiling. Dust, cobwebs, grease, whatever's accumulated needs to come down. Paint won't stick properly to dirty surfaces. The result is a bumpy texture that shows through every coat.
Water stains, grease above the stove, or moisture damage all require primer. These problems bleed right through regular paint within weeks, forcing a complete redo. For smooth ceilings, light sanding with 100-grit paper helps everything adhere better. It sounds tedious because it is, but this step separates quality work from quick jobs that fail fast.
The Direction You Roll Actually Matters
This is something most DIYers overlook, but it’s a real secret to flawless painting: the direction you roll makes a huge difference. Professional painters always recommend rolling toward the natural light source, usually toward a window.
Light exposes every imperfection. When it hits the ceiling the wrong way, roller marks and streaks become painfully obvious. Rolling toward the light helps those marks disappear. Roll randomly or change directions midway, and you’ll end up with permanent streaks that no extra coat can fix.
Experienced painters treat this as a rule, not a suggestion, because the difference in the final finish is immediate and unmistakable.
Quality Paint Isn't Where to Cut Costs
Grabbing the cheapest ceiling paint seems like smart budgeting until the results prove otherwise. Ceiling paint is formulated completely differently than wall paint, thicker consistency, reduced splatter, and usually a flat finish that hides flaws instead of highlighting them.
Kitchens and bathrooms need moisture-resistant paint, or peeling starts within months. Spending a few extra dollars upfront beats repainting the entire ceiling later because of penny-pinching.
That flat finish everyone uses isn't just tradition. It genuinely diffuses light and makes ceilings look smooth and even. Glossier finishes bounce light around and emphasizes every tiny imperfection.
Cut In First or Pay the Price
Before your roller touches anything, you need to cut in. That means using a 2-3 inch angled brush to paint around all the edges where your ceiling meets the walls. It creates a buffer zone so you can roll freely without accidentally painting your walls.
Most people skip this or rush through it because it seems unnecessary. Then they mash the roller into corners and wonder why everything looks messy. The pros cut in about ten feet at a time, then immediately roll that section while the edges are still wet. Everything blends together smoothly, and you don't get harsh lines where wet paint meets dried paint.
Work in Sections, Not All at Once
No professional tries painting an entire ceiling in one continuous pass. They work in manageable chunks, usually four to six square feet at a time. This prevents lap marks and keeps you from feeling overwhelmed.
The secret here is maintaining a wet edge. You want to work quickly enough that you're always rolling into paint that's still wet. This creates seamless transitions instead of obvious lines showing exactly where you stopped and started. Start your roller slightly past your last section and roll back into the wet area. That's how you avoid visible seams.
Two Thin Coats Always Win
When exhaustion sets in and the project feels endless, applying one thick coat seems incredibly appealing. That temptation should be resisted completely.
Two thin coats consistently deliver better results than one thick application. Thick coats drip, sag, and create uneven texture that looks awful once dry. Patience between coats is equally important, the first coat must dry completely before starting the second. Rushing creates dragging, messes up texture, and sometimes pulls up that initial layer.
Painting Order Prevents Frustration
This seems obvious once explained, but people get the sequence backwards constantly. Ceilings must be painted before touching anything else. Painting walls first, then tackling the ceiling, means dripping paint all over pristine wall work.
The correct order is ceiling, walls, then trim. This top-to-bottom approach lets gravity help instead of creating problems. Professionals work this way because experience taught them what happens otherwise.
Good Tools Make a Massive Difference
Cheap brushes shed bristles into your wet paint. Worn rollers create streaks and don't hold paint properly. Bad painter's tape bleeds or leaves sticky residue everywhere.
Quality tools aren't an expense, they're an investment that pays off in better results and way less frustration. You don't need the fanciest stuff available, but you need decent basics.
Roller nap length has to match your ceiling. Smooth ceiling? Shorter nap (1/4 to 3/8 inch). Textured ceiling? Thicker nap (1/2 inch or more) to get into all the grooves. Use the wrong on,e and you'll fight it the entire time.
And seriously, get an extension pole. Your neck will thank you. Even attaching your roller to a broomstick beats constantly climbing up and down a ladder.
The Physical Exhaustion Is Real
Nobody warns you about this part. Painting a ceiling is genuinely exhausting. Your neck hurts, your shoulders burn, your arms feel like dead weight. And when you're tired and uncomfortable, your work quality drops. You apply uneven pressure, miss spots, and stop caring about technique.
Professional painters take regular breaks, not because they're lazy but because they know tired arms produce inconsistent results. This isn't a sprint, pace yourself.
White Isn't Your Only Option
Most ceilings are white, sure. But yours doesn't have to be. Some designers suggest painting ceilings the same color as walls, but at half strength. It creates a subtle contrast that looks sophisticated without making rooms feel small or dark.
Lighter colors make spaces feel bigger and more open because they reflect light. But with really high ceilings, going darker can make rooms feel cozier instead of cavernous. Think about what your specific space needs instead of automatically defaulting to standard white.
Know When to Call the Pros for Interior Painting
Every professional interior painter agrees on one thing: shortcuts always catch up with you. Cheap paint fails faster, skipped prep leads to peeling, and the wrong tools often mean paying someone later to fix the mistakes.
Ceiling painting is physically demanding and highly technique-sensitive, but with proper preparation, quality materials, the right tools, and patience, homeowners can still achieve professional-looking results. Interior painters don’t discourage DIY projects, they simply stress that knowing what truly matters makes all the difference.
A well-painted ceiling goes unnoticed, but a poorly done one is the first thing people see. That’s why experienced interior painters emphasize getting it right from the start, and why homeowners should, too.


Sign in to leave a comment.