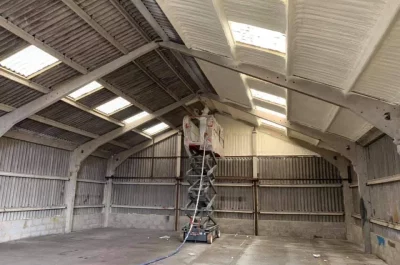
A typical residential spray foam insulation project follows a strict three-phase process: extensive site preparation, the actual chemical application, and a mandatory curing period that requires the home to be vacant. Homeowners should anticipate a timeline of 1 to 3 days, depending on the size of the area being insulated. The crew arrives with a specialized rig to remove old materials, mask off windows and floors, and apply the foam, which expands instantly to seal the building envelope.
Understanding this workflow helps families prepare for the temporary disruption to their daily routine. Industry professionals follow rigid safety protocols to ensure the chemicals mix correctly and cure safely. By knowing the steps involved, homeowners can ensure their property is ready for the crew and that the installation proceeds without unnecessary delays.
Site Preparation and Safety Measures
The preparation phase often takes as long as the spraying itself. Before any foam is applied, the installation team must secure the area to protect furniture, flooring, and personal items from overspray. Spray foam is incredibly adhesive and difficult to remove once it cures, so installers use plastic sheeting and heavy-duty tape to cover everything that should not be insulated.
For retrofit projects in existing homes, the crew first removes the old fiberglass or cellulose insulation. This is a dusty process that requires industrial vacuums and containment zones to prevent debris from entering the living space. Once the cavities are clean, the team checks for moisture issues or electrical hazards that need to be addressed before the foam is applied.
Ventilation Setup
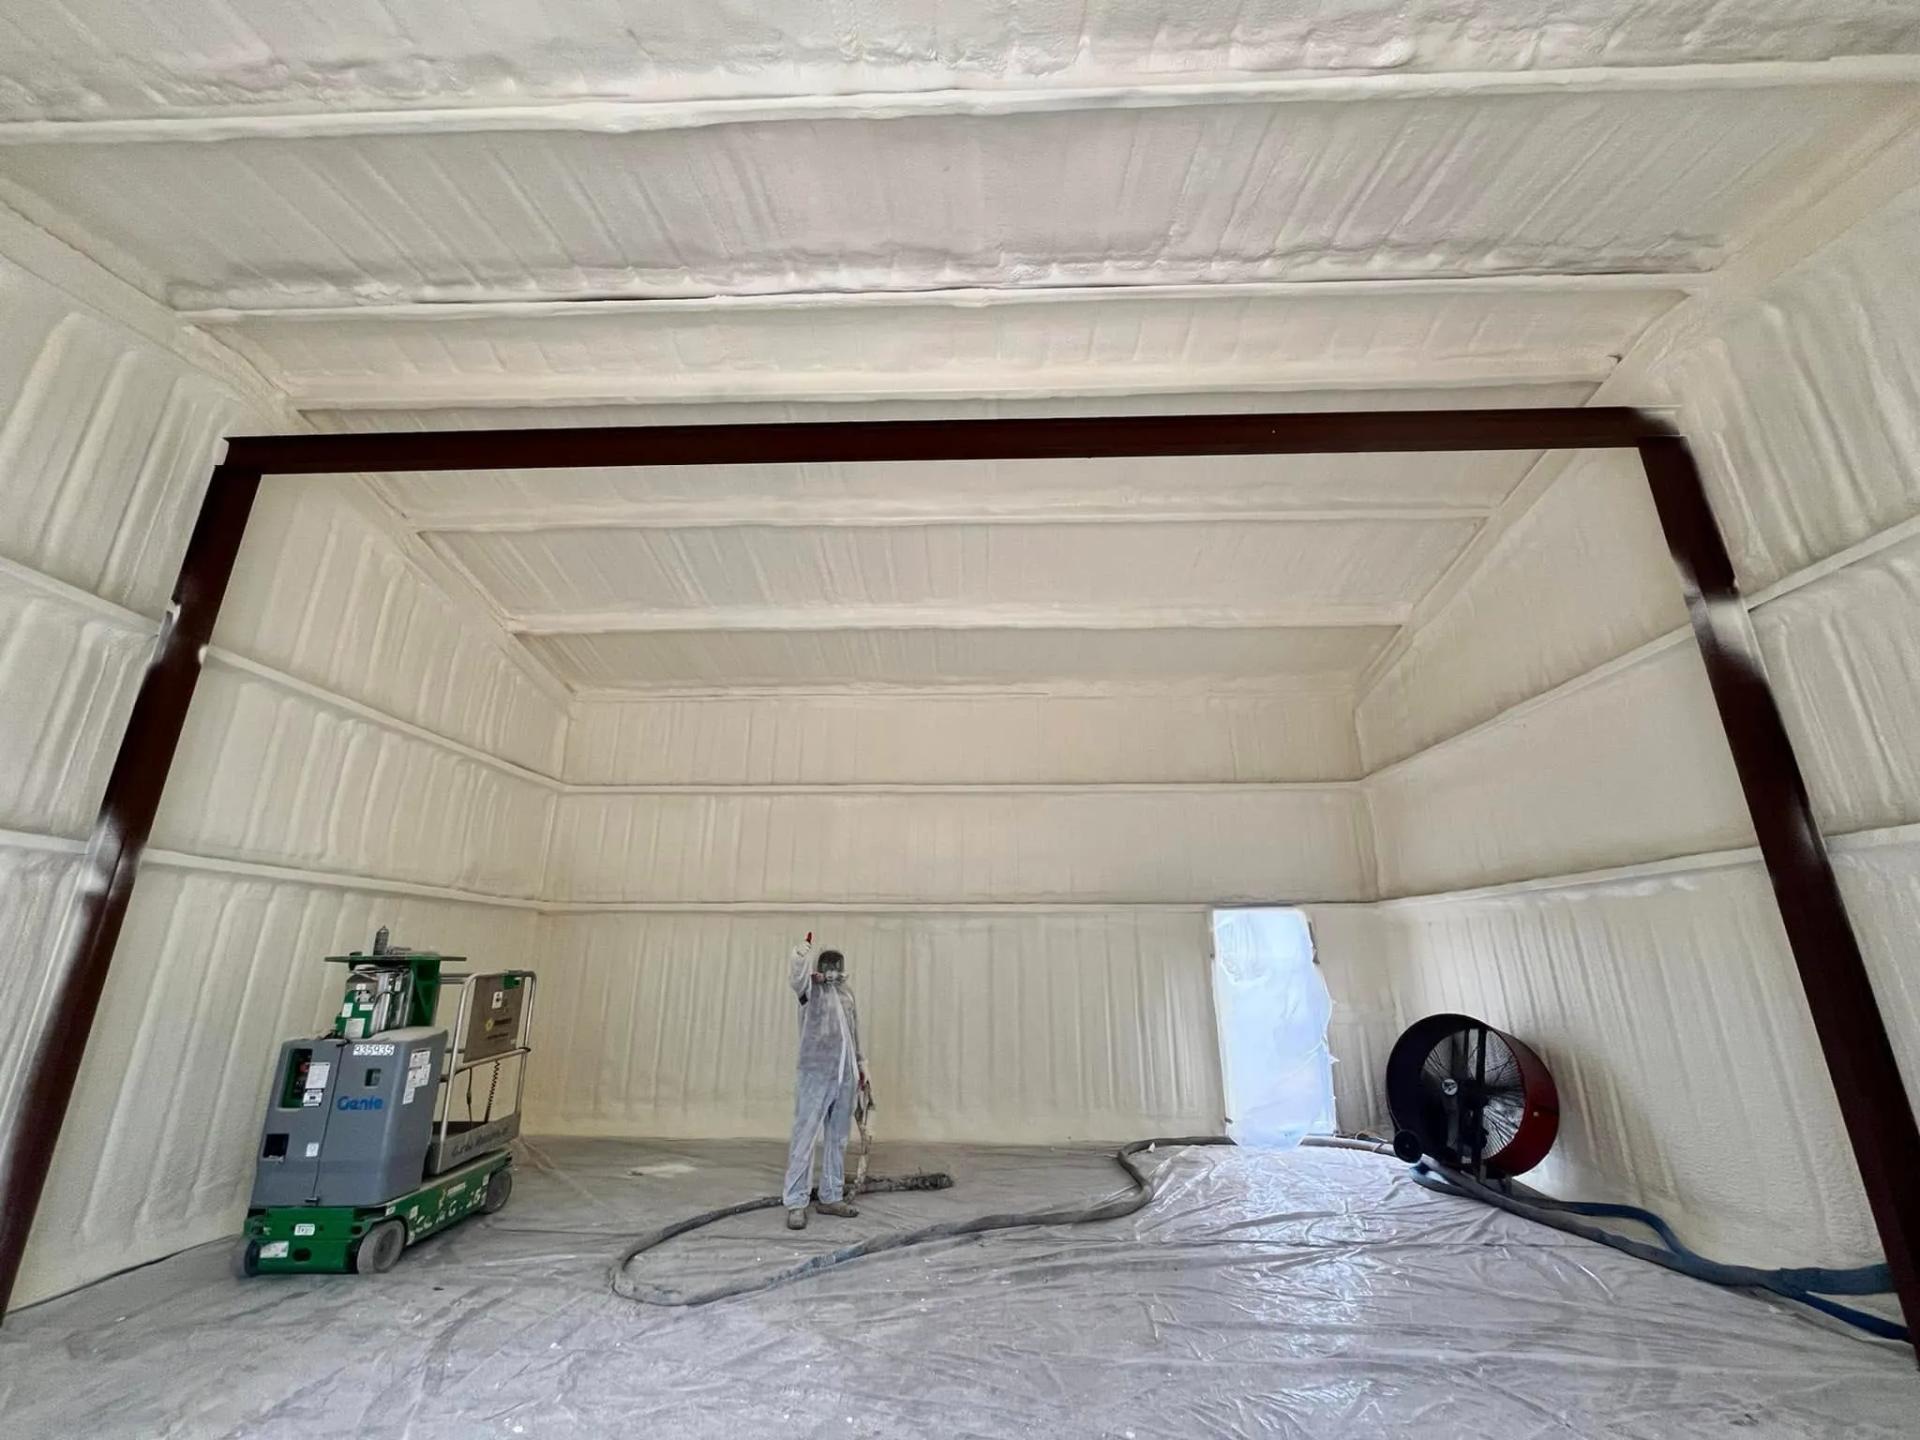
Proper airflow is essential during the application process. The crew sets up large exhaust fans and flexible ducting to create negative pressure in the work zone. This system pulls chemical vapors and dust from the house, ensuring that indoor air remains safe for workers and that odors do not settle in carpets or drywall.
- Containment Barriers: Plastic walls are erected to separate the work zone from the rest of the house.
- Window Protection: Glass and frames are masked off to prevent damage from the expanding foam.
- HVAC Shutdown: Heating and cooling systems are turned off and covered to prevent foam dust from entering the ductwork.
Equipment Calibration
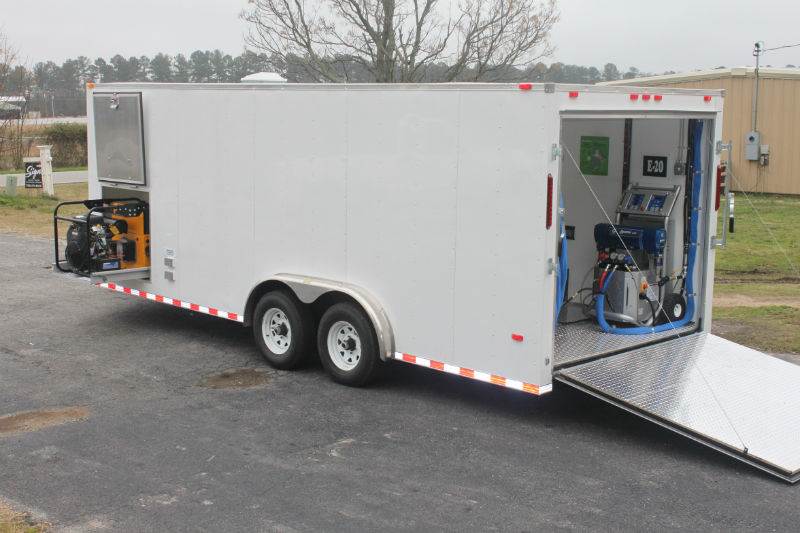
Before bringing the hoses inside, the technicians calibrate their machinery at the truck. The two chemical components must be heated to a specific temperature and pressurized correctly to ensure a proper reaction. If the ratio is off by even a slight amount, the foam will not cure properly, so this pre-check is a non-negotiable step for professional installers.
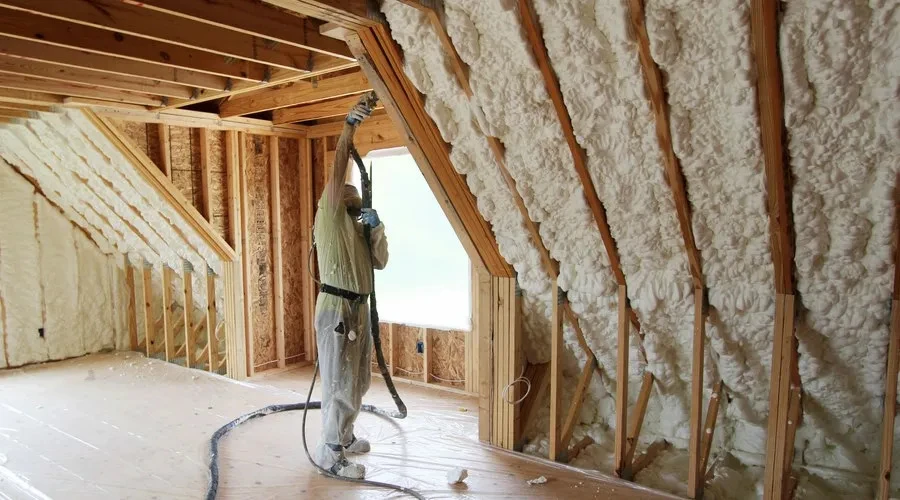
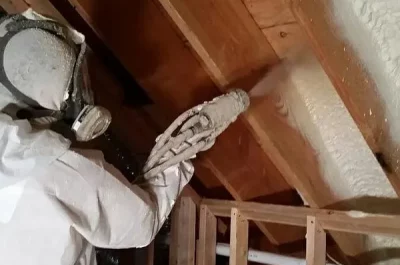
The Application Process
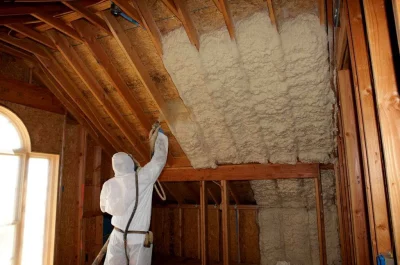
Once prep is complete, the installers put on full-body protective suits and fresh-air respirators. They bring long heated hoses into the attic, crawl space, or wall cavities. The application is loud and fast-paced, as the foam expands up to 100 times its liquid volume within seconds of hitting the surface.
The sprayer moves systematically across the framing bays, building up the required thickness in layers or passes. For open-cell foam, the material expands outward past the studs and requires trimming later. For closed-cell foam, the application is more controlled, often stopping just short of the stud face to allow for drywall installation without trimming.
The Chemical Reaction
The foam is created by mixing two liquids, commonly referred to as Side A (iso) and Side B (resin), at the spray gun tip. This reaction generates heat, making it exothermic. Technicians monitor this heat carefully, as spraying too much foam too quickly can cause excessive heat buildup.
Bonus Tip: Ask About Fire Safety
Homeowners should verify that the foam being used contains a fire retardant. In occupied spaces like attics used for storage, building codes often require an additional ignition barrier paint to be sprayed over the foam for safety.
Pro Verification Strategy
Ask the lead installer to check the moisture content of the wood framing before they start spraying. Foam should never be applied to damp wood, as it can trap moisture inside and lead to rot.
Curing and Re-Entry Timeline
After the spraying stops, the home must remain vacant while the foam cures and off-gases. This is the period where the chemicals stabilize and become inert. Industry standards typically recommend a re-entry time of 24 hours for occupants and pets, although some modern low-VOC foams allow for faster re-entry.
The table below outlines a typical schedule for a mid-sized residential project.
| Project Phase | Duration | Activity | Homeowner Status |
|---|---|---|---|
| Arrival & Prep | 4-8 Hours | Masking, removal of old insulation, and equipment setup. | Can be home (away from the work zone). |
| Application | 4-10 Hours | Spraying foam, monitoring reaction. | Must vacate the premises. |
| Curing Period | 12-24 Hours | Ventilation fans run, foam hardens, and off-gases. | Must remain out of the home. |
| Cleanup & Trim | 4-6 Hours | Scarfing excess foam, vacuuming, and removing plastic. | Can return after "All Clear." |
| Final Walkthrough | 1 Hour | Inspection of depth and coverage. | On-site for review. |
Post-Installation Cleanup
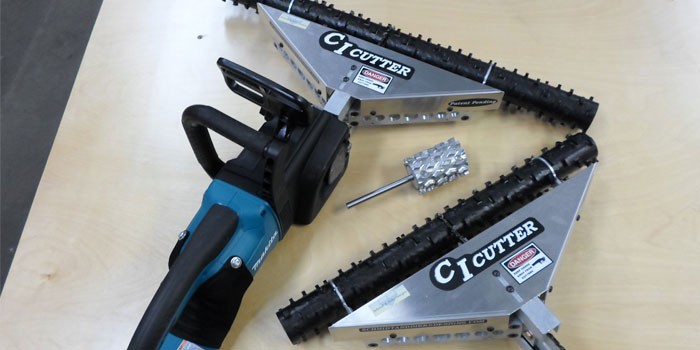
For open-cell foam projects, the cleanup phase is intensive. The expanded foam that bulges past the studs is sliced off using a large saw or a planer, a process called "scarfing." This creates a significant amount of static-charged waste material that clings to everything.
The crew bags up this waste and vacuums the entire area. They remove the plastic masking and tape, ensuring the home is returned to its original condition. A quality installation company will leave the job site cleaner than they found it, with the only evidence of their presence being the new insulation.
Things to Consider Before Scheduling
Homeowners need to plan for the displacement of their family and pets. Since the HVAC system will be off during the work, the house temperature will drift, which is something to consider during extreme weather months. It is also wise to remove fragile items from walls in adjacent rooms, as the vibration from cleaning and trimming can sometimes knock pictures askew.
Additionally, there will be a distinct odor immediately following the application. This smell is similar to fresh paint and typically dissipates within a day or two if the house is adequately ventilated.
Common Questions About the Process
People often worry about the mess. While the process itself generates debris, the masking and containment protocols are designed to keep it 100% contained. Another common concern is noise: the rig's generator and compressor are loud, so neighbors might hear them running throughout the day.
Determining Completion
The job is considered complete only after a final visual inspection. The foam should be uniform, fully adhered to the substrate, and free of large voids or gaps. The installer should verify that the depth meets the contract specifications and local building codes.
Conclusion
Residential spray foam installation is a rigorous construction activity that delivers lasting energy benefits. While the process involves a day or two of disruption and requires the family to vacate the premises, the result is a permanently sealed, energy-efficient home. By understanding the stages of preparation, application, and curing, homeowners can plan accordingly and ensure a smooth experience. The key to a successful project lies in hiring a team that adheres to safety standards and respects the property from start to finish.
Finding a Professional Installer
For homeowners planning an insulation upgrade, selecting a contractor who prioritizes safety and cleanliness is essential. Premier Insulation manages the entire installation process, focusing on minimizing disruption and maximizing results. Their crews are trained in the latest safety protocols to ensure every home is treated with care.
To learn more about their process or to schedule a site evaluation, contact them at (229) 554-3939. Questions regarding timelines and preparation can also be sent via email to [email protected].
Frequently Asked Questions
Do I really have to leave my house?
Yes, for your safety, you must vacate the home during the spraying and curing process. The chemical vapors released during application can be harmful without respiratory protection.
How long does the smell last?
Most of the odor dissipates within 24 to 48 hours. If the house is ventilated properly during and after the job, the smell should be undetectable by the time you move back in.
Will the spray foam damage my wires or pipes?
No, spray foam forms around wires and plumbing pipes without damaging them. However, it does encase them, so any future electrical or plumbing work in those walls might be more labor-intensive.
Can I paint the foam?
Yes, but foam is not a finished surface. It typically needs to be covered by drywall or an ignition barrier paint to meet fire codes. In unconditioned spaces, it can be painted for protection against UV light if a window is nearby.
Will spray foam make my home too airtight?
No. A well-sealed home is healthier and more efficient when paired with proper ventilation. Spray foam stops uncontrolled air leaks, but your home will still breathe through designed ventilation paths, keeping indoor air fresh and balanced.
Reviewer: Jack Parker, a spray foam professional with 7 years of experience, reviewed this post and helped improve sections dealing with brand clarity and customer communication.


Sign in to leave a comment.