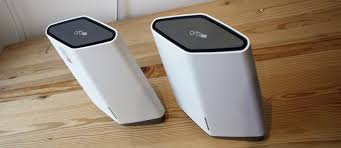
The Netgear Orbi is the most reliable router available on the market today. The Orbi router provides fantastic Wi-Fi speeds throughout your whole house. The basic Orbi wifi system consists of a base station and a satellite unit. If you already have the Orbi wifi system, setting up this product is a breeze. You have the choice of setting it up with the Orbi login app or through orbilogin.net.
This article shows how to set up the Netgear Orbi wifi in a few easy steps. Here, you’ll also learn about the Orbi router login process.
What do you need for Orbi setup?
- The Netgear orbi wifi system
- A DSL or cable modem
- A PC or Smartphone
- The Default Orbi login address: orbilogin.net
- Power cords and Ethernet cables
Steps for the Netgear Orbi login & setup
Installing the Orbi router
- First, unplug your DSL or cable modem and replace the battery backup if it has one.
- Now, plug your modem back into the power source.
- Plug in your Ethernet cable from the modem to the yellow internet port on the Orbi.
- Next, connect the Orbi router to the power source with the help of a power cord.
- If the router doesn’t turn on automatically, press the Power on/off button on the device.
- Afterward, the ring LED on the Orbi router turns solid white and then pulse white.
Installing the Orbi satellite
- Now, plug in the Orbi satellite to a power source in a central location of your home.
- Once powered on, the satellite’s ring LED turns white.
- Then the LED ring turns solid blue to indicate that the connection between the satellite and the router is good.
- If the satellite’s LED ring shows magenta, the satellite is unable to connect to the router. In case, move the satellite closer to the Orbi router.
Connecting to the Orbi router’s network
- Now, open your phone’s Wi-Fi settings and scan for your Orbi router network name.
- Then connect to the network using the wireless password of your Orbi router.
- Alternatively, you can connect your computer system to the Orbi router either through Ethernet or wirelessly.
- Once connected, try to perform the Orbi router login process.
Accessing the Orbi login page
- Launch a browser on the connected device and type the default Orbi login address i.e. Orbilogin.net in its address field.
- Next, enter the Orbi router login default credentials like username and password.
- Make sure to enter the correct login details to avoid installation issues.
- You can find the default username and password for Orbi in its user manual.
- Click on Login and the basic home page will appear on the screen.
- Now, agree to the Terms and Conditions and follow the instructions to complete the setup.
- After that, change the Wi-Fi name and password of your Orbi device.
- Next, connect your devices to the new SSID name by typing the new wireless password.
Conclusion
With the above steps, you can install the Orbi router and satellite successfully. If you want to know how to set up the orbi router with the Orbi app, then you can contact our technical experts. For more queries about the Orbi router login, dial our toll-free number.


