Apple Classroom is an administration system that can be used to manage student devices and share content in easily. The application is free for users, and works on iPad and iOS version 10.3.2 or afterward. It became a part of the several iPad users due to its excellent features helping mentors and teachers who have several students’ devices in a classroom.
There are two methods for setting up an Apple Classroom. You can set up with the mobile device through MDM (Mobile Device Manager), or you can also use it as a teacher-created classroom. The MDM comes close to the import of several users automatically. Here you can assign your profile and setting up several classes at once. In this article, we will teach you how you can use Apple classroom in easy and convenient methods.
Start with Apple Classroom
First, you need to download and install the Apple Classroom application on your teacher’s iPad. Remember that only the teacher’s device needs this application. The student doesn’t need to download and install this device because they need to use Wi-Fi, Bluetooth, to join the class.
Now you only need to launch the application on your device, tap on “Create New Class,” and then rename your classroom. You can make several classes as you need. So you can free to create several courses at the same time according to your use. The primary teacher might only need one class, But the High School and Middle school teacher can use several classes. Students can also a member of several classes, and their device will be automatically attached to new classes whenever they leave the classroom or connect with another class.
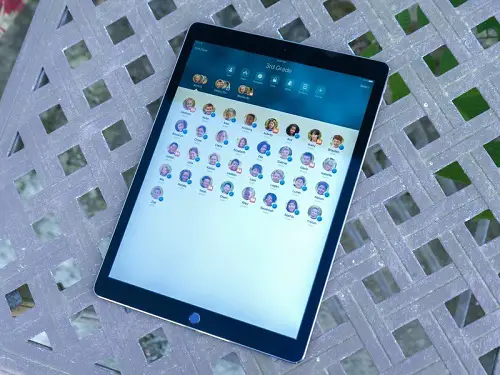
How to Add Students into Apple Classroom
Before adding into an Apple classroom, make sure that you have turn on your device Bluetooth on all the devices that you wish to connect. And the iPad is also attached to a similar Wi-Fi network. You need to know that Apple Classroom can work with the 4th generation of iPad or latest version, and also in the iPad mini 2 or latest version that have iOS 10.302 latest version installed into your device. To work smoothly, you need to set up your device up-to-date. So first, you need to check that your device is up-to-date by tapping on the Settings, tap on General, and then hit the Software Updates to check that everything is up-to-date.
Here are the steps on how to add students into Apple Classroom:
- Click on the classes that you have created and launch it.
- Now click on the “Add student.”
- Now tell your student to launch the settings application and locate the classroom in the menu option. It appears near the Bluetooth option on your left sidebar in the settings application.
- When you choose the Orange Classroom option, they ask them to locate for the name of your classroom that appears on the right of your screen. It might take a couple of seconds to appear on the screen, but if the entire device is attached with the similar Wi-Fi, then they can appear rapidly.
- When you tap on the name of your classroom, then you need to enter your four-digit code that is appearing on the screen of your teacher device.
- When the students have finished these steps, they will be added to the class, and then you can see their names on your screen.
Management of Classroom through Apple Classroom
So you need to know that what you can do with the Apple classroom when your entire students are attached, now you can use your new superpower bt launching your class in the application and then select the option that appears on the upper top corner of your screen,
Here are the options that appear on the list.
Add: Add a further student in the class.
Open: Choose an application to launch your entire device. The teacher’s iPad has installed an application, and you opt to look into the student’s application has started.
Navigate: Choose a Safari Bookmark to let your students launch into a separate website.
Lock: You can lock the entire student iPad so they cannot be used. It is a work as an eye of the teacher on the student’s device.
Mute: Silence the entire student’s iPad by muting the volume.
Screens: Here, you get a live view of the entire students’ screen at one time. You need to tap on ant students to view in a huge or full-screen view.
Group: Here, you can create a group of students, here you can add a collection of students who are studying or working on a similar project. These features allow you to create with a maximum of six students and minimum two students.
After the above process, you can manage all the students in your classroom.
Devin Smith is a creative person who has been writing blogs and articles about cyber security and utility software programes. He writes about the latest updates regarding office.com/setup and how it can improve the work experience of users. His articles have been published in many popular e-magazines, blogs and websites.
Source:-https://devinsmith007.wordpress.com/2020/05/07/how-to-use-apple-classroom-like-a-pro/


