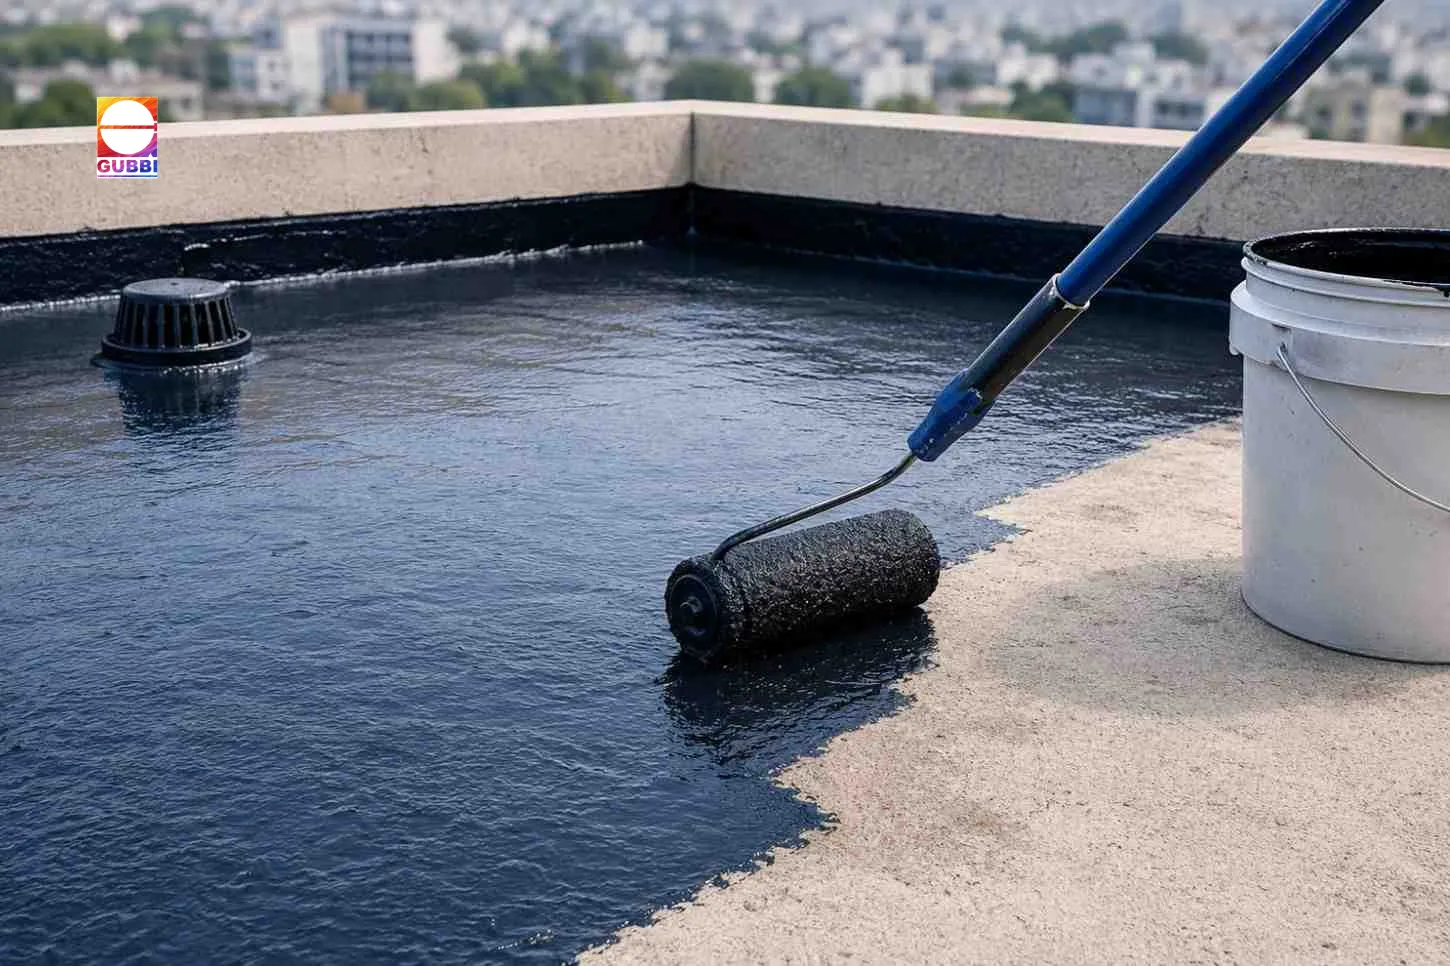

Roof waterproofing is an essential process that protects residential, commercial, and industrial buildings from water leakage, moisture damage, cracks, and structural deterioration. A properly waterproofed roof improves durability, prevents seepage, and extends the life of the building.
In this guide, we explain the complete roof waterproofing solutions and process, the materials used, and key factors to ensure long-lasting roof protection.
Roof Waterproofing Process Complete Step-by-Step Guide
What is Roof Waterproofing?
Roof waterproofing is the process of applying protective materials and membranes to prevent water penetration through the roof surface. It helps safeguard buildings against rainwater leakage, dampness, mold growth, and structural damage.
Proper waterproofing is important for:
- Preventing roof leakage and seepage
- Protecting walls and ceilings from moisture damage
- Improving roof durability and lifespan
- Reducing repair and maintenance costs
Why is Roof Waterproofing Important?
Ignoring roof waterproofing can lead to serious problems such as water seepage, concrete deterioration, corrosion of steel reinforcement, and interior damage.
Benefits of roof waterproofing include:
- Long-term leak prevention
- Better structural protection
- Improved indoor comfort
- Enhanced property value
- Lower maintenance expenses
Step-by-Step Roof Waterproofing Process
1. Roof Inspection and Surface Assessment
The first step in the roof waterproofing process is a detailed inspection of the roof condition. Professionals identify:
- Cracks and damaged areas
- Water stagnation points
- Existing leakage issues
- Surface irregularities
A proper assessment helps determine the most suitable waterproofing solution.
2. Surface Cleaning and Preparation
Before waterproofing application, the roof surface must be thoroughly cleaned.
This includes:
- Removing dust, dirt, and debris
- Cleaning algae or fungus growth
- Removing loose concrete or damaged coatings
- Ensuring the surface is dry and stable
A clean surface improves waterproofing adhesion and performance.
3. Crack Filling and Surface Repair
Any visible cracks, joints, or damaged sections are repaired before waterproofing begins.
This process may include:
- Crack sealing using repair compounds
- Filling expansion joints
- Repairing damaged concrete areas
- Slope correction for proper drainage
Proper repair prevents future leakage issues.
4. Primer Application
A waterproofing primer is applied to improve bonding between the roof surface and waterproofing material.
The primer:
- Enhances adhesion
- Seals porous surfaces
- Creates a stable base layer
This step ensures better durability of the waterproofing system.
5. Waterproofing Membrane or Coating Application
The main waterproofing layer is applied based on roof type and project requirements.
Common roof waterproofing methods include:
- Liquid waterproofing membrane
- Bituminous waterproofing
- PU coating waterproofing
- Acrylic waterproofing coating
- Cementitious waterproofing systems
The material is evenly applied to create a seamless protective layer.
6. Reinforcement Layer Installation (If Required)
For enhanced durability, reinforcement fabric or mesh may be added, especially in:
- High-risk leakage zones
- Terrace waterproofing systems
- Commercial and industrial roofs
This improves crack resistance and flexibility.
7. Final Protective Coating
A protective top layer is added to improve weather resistance and waterproofing performance.
Benefits include:
- UV protection
- Heat resistance
- Increased durability
- Enhanced waterproof performance
8. Water Ponding Test and Quality Inspection
After application, a water ponding test is conducted to check waterproofing effectiveness.
This helps ensure:
- No water leakage
- Proper sealing of cracks and joints
- Reliable waterproofing performance
Types of Roof Waterproofing Solutions
Different roofs require different waterproofing methods depending on structure, climate, and exposure.
Popular options include:
- Terrace roof waterproofing
- Concrete roof waterproofing
- Industrial roof waterproofing
- Metal roof waterproofing
- Flat roof waterproofing systems
Common Mistakes to Avoid During Roof Waterproofing
Avoid these mistakes for better results:
- Skipping surface preparation
- Ignoring crack repairs
- Choosing the wrong waterproofing material
- Poor drainage planning
- Improper application thickness
How to Choose the Right Roof Waterproofing Method?
Selecting the right waterproofing process depends on:
- Roof age and condition
- Climate and rainfall exposure
- Type of roof material
- Budget and maintenance requirements
Professional inspection helps identify the best waterproofing solution for long-term protection.
Conclusion
The roof waterproofing process involves inspection, cleaning, repairs, primer application, waterproof coating, and quality testing to ensure complete protection against water damage. Investing in proper roof waterproofing not only prevents leaks but also improves the structural lifespan of the building.
If your roof shows roof waterproofing signs such as seepage, cracks, damp patches, peeling paint, mold growth, or water damage, timely waterproofing can help prevent leaks and avoid costly repairs in the future.


























Sign in to leave a comment.