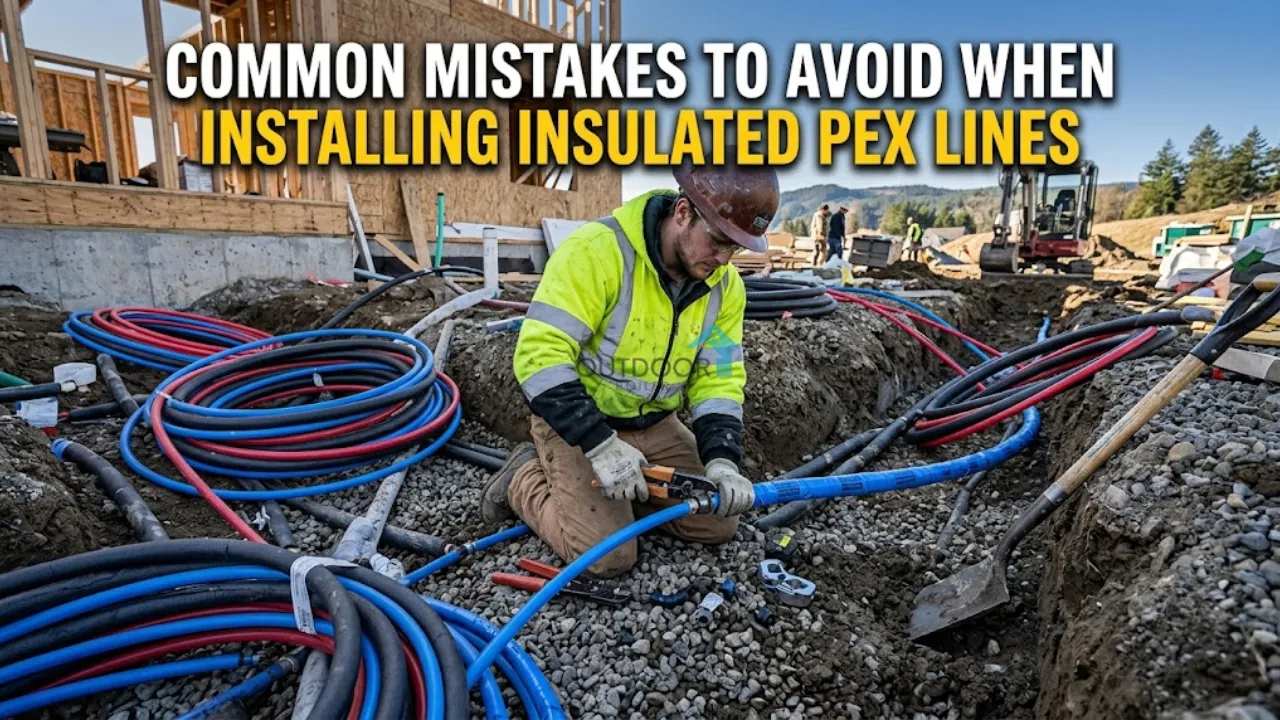


Properly installed, insulated PEX lines can improve heating efficiency and reduce energy loss. However, even small installation mistakes can lead to higher heating costs, poor performance, and expensive repairs down the road.
Why Proper Installation Matters
Insulated PEX lines are designed to transport hot water efficiently from an outdoor boiler or heating system to your home or building. Their insulation helps minimize heat loss while protecting the piping from moisture and changing ground temperatures.
According to the U.S. Department of Energy, insulating hot water pipes can significantly reduce heat loss and improve overall system efficiency. That makes proper installation just as important as choosing the right pipe.
Unfortunately, many homeowners and installers make simple mistakes that reduce the benefits of insulated PEX lines. Here are the most common ones to avoid.
Mistake #1: Choosing the Wrong Type of Insulated PEX Lines
Not all insulated PEX lines are built the same. Some products use lower-quality insulation or materials that allow water to seep into the insulation over time.
When moisture enters the insulation, it greatly reduces its ability to retain heat. This can result in higher fuel consumption and reduced heating performance.
Before purchasing insulated PEX lines, make sure they are specifically designed for underground use and have durable, waterproof insulation.
Mistake #2: Digging a Trench That Is Too Shallow
One of the biggest installation errors is placing insulated PEX lines too close to the surface.
Shallow trenches expose the lines to freezing temperatures, accidental damage from landscaping equipment, and temperature fluctuations that can impact performance.
Although local requirements vary, many installers recommend burying insulated PEX lines deep enough to protect them from frost and external damage.
Always check local building codes and frost depth recommendations before beginning installation.
Mistake #3: Ignoring Drainage Conditions
Water is one of the biggest threats to underground insulated piping.
Installing insulated PEX lines in an area that collects water can create problems over time. Excess moisture may eventually reach the insulation if the outer jacket becomes damaged.
Whenever possible, avoid low spots where water accumulates and ensure the trench allows proper drainage.
Mistake #4: Creating Sharp Bends in the Pipe
PEX tubing is flexible, but it still has limitations.
Forcing sharp bends during installation can place stress on the pipe and may eventually lead to kinks or reduced water flow.
Instead, make gradual curves and follow the manufacturer's recommended bend radius. Taking a few extra minutes during installation can prevent future headaches.
Mistake #5: Failing to Protect the Pipe During Backfilling
After the insulated PEX lines are placed in the trench, backfilling is just as important as installation itself.
Large rocks, construction debris, and sharp materials can damage the outer jacket of the insulated pipe.
A common best practice is to use clean soil or sand around the piping before completing the backfill. This helps protect the insulation and outer covering from unnecessary damage.
Mistake #6: Installing Lines That Are Longer Than Necessary
Every extra foot of piping creates additional opportunities for heat loss.
While insulated PEX lines are designed to minimize energy loss, longer runs can still reduce system efficiency.
Whenever possible, plan the shortest practical route between the heat source and the building. A well-planned layout can improve performance and lower operating costs.
Mistake #7: Forgetting to Pressure Test the System
Many people are eager to finish the project and immediately cover the trench. However, skipping a pressure test can be a costly mistake.
Pressure testing allows you to identify leaks or damaged fittings before everything is buried underground.
Discovering a problem after the trench is filled often means digging everything back up, which can be time-consuming and expensive.
Mistake #8: Overlooking Future Access Points
Another common mistake is failing to think about future maintenance.
If valves, fittings, or connections are buried without accessible locations, repairs become much more difficult.
Planning for future access can save significant time and money if maintenance is ever needed.
Signs Your Insulated PEX Lines May Have Installation Issues
Even after installation, there are warning signs that something may not be right:
- Higher than normal fuel consumption
- Reduced heating performance
- Inconsistent indoor temperatures
- Unexpected pressure loss
- Wet areas along the trench route
- Increased operating costs
If you notice these issues, it may be worth inspecting the system to identify potential installation problems.
Tips for a Successful Installation
To get the best performance from insulated PEX lines:
- Use high-quality underground insulated piping.
- Follow local building codes and frost depth requirements.
- Keep the trench well-drained.
- Avoid sharp bends and kinks.
- Protect the pipe during backfilling.
- Pressure test the system before covering the trench.
- Plan the shortest practical route.
Taking the time to install insulated PEX lines correctly can improve efficiency and help your heating system perform reliably for many years. With a well-executed installation, you’ll experience fewer maintenance issues and also avoid costly repairs, making the investment in your outdoor boiler much more worthwhile. Read the full article HERE for the installation guide.
Frequently Asked Questions
How deep should insulated PEX lines be buried?
The ideal depth depends on local climate conditions and frost lines. Always follow local building codes and manufacturer recommendations.
Can insulated PEX lines get wet?
The outer jacket is designed to protect the insulation, but damage to the jacket can allow moisture to enter, reducing insulation performance.
Do longer insulated PEX lines lose more heat?
Yes. Even well-insulated piping experiences some heat loss over long distances, which is why shorter runs are generally more efficient.
Should insulated PEX lines be pressure tested?
Absolutely. Pressure testing helps identify leaks or installation issues before the trench is filled.
How long do insulated PEX lines last?
High-quality insulated PEX lines can last for decades when installed properly and protected from physical damage.
Conclusion
Installing insulated PEX lines may seem straightforward, but the small details make a huge difference. From trench depth to proper backfilling and pressure testing, avoiding these common mistakes can improve efficiency, reduce operating costs, and help your heating system perform at its best.
I always believe that taking the time to plan and install insulated PEX lines correctly is an investment in long-term reliability. If you are preparing for an installation, use these tips as a guide so you can avoid costly problems. Contact us at outdoorboiler.com and enjoy the full benefits of an efficient heating system.
























Sign in to leave a comment.