Before using any model of craft plotter machine, you must know about the Cricut EasyPress Heat Guide. This machine can be defined as ‘an easy-to-use and portable machine combining the speed of a heat press with the comfort of an iron.’
It adjusts heat up to 360*F (180*C) and is compatible with major brands of heat-transfer material. The company keeps adding new members to the machine family tree, like EasyPress 2, EasyPress Mini, and EasyPress 3. To get the desired project from this machine, you must learn about the machine settings and heat guide.
How to Set Up EasyPress Controls?
To get the needed craft from the EasyPress machine, you must have full knowledge about the machine controls via which you can access the machine. Read the below pointers to learn about the machine’s basic control:
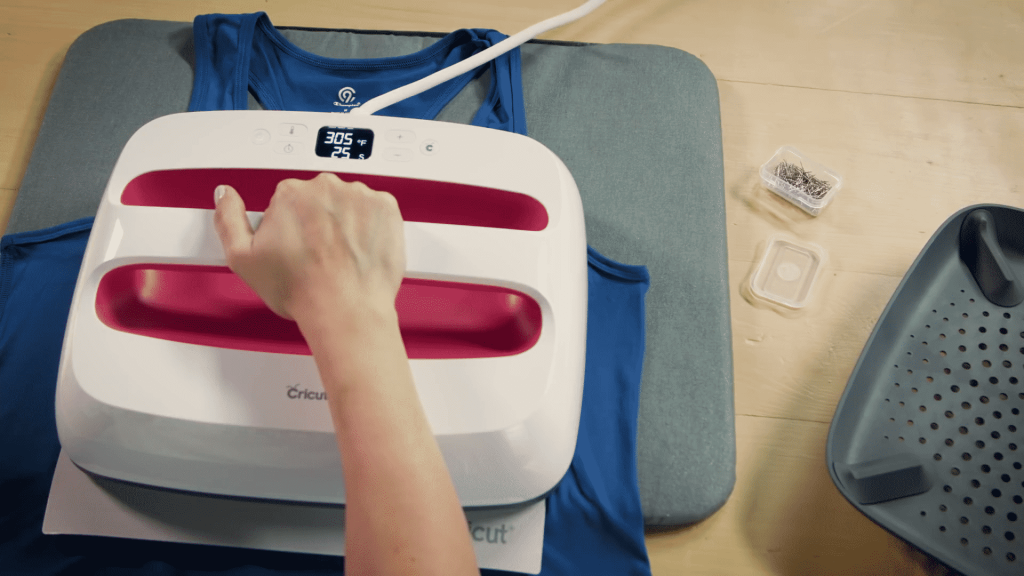
Set Temperature
Adjust the machine temperature as per your material with plus (+) or minus (-) buttons other than that, if you want to switch from Fahrenheit to Celsius, press and hold the Temperature button.
Set Timing
After adjusting the temp, you must choose the Timing using + and – to arrange the number of seconds for the countdown.
Countdown Button
To begin the countdown, you need to click on the C button. The machine will calculate the timing to indicate that you aren’t pressing the button for too long or too short. The button will have two colors: Orange means it’s still heating up & Green means that the machine is set to get started.
It’s crucial to know about the settings they are supposed to settle before starting the crafting process.
How to Use Cricut EasyPress Heat Guide?
If you want to create an appropriate craft, it’s essential for all users to ensure that they’ve come across with Cricut EasyPress Heat Guide. However, there are a few essential components you must have before proceeding to the next stage.
The components include an EasyPress machine, Heat Guide, or Cricut Heat App (for EasyPress 3 model). If you are using EasyPress 3, you need to install a Heat app for iOS & Android.
To get the needed DIY project from EasyPress, you must know the steps revolving around the machine Heat Guide process. Ensure that you don’t skip any step while accessing the machine:
- First, you have to visit the Cricut official website.
- Second, open the Heat Guide page.
- Third, choose the machine type (EasyPress).
- Under the Heat-Transfer Material Dropbox, choose the material type.
- After selecting the material, select the Base Material.
- Then tick on the Cricut Pressing Mat and press on the Apply option.
- Further choosing the option, you’ll need to preheat the machine.
- You can also change the temperature (*F to *C) as per your choice.
- Followed by that, you need to wait till the heating process gets complete.
- Lastly, slowly peel off the liner when cool to the touch.
Once the accessing process gets complete, you can start using the machine and create an unlimited number of crafts.
How to Create Iron-On Projects With EasyPress?
You need to pay special attention while creating the Iron-On projects with the machine. Just follow the instructions, and you’ll be able to get your specific project.
- First, search for a firm, flat, and heat-resistant surface that matches the height of your waist.
- Second, set the timer along with the temperature by pressing the Temperature/Timer button.
- Third, you are advised to be very careful while operating the machine at high temperatures.
- After that, put the machine on top of the fabric for a specific time period.
While placing the machine, you need to be sure that the shiny side (clear carrier sheet) is facing up. - Followed by that, you need to put on the machine the Base material.
- Then, press on the Go option to start the timer.
- Further, apply the suggested pressure during the process. Don’t put too much pressure; otherwise, your material will get damaged.
- The machine will start beeping, reminding you to remove the machine.
- Wait for a few minutes till the carrier sheet cools down.
- Lastly, remove the sheet after it gets completely settled on the fabric.
Conclusion
It can be expressed that it’s very for every crafter to have summarised information about the Cricut EasyPress Heat Guide. The facts will indeed help you in designing hassle-free projects. In addition to that, you can also refer to the following FAQs.
FAQs
Question: What are important points to remember while accessing EasyPress?
Answer: The important points you need to remember while using the machine include using the EasyPress at room temperature, ensuring that the fabric and other base materials are dry, and returning the machine to its Safety Base when not in use.
Question: Do I’ve to put the heat on the back of the project?
Answer: To get the proper design & shape of the project, you must apply heat on the back of the project for 10 seconds-15 seconds. However, you need to ensure that the pressure should not be too much. Other than that, you can also read the Heat Guide for more information.
Question: How much force do I need to use for pressing?
Answer: If you use both hands, use 15-20 lbs of your body weight. Besides, if you use a single hand, use 5-10 lbs of your body weight. Use a waist-height table while creating your design using the machine.
Source :- Cricut EasyPress Heat Machine


