Do you wish to learn how to Tie-Dye with the crumple technique of tie-dye? Its most accessible Tie-Dye patterns and colorful results are so fun! The below guide will show you how to create a crumble tie-dye design with a few basic supplies. So just get ready to have some fun and make unique tie-dye designs.
What is Crumple Tie Dye?
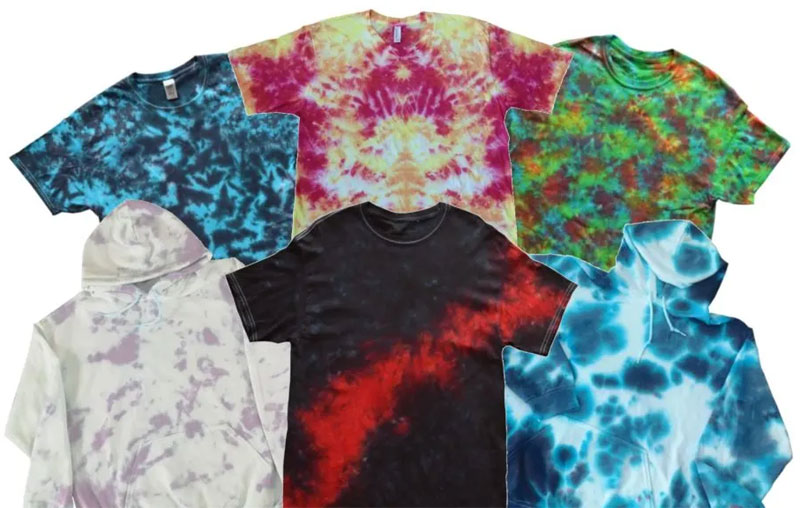
Crumple tie-dye is a technique of tie-dye that makes some beautiful designs that are totally unique and simple – you just need to crumple up the fabric and then tie it with a few strings or rubber bands. Once you apply the dye, the fabric will have a pretty random design that looks marbled.
Basic Supplies of Tie-Dye
To do crumple tie-dye, you will need some basic supplies such as dye and fabric. Also, you will need a few household tools and safety gear, such as gloves. So here are the supplies you will need for this project.
- Fiber-reactive dye
- Fabric items like a t-shirt or sweatshirt
- Soda ash
- Synthrapol or dye-safe laundry detergent
- Rubber bands or twine
- Squeeze bottles to apply the dye
- A large trash bag or a plastic tablecloth to secure your work surface
- A wire rack to uplift the fabric off the work surface
- Dust mask and gloves
- Plastic wrap or zip-top bags
How to crumple Tie Dye?
Before starting the process, gather your safety gear and supplies. Also, you need to wear old clothes, so you don’t mind getting smudged, wear gloves to secure your hands, and wear a dust mask when you are combining the dye powder.
Step 1: Prepare your fabric and your workspace
- Before starting, it’s essential to prewash your fabric to abolish any dirt that can interfere with the dying process.
- Then, prewash your fabric in the washing machine with any laundry detergent.
- After that, set up your work area with all your supplies and tools. If you are working inside, then lay down a tablecloth to keep your work surface from getting stained.
- In any case, set up a wire rack on the top of your work so that your fabric won’t be sitting in an excess dye puddle.
Step 2. Mix the dye powder and pre-soak your fabric in a soda ash solution
- If you are using Procion MX dyes, you will have to pre-soak your fabric in soda ash for just 15 minutes before applying the dye.
- In order to make a soda ash solution, just mix 1 cup of soda ash in warm water and then stir to dissolve.
- Once you pre-soak, wring out the fabric so that it will be slightly damp.
- After that, mix the dye powder in warm water according to the instructions given in the package.
Step 3: Make the crumple pattern
- Now it’s time to make the pattern, but decide how you want the design to look before starting it. You can crumple the fabric somewhat roughly to get an extra subtle effect or scrunch it up tightly for an extra-defined design.
- Firstly, lay the damp fabric flat on your work exterior.
- Then, scrunch it up in small pleats and fold it in the middle of your fabric.
- Work your way toward the corners. Keep scrunching the fabric to get a tight and dense bundle.
- Next, secure the fabric bundle with some rubber bands because it will keep the fabric from shifting when you implement the dye.
Step 4: Apply Dye to the Scrunched Fabric
You can apply the tie dye to your fabric in a few different ways. You can apply it with plastic squeeze bottles or by dipping the fabric into buckets of dye, but we recommend using the quiz bottles for control over your crumple design.
- To create a one-color design: Dip your fabric bundle into a dye bucket, or apply one dye color with a squeeze bottle. Just remember to flip the fabric bundle over and apply dye to the other side. You can leave a few areas without dye if you wish for white space.
- To create a multi-color design: Apply different types of dye colors to fabric in a random pattern. Make sure to flip the fabric bundle over and apply dye to the other side. Also, you can leave some areas of the fabric without dye.
- To get extra white space in your design: If you need white space in your crumple design, then make sure to scrunch the fabric tightly and also tie the rubber bands tightly. Also, you might try applying the dye to the edges and avoiding areas that you want to stay white.
Step 5: Set the Dye
- Once you apply the dye, now it’s time to let the dye set for a minimum of 8 hours. Elegantly you can let the dye set for up to 24 hours to give it enough time to react with the fabric.
- Keep your fabric relatively warm when the dye sets (at least 70°F (21°C). Also, you can place the fabric in a plastic bag and wrap it in a plastic bag to protect it from drying out overnight.
Step 6: Rinse, wash, and dry
- After eight to twenty-four hours, you can begin to rinse out the design. Simply rinse the ties fabric bundle under the cold water, then get rid of the rubber bands or twine and continue the rinsing process.
- You will see a few dyes coming out of your fabric as you rinse. This is just the extra, inert dye leaving the fabric. Keep rinsing until the water runs clear.
- After rinsing, wash the fabric in the washing machine with Synthrapol and another dye-safe laundry detergent.
- After washing the item, you can put it in the dryer or air-dry them.
Variations on the Crumple Tie-Dye Technique
- Pastel Crumple Tie Dye
To get extra pastel and faded effects, dilute your dyes with some extra water before adding them to your crumpled item. If you use the tulip refill packets, then try to use 1 ⁄ 2 teaspoon of dye powder for each cup of water. You can try ¼ teaspoon of dye powder per cup of water for player colors.
- Rainbow Crumple Tie Dye
Visually cut the crumpled shirt into six types of horizontal sections. Then, apply one dye color to each section in rainbow order, like red, orange, yellow, green, blue, and purple.
- Galaxy Tie Dye
The Crumple technique is best for making a galaxy tie-dye design. In order to make a galaxy tie-dye shirt, follow the below steps:
- Firstly, crumple the shirt roughly. Then you can add some rubber bands to keep each thing together, but make sure that the fabric bundles stay loose.
- After that, apply the dye in galaxy colors. Use the darkest blue and black dyes around the corners of the bundle. Flip the fabric bundle over, and put the dye on the other side. Add adequate dye so that you don’t have white areas showing.
- Next, let the dye set as orderly or normally. Rinse the waste dye and then wash and dry the shirt.
- Lastly, if you want to create a galaxy effect, add some white fabric paint splatters to the dry shirt.
Final Verdict
The Tie-Dye trend is the best way to express yourself while making your own one-of-a-kind pieces. Also, various Tie-Dye techniques give off their own personal style. This comprehensive guide will teach you how to Tie-Dye with the crumbles method. So just check this complete tutorial and start creating beautiful crumple Tie-Dye designs with some basic supplies.
Source:https://hariguide.com/how-to-crumple-tie-dye-technique/
0
0


