If you are using two in one Windows 10 operating system, then you can regulate only one standard feature that you have to use.
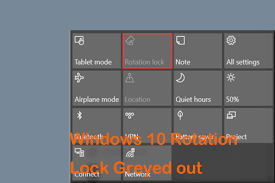
Although, several users complained that the rotation lock option is turned progressively out and then Rotation is not working on their operating system. In this article, you can learn how to fix rotation lock Grayed out in Windows 10.
1) Turn on Your Device Portrait Mode
- Launch the Settings application on your device.
- Visit the System settings.
- Tap Display.
- Search Orientation and select Portrait on the menu.
- After this process, the device will automatically turn over to the portrait mode.
2) Reset your Operating Device
- Switch off your operating system.
- When your systems switch off, hold “Volume up” and “Power button.”
- Select Restart and tap on saving on exiting.
3) Use Devise as Tent Mode
- Put your operating system in tent mode.
- If your screen is upside down, then you don’t worry.
- Tap the Action Center logo in the Taskbar and Rotation lock available.
- Now you have to switch off rotation lock, and you can see your display is rotated in a proper position.
4) Unattached Keyboard
- Here you might be trying to unattached your keyboard.
- There is a study that shows us if keyboard unattached, then Rotation lock key work normally.
- So if you are using and two in one device, then you can remove the keyboard from your device.
5) Turn on Table Mode
Here are the steps on how to turn on table mode to fix rotation lock grayed out in Windows 10:
- Few users have complained that they are facing issues with missing the Rotation lock button or grayed out can be resolved by turning on to Table Mode.
- If your operating system does not rotate automatically to Table Mode, then you have to go through the give steps:
- Tap on the “Action Centre” option on the Taskbar.
- Tap on “Table Mode” when the Action center launched.
- You can also go to the Table mode with the give steps:
- Launch settings.
- Tap System.
- Hit Table Mode.
- You have to ensure “Make Windows more touch-friendly when using your device as a tablet” is switch on.
- You can also make your device will automatically work when you turn on the Tablet Mode off or on.
6) Changing Previous Orientation Registry Value
Here are the steps on how to changing last orientation registry value to fix rotation lock grayed out in Windows 10:
- Tap Windows + R key and enter “regedit” in the search bar.
- Tap “Enter and then hit “OK.”
- After Registry Editor launches, you have to move on the given command that appears in the left panel:
- HKEY_LOCAL_MACHINESOFTWAREMicrosoftWindowsCurrentVersionAu
- Now in the right panel, search “LastOrientation” and double-tap on it.
- In the data, value type 0 and then tap OK to save your changes.
- Here you view “SensorPresent” DWORD available, double-tap on it, and sure that its value is 0.
7) Updates or Uninstall Display Drivers
Here are the steps on how to updates or uninstall display drivers to fix rotation lock grayed out in Windows 10:
- Tap Windows + X key and select “Device Manager in the list.
- When the device manager launched, move to Display Adapters option and find your drive.
- Right-tap on the driver and select Uninstall.
- When you have uninstalled driver, you have to restart the device.
If the issue is still available, then you have to update your display adapters. Here are the steps to follow:
- Launched “Devise Manager” and find your display adapter driver.
- Right-tap on it and select “Updates Driver Software.”
- Select any one method from the above instruction.
8) Sure to Allowed Auto-Rotate
Here are the steps on how to confident to allow auto-rotate to fix rotation lock grayed out in Windows 10:
- Right-tap on your desktop and select “Display Settings.”
- When “Display Settings” Launched, Tap on “Advanced Display Settings.”
- Now tap on “Advanced sizing of text and other items.”
- On the left side, select “Change display settings.”
- Verify, “Allow the screen to auto-rotate.”
- Tap “Apply” and “OK” to change you save.
- After this process, you have to restart the PC to apply the change.
9) Disable YMC Service
Here are the steps on how to disable YMC service to fix rotation lock grayed out in Windows 10:
- Tap Windows + R key and enter “services.msc.”
- Tap “Enter” or tap “OK.”
- When “Service Windows” Launched, and find “Sensor Monitoring Service” and double-tap on it.
- Change the Startup enter “Automatic and tap “Start the service.
- Tap “Apply” and then “OK” to save you changes.
10) Delete Intel Virtual Button
Here are the steps on how to delete Intel virtual button to fix rotation lock grayed out in Windows 10:
- Launch “Device Manager.”
- TapWindows + X key and select “Device Manager” in the list.
- When the device Manager opens, locate “Intel Virtual Buttons driver.”
- Right-tap and select “Uninstall.”
Source url:- https://williamsblogpoint.wordpress.com/2020/05/09/how-to-fix-rotation-lock-grayed-out-in-windows-10/


