This easy punch needle pillow guide will teach you how to change your punch needle fiber art into a wonderful piece of home decor. Keep reading to learn how to create a punch needle design and how to sew the completed piece into a fancy throw pillow. In addition, you will see a simple whip-stitch finishing technique to make your punch needle pillow look more efficient and professional.
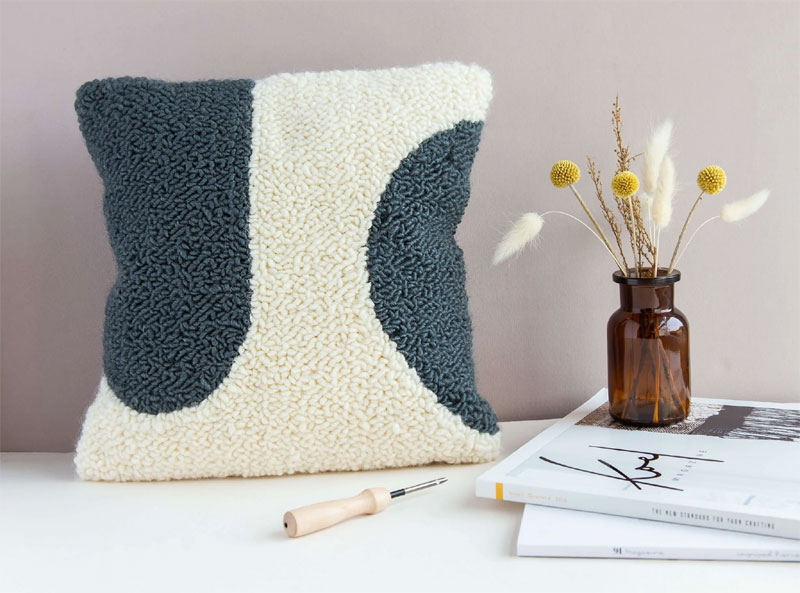
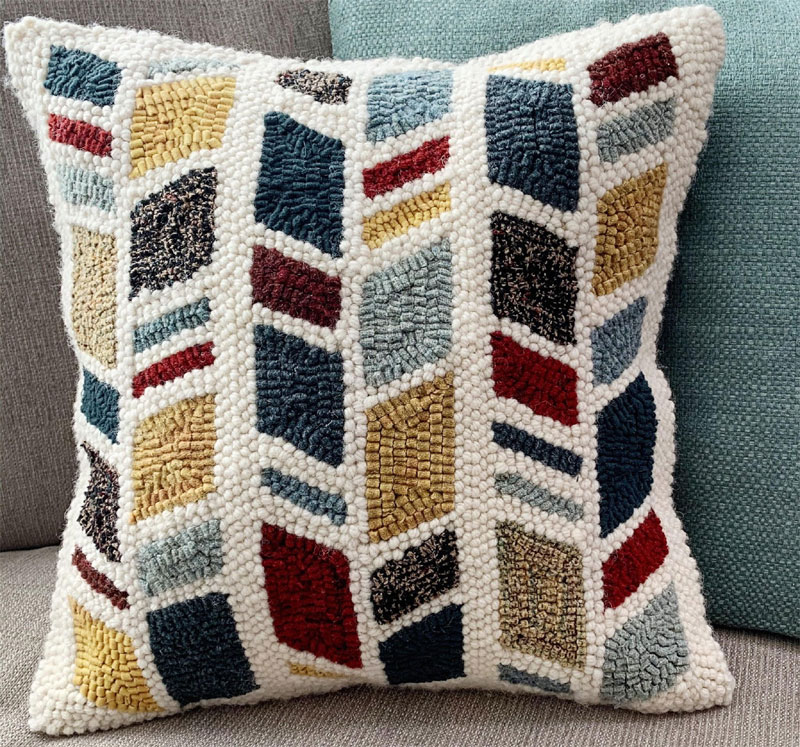
With this embroidery, the only limit is your imagery! You can easily make all sorts of textile objects, such as pillows, wall hangings, rugs, and much more. Once you learn how to punch a needle, it’s tough to stop! If you have a stack of finished pieces of punch needle piling up in your art space, why not turn a few of them into beautiful throw pillows for your sofa?
Punch Needle Pillow Tutorial
In the tutorial below, you will learn how to punch a needle and sew a finished needle design into a pillow. So if you are completely new to the punch needle, you might wish for extra details about it. You will learn how to make and finish a punch needle pillow in the given section.
Follow the basic steps to make a punch needle pillow
- Firstly, punch the pattern design.
- Next, clean up stray loops and steam the pieces if applicable.
- Then, cut and edge fabric for the side of the pillow.
- Gather and sew the pillow.
- Complete the pillow edges with a whip stitch edge.
Materials and tools that you will need to make a punch needle pillow
To make a punch needle pillow and whip the pillow edges, you will need to gather some supplies so that you can easily sew a punch needle design into a pillow.
- A finished punch needle piece
- Fabric for the back of the pillow
- Scissors
- Sewing pins or clips
- Sewing machine with a zipper or straight foot.
- Matching thread
- Blunt tapestry needle
- Matching rug yarn
A Complete Process to Finish a Punch Needle Pillow
Once you have completed the punch needle piece, it’s simple to sew it into a pillow. All you need is the piece, half a yard of fabric, and a sewing machine. So, now go through each of the steps with more details.
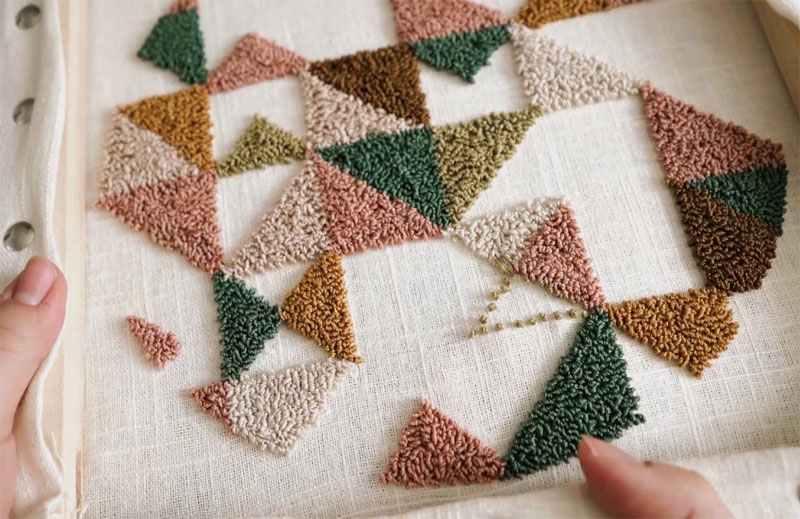
Step 1: Finish The Punch Needle Embroidery Design
You first need to complete a piece; now, this is a complete project in itself! For an 18″ pillow, you will need to create a punch needle pattern design that’s 18″ square. Also, ensure to leave an acceptable amount of some more monk’s cloth on every edge to keep fraying in check while you work. So here are the steps to make a punch needle design.
- Firstly, stretch the monk’s cloth on the frame.
- Next, transfer the needle design to the mons cloth.
- Then, thread the tool of the punch needle with yarn.
- stroke the outlines of the design and fill in the shapes
- Lastly, snip yarn ends and clean up stray loops
The best yarn for punch needle pillow
When preparing a functional piece such as a pillow, we highly recommend using wool rug yarn, which is a little coarser than craft bulky-weight wool, so it is easier to punch. It is also sturdier than other types of fibers, ensuring your created project will last for years to come.
Step 2: Clean up the Design
- Once the design is finished, you have to flip your work over so the loop or right side is facing up. Clip any yarn tails which are remaining. Then, trim the tails with the loops’ height and remove any stray fuzz or yarn pieces.
- At this point, you may notice that the design outlines are not as sharp as you would want. So don’t worry about that. That is a very common issue, and it happens because when you start punching, the yarn loops can push out beyond the design outline. To solve this kind of issue, you need to nudge the yarn loops back into the right spot. You also need to use a chopstick or some blunt project like a wooden knitting needle in order to rearrange yarn loops.
Step 3: Steam the Punch Needle Design (Optional Step)
- In this step, you can steam the punch needle piece to set the design and relax the loops.
- A quick note: if you have used backing fabric and yarn, you have to steam your punch needlework because this backing fabric can only handle the high temperature of the iron.
- In order to steam your design, place your punch needle piece on an ironing board along with a looped side facing up. Then cover your piece with a gentle press and wet towel with a hot iron. Once you steam it properly, the piece should lay nice and flat.
Step 4: Prepare Fabric for the Back Side of the Pillow
- Now that the design is ready, it’s time to sew the real pillow. For punching the needle pillows, you should make envelope-style pillow back closures. These covers are removable, so you can easily take the pillow cover off to repair it or clean it.
- To make an 18″ pillow, you will need an 18″ square finished piece of punch needle with 1″ of monk cloth on every side. This will give you a total size of 20″ by 20″.
- Cut the two back pieces:
- You will need two pieces of medium-heavy fabric in a matching color. The two back pieces have to each measure 20″ by 13″. To create an overlap of 4″, this measurement provides you enough material, plus an extra inch, in order to create the hem on the shortest sides.
Measurement for some other sizes of pillows
You can easily make an envelope pillowcase for any type of size pillow insert. To get the measurement for two back pieces of the pillow, you have to follow the below formula:
- If x equals the soiree punch needle piece size:
- the height of the back pieces is x + 2
- The width of the back pieces is x/2 +4.”
Hem the back pieces to make finished edges
- Before you sew the whole pillow together, we have to hem the overlapping ends of two back pieces. First, take the one back piece and fold the shortest sides in ½”. Then press with an iron. To incase the raw edge, fold the end over ½.
- After that, sew a straight top stitch with the folded hem. You just need to backstitch at the start and end of the seam.
Step 4: Assemble and sew the pillow
- Firstly, lay out the pieces of fabric in order; you have a place to punch the needle piece right side up. Insert the two needle pieces, right side down, on the upper side of the punch needle piece.
- Then, pin the pieces to protect them. You can use fabric clips if you suggest.
- Sew along all four pillow edges with a 1″ seam allowance. Clip any thread and trim the seam allowance and the corners at a 45° angle to reduce bulk.
- To further save the cloth of monks, you can make a second pass with a zig-zag stitch. If you are a serger, you can easily serge the edges. If you are worried or troubled about fraying, you can fleck on a little fray-check.
Here are a few sewing tips for punch needle pillow
- When you start sewing the final seam, you will easily raise the punch needle loops edge via the fabric layers. Now, try to follow the edge using your presser foot. This will help you sew without sewing over or into any of the yarn loops.
- You want to be able to sew, particularly on the line where the monk’s cloth starts and loops end – but that’s totally ok. You wish to leave a little strip of exposed monk cloth to give a slot for the whip stitch edge that you pursue in the next step.
- Keep in mind to backstitch at the beginning and end of your seam to save the stitch.
- In order to turn the corners, insert the needle in its own position. Lift the presser foot and then rotate the fabric in the down position. Next, lower the presser foot and continue sewing.
Step 5: Complete The Pillow Edges With A Whip Stitch
Now that all things are sewn together, you can easily flip the pillow right side out. You can see a thin strip of exposed monk cloth between the backing fabrics and punch needle section – just as destined.
Whip stitch the edge
- The whip stitch edge is a shining way to complete a punch needle pillow, and it looks like corded piping.
- To make this whip stitch the edge, thread a blunt tapestry needle with bulky weight yarn or rug wool. You can use the punch needle background color or any contrasting color.
- First, cut a 3′ yarn length. This is the right length to work with so that the yarn doesn’t become too unmanageable or twisted.
- Then, place the yarn tile on the pillow edge, with the tail pointing to the left. Working from back to front, put the needles as close to the backing fabric, and come up as close to the finished punch needle as possible.
- Next, start working from right to left and rerun this stitch down the pillow edge. Keep the spacing light adequate, so you don’t see remains of monks’ cloth via the stitches.
- The whip stitch edge does take a while to finish. But, once you get going, you are able to stitch while listening to a podcast or watching TV.
Final Words
Punch needle is really an inventive embroidery technique that both learners and experienced crafters want to do, and it’s also very easy to get started. Once you learn the techniques, you can easily make a variety of projects, including pillows, rugs, and hangings. So if you want to learn the process of how to make and finish punch needle pillows, this complete post is the best option for you.
Source:https://hariguide.com/how-to-make-a-punch-needle-pillow/
0


