Can you believe that Christmas is just around the corner? Now, are you thinking what I am thinking? Ever since I got my Cricut EasyPress 2 machine, I have become a fan of creating custom T-shirts with Cricut as well as Heat Press. I got into the world of crafting less than a year ago and have completed various projects.
It not only hones my artistic skills but also helps my business grow huge. Being a pro at making DIY projects, I’ll teach you how to make Christmas shirts with Cricut in this tutorial. Of course, before you can proceed with the design process, you will need to have all the supplies with you. If you are new and don’t have a clue, I am here to solve all your doubts and make your crafting journey much easier.
What Supplies Are Required to Create Custom Christmas Shirts?
To keep up with the holiday spirit and create Cricut Christmas shirts, I need to buy some crucial supplies. Each supply will help me create how to make Christmas shirts with Cricut more manageable. Have a look at the list of mandatory supplies below:
- Cricut machine
- Design Space
- Cricut StandardGrip mat
- Everyday Iron-On
- Foil Iron-On sampler, Very Merry
- Cricut EasyPress 2
- Cricut Heat Guide
- T-shirt blank
As an expert, it’s my advice to all the crafters to ensure that they use all the above-said supplies very carefully.
How to Create a Cricut Christmas Shirt?
After coming up with the crucial supplies, go through the details given in the following section. Here, I’ve got to learn all the details regarding how to make Christmas shirts with Cricut simply and crisply.
Step 1: Cricut App Login & Create Your Text Design
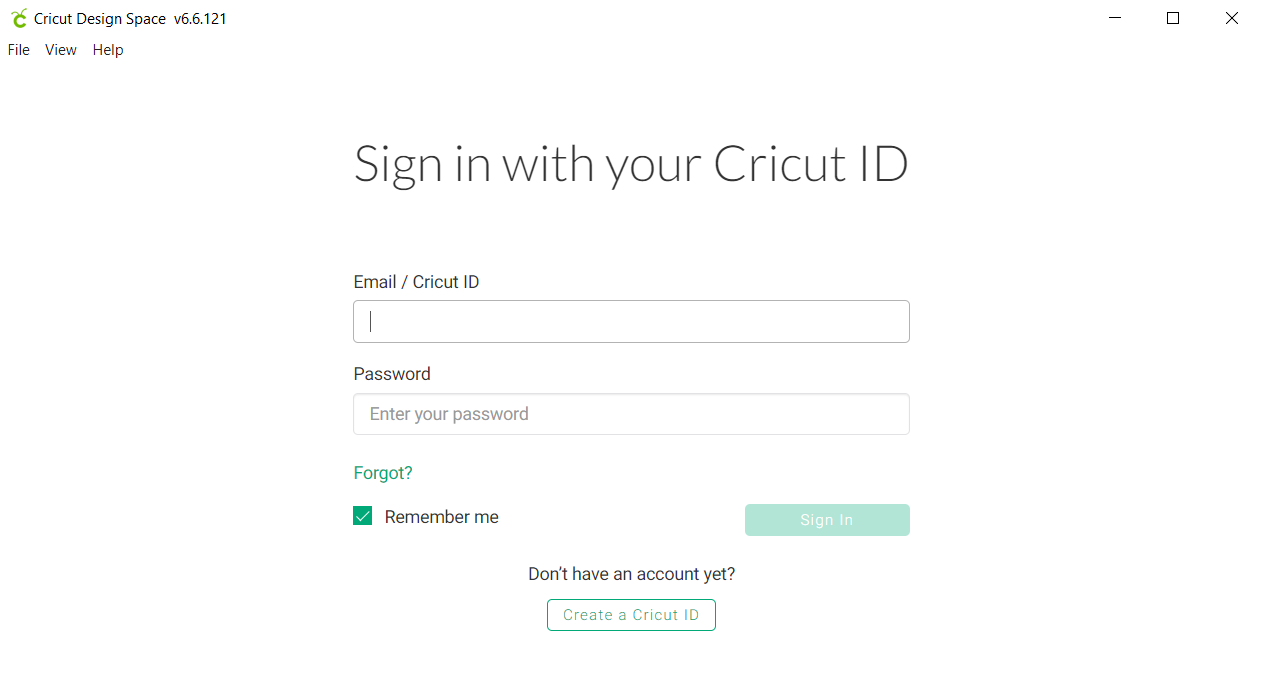
I will start the process by opening the Cricut app and logging in with the Cricut ID and password at the sign-in window.
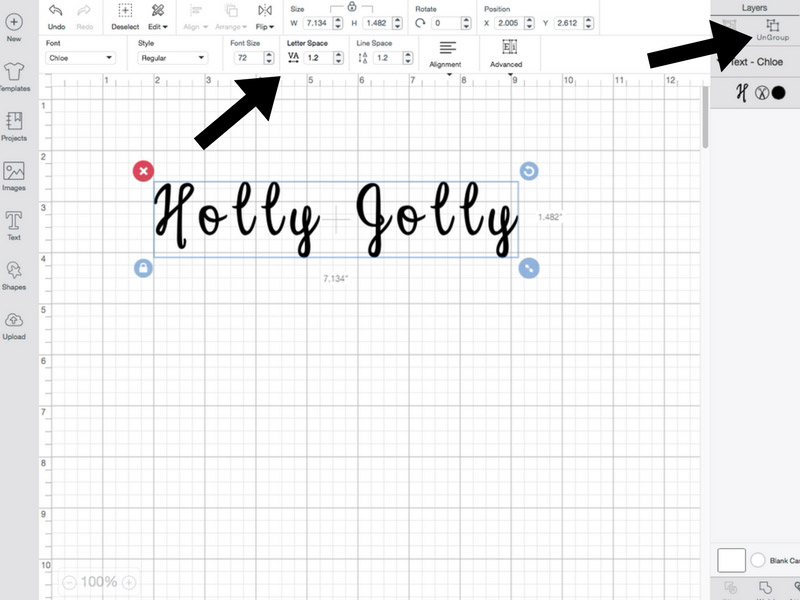
After doing that, press the New Project icon and I land on the Design Space canvas. Now, I am going to choose the Text toolbar and start typing the text inside the box. Next, I will change the text fonts, size, and color from the Menu bar given at the top of the screen.

Following this, I will press the Ungroup tool or Letter Space tool to bring each letter close to the other. On the other hand, I also got the option of choosing the Weld tool to delete the overlapping cutlines.
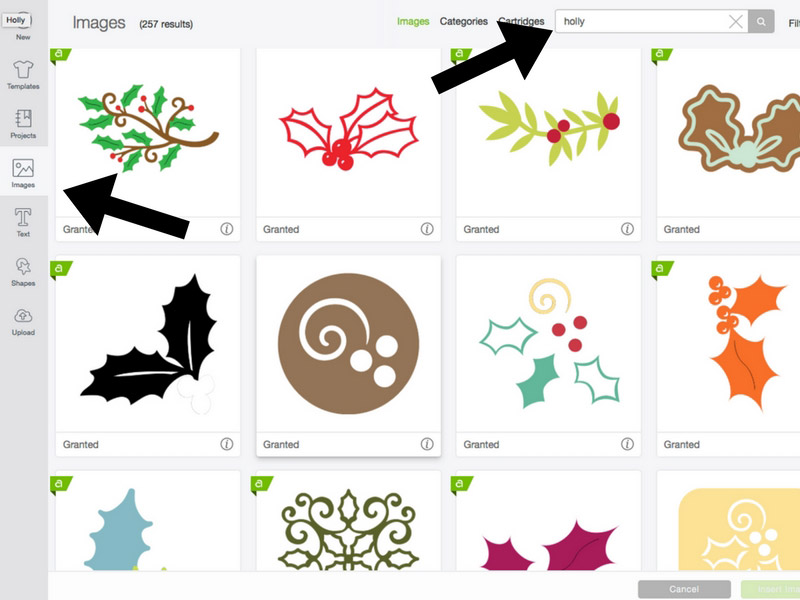
Next, I will upload the image by clicking the Image icon and start searching for the image inside the Search field.
Further designing your Cricut Christmas shirts on the Cricut app, make progress by stepping towards the next step.
Step 2: Open the Cricut Heat Guide, Cut & Weed Out Your Design
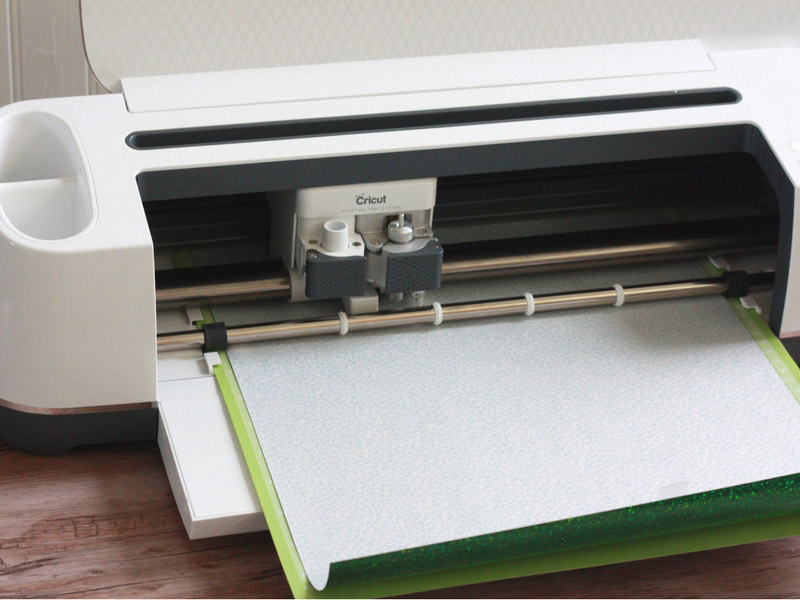
To start with the second step of making customized Xmas shirts out of Cricut, I will press the Make It option. Afterward, I will open the Heat Guide app available on my mobile device or computer. Now, I am going to tap EasyPress 2 and choose the Heat-Transfer Material and Base Material from the drop-box. Next, I will tap the Apply button and follow the on-screen instructions.
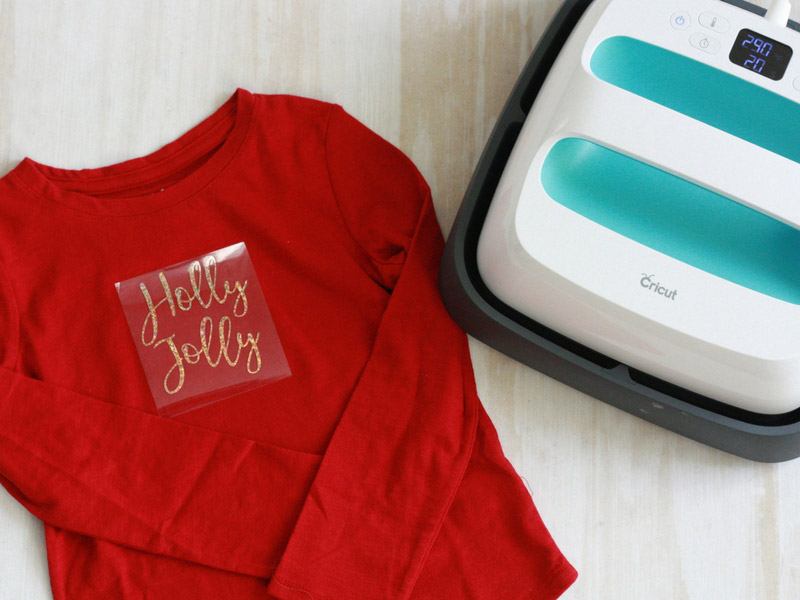
Following this, I will place my shiny side down on the Cricut cutting mat. After doing that, I will hit the Go button, and my machine will start cutting the material with perfection.
Step 3: Preheat Your Cricut EasyPress Machine
Now, I will preheat my EasyPress 2 temperature & timing depending on the material I am using for the project. Afterward, I will use my Heat Press and move it across the shirt to remove the extra wrinkles. As a piece of advice, you are suggested not to put too much pressure on your press while eliminating the wrinkles; otherwise, it will burn your shirt blank.
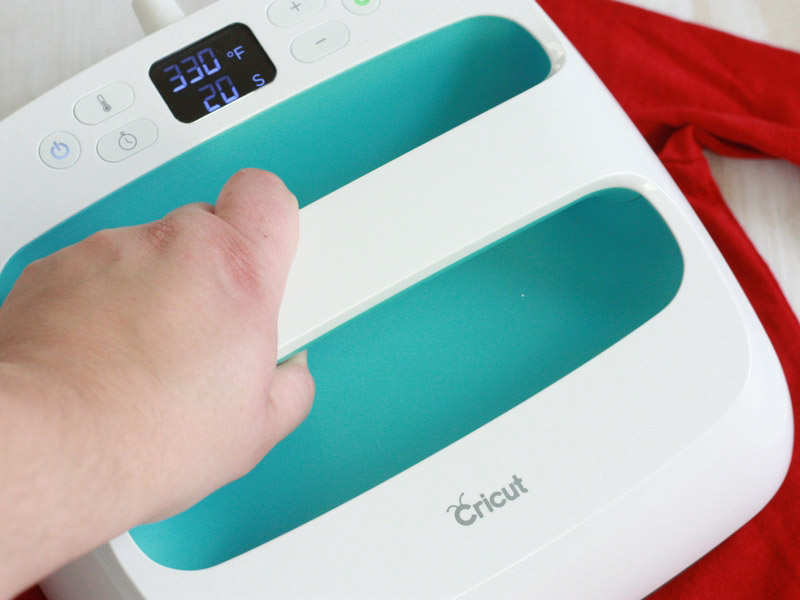
Step 4: Pressing the Design on Your Shirt
Following the completion of the preheat process, I am going to put the design on the shirt in a proper alignment. Next, you will see that I have placed my Cricut Heat Press on top of your design and set the timer from the Heat Guide app.
Completing the how to make Christmas shirts with Cricut process, I will slowly remove the liner. In case you aren’t able to remove the liner, then reapply the heat with the exact timing and temperature. After the pressing process comes to an end, I will get to see my personalized shirt for this Christmas.
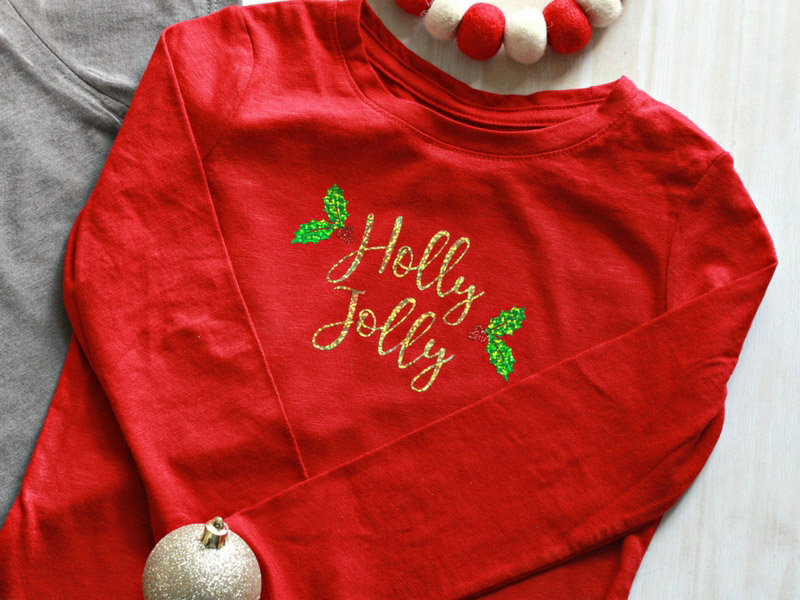
As a result of this blog, all your concepts about designing personalized shirts for this Xmas must have gotten clear. Apart from shirts, you can also make various projects from a Cricut machine as well as a Heat Press for various festivals or occasions.
Visit: Install cricut design space app
Source: https://criccricut.com/how-to-make-christmas-shirts-with-cricut-full-guide/


