Are you curious to explore how to make gift card holder with Cricut? Here, I am introducing you to the complete tutorial on how to create beautiful card holders. This card holder will make your card-giving experience even more special!
For the last few weeks, I have been looking for Cricut project ideas, and finally, this cardholder idea suddenly came to my mind. One of my school friends, Olivia, moved to Germany last year for her higher education. Since then, I haven’t sent her any gifts, and her birthday is coming up soon. So, I am planning to write something on the card and also send a gift.
For that reason, I am going to make this gift card holder. Do you want to learn how to make it for yourself? Below are the steps given for making this amazing gift card holder. Let’s get started!
Supplies and Tools for Creating a Cricut Card Holder
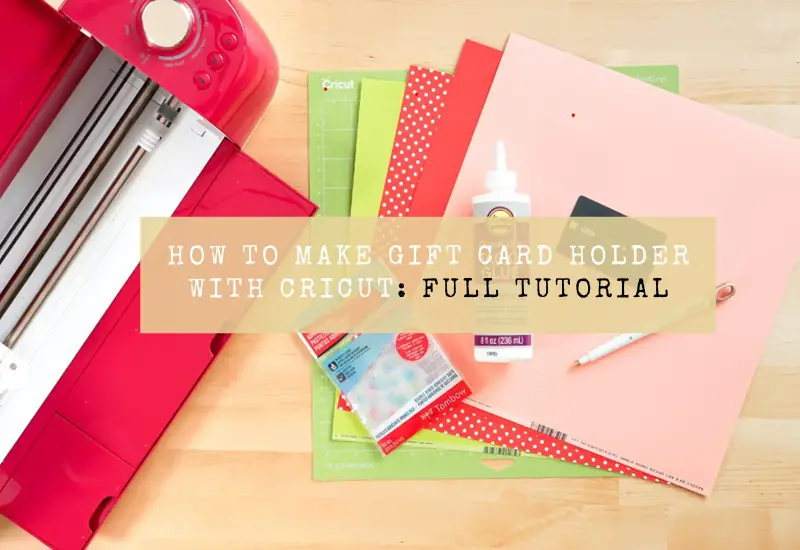
So, are you ready to learn how to make gift card holder with Cricut? If yes, then gather the supplies I have provided below. Make sure you have essential materials or machines before starting your project.
- Cricut Explore Setup or Maker
- Scrapbook paper or cardstock (in four different colors)
- Craft Glue
- Blue LightGrip Mat
- Gift Card
- Gift Card Holder SVG File
- Fine Point Blade
- Scoring Stylus or Scoring Wheels (For Maker Only)
How to Make Gift Card Holder With Cricut Machine: 3 Easy Steps
So, let me take you to the steps below to help you create a gift card holder using the Cricut cutting machine. Before this, you must be ready with all the tools and accessories required to make this project. Now, let me introduce you to making a gift card holder with Cricut in a stepwise manner.
Step 1: Add a Gift Card SVG to Cricut Design Space
Look for the gift card holder SVG file from the internet or on Design Space itself. Then, add this to your Design Space. To add the SVG to your Cricut software, you have to follow the simple steps given below:
- Launch the Cricut Design Space app on your compatible device.
- On the lower left corner, you have to go to the Upload icon.
- Then, choose your downloaded SVG file for your Design Space.
Now, I have added my SVG file to my Cricut app. As you can see in the picture below, this file includes the scoring lines.
Let’s click the Make It button in the upper right corner of Design Space. After that, you will see a Prepare Screen. Click Continue to proceed.
Step 2: Choose Your Material on Design Space
As you press the Continue button, you move to the Maker Screen, where you can choose the materials you use. In my project, I am using both scrapbook paper and cardstock. Besides, I have inserted the Scoring wheel into my Cricut machine setup.
After that, follow the screen’s instructions to cut all the different layers of your designs.
Step 3: Assemble the Gift Card Holder
Now, it’s time to bring all the cut pieces together and assemble them. You should first start by folding the paper along with the score lines.
I also used some glue to adhere to each side properly. I made it like an envelope.
Plus, I glued the gift card to the insert piece using glue. However, you can use the tape or another glue that you prefer. There is no specific glue that you will need to use in this project.
After that, I slide the insert card into my envelope.
Then, here’s the final touch.
Finally, here you go! It is done. Wasn’t that easy to make?
Now, you know how to make gift card holder with Cricut. By following these simple steps, you can make your own card older, too. This is a friendly craft, so everyone can easily create it.
FAQs
Can I make a Cricut card holder on Cricut Joy?
Obviously, yes! If your design is small in size, then you can prefer Cricut Joy for your card holders. You can go to the Design Space and search for the “Tear-Away Gift Card Holder” design from the free folder. Also, you will need materials such as a pen and marker that fit your cutting Joy. In addition, you need a blue LightGrip cutting mat.
What is the best method to create a gift card holder?
To create a simple gift card holder, you need to follow the methods below:
- First, select a design from the Cricut Design Space or create one yourself.
- Then, choose cardstock or paper to make your design on.
- Then, lay it down on your Cricut cutting mat.
- Start your Cricut machine to cut out the design
- Next, fold and assemble the holder according to your design.
- Finally, insert the gift card into the holder.
Which is the best Cricut cutting machine for cards?
I prefer using Cricut Joy as it comes with a special card mat. This is the only machine that uses this card mat, making it easier for all crafters to create cards effortlessly in less time. Also, Joy is famous for its compact and small design. Due to this feature, it is more portable and can be carried anywhere hassle-free.
Final Words
So, I assume you have learned how to make gift card holder with Cricut. In this easy-to-follow tutorial, I tried to explain everything using pictures so that everyone, including beginners, could understand what I was talking about. So, get all the supplies or tools mentioned above and start following the 3 steps I have provided in this tutorial. Only 3 steps are required to complete your gift card holder.
For More Information Visit: www.cricut.com/setup login
Cricut Design Space Desktop
install cricut explore air 2


