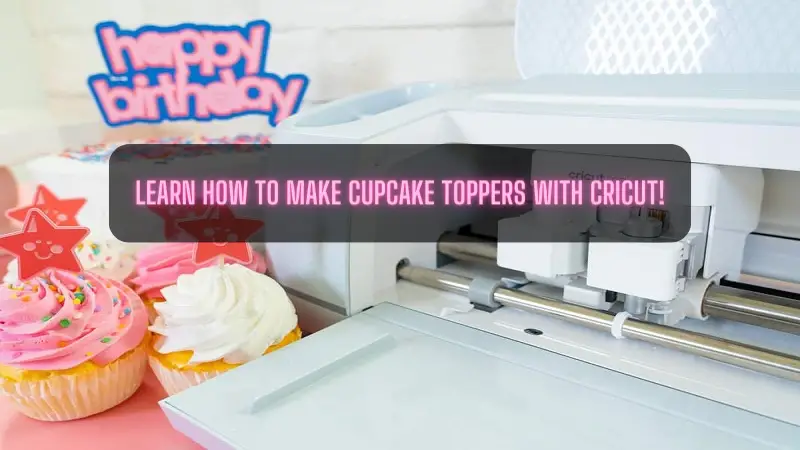
Finishing a meal with dessert gives the guests a different level of satisfaction. However, it becomes much more special when they are baked personally. If you love hosting parties for various occasions, then DIY decorations must be on your list. If you are fresher in the crafting industry, then coming across how to make cupcake toppers with Cricut is very important. Per the crafters, this is one of the simplest do-it-yourself crafts completed within a few minutes. In this post, you will learn how to create this custom project.
Step 1: Create a Design in the Cricut App
- Commence the process by going to Design Space software and opening a New Project.
- On the new canvas, press the Text tool and type down your respective text.
- Now, select the text and choose the font from the drop-box menu.
- Next, you need to ungroup the word and move each letter to make it touch with another one.
- After that, weld down the respective letters to give them a single shape.
- Followed by that, add an offset cut and do the necessary editing on the text.
- Once the modification completes, tick the Apply box and move further to the next step.
- It's completely up to you to change the design color to represent the paper choices. By choosing more than one color, the user won't get confused between the papers.
Step 2: Cutting Cupcake Toppers With the Machine
- Besides completing Step 1, select Make It and choose the mat option.
- Now, you must ensure the mat size is correct and compatible with Cricut.
- Under the Project Copies dialog box, increase the copies by pressing the downward arrow.
- Once the copies are final, tick the Apply button, and the design duplicates will be complete.
- In addition, choose the material and place it on the purchased cutting mat.
- After inserting the mat into the machine, press the Start button to begin cutting.
- Once the cutting process gets complete, start removing the glitter paper by peeling off the mat from the paper.
- Choose the same method and spatula tool to remove the rest of the letters from the mat.
- Take the scraper tool and remove any leftover paper from the used mat.
- Next, insert the second selected material and start the cutting process.
- Lastly, use a method to remove the paper from the LighGrip cutting mat.
Step 3: Forming Custom Cupcake Toppers
- Take the glue gun and fill it completely with strong adhesive glue to stick both the cardstock.
- After sticking the cardstock, let it dry and avoid flipping over the paper.
- Again apply hot glue in the middle of the paper and stick the skewers or toothpick in the center.
- On the other hand, you can also add a hot glue extra dot on the top of the stick.
- Following this, remove any hot glue strings within one go before it gets dried up.
- Let the glue dry up completely before placing it on the cupcake.
- Wait for a few minutes and place the prepared topper on the cupcake.
- Bravo! You have successfully created your customized cupcake topper.
To become an expert in creating this DIY project, every crafter must follow the same method very seriously. You shouldn't skip any of them; otherwise, you won't get the desired result.
Conclusion
In brief, to this blog, you must have learned how to make cupcake toppers with Cricut. It can be expected that each one of the users will follow all the steps mentioned in this process. Moreover, they must also hold all the supplies beside them during the decorative item designing process. It can be anticipated by the users that they will take this blog seriously and follow all the instructions mentioned in the earlier sections of the blog. In case you have any queries, then study the following FAQs.
FAQs
Which Cardstock Should I Use to Design Cupcake Topper?
Per the crafters, brand-smooth, solid cardstock is the best for the cupcake topper. However, you must choose the materials after confirming their thickness and quality. The thick or lightweight cardstock should be 65 lb & heavyweight cardstock should be 110 lb. The crafter's creativity skills also shine up when mixing two cardstock textures to add dimension to the respective crafts.
What are the Best Materials to Create Personal Cupcake Toppers?
Apart from the earlier shared materials, the professional DIYer can create these dessert toppers by choosing the following material. However, all crafters must use all the supplies systematically without wasting them.
- Scrapbook Paper
- Buttons
- Photograph
- Chocolate
- Fondant
- Plastic
- Googly Eyes
Apart from that, all these materials should be of top-class quality and must be involved in the design.
How to Can I Custom Cupcake Topper for Events?
Follow the steps to create custom cupcake toppers for different events:
- Open the Cricut app and draw the design of your choice using various tools.
- Choose the material type and insert the decided material into the cutting machine.
- After the cutting process, remove the design from the mat and stick it with glue.
- After the glue dries up, place the topper on your dessert.
For more information visit: Cricut.com setup mac
Cricut Explore Air 2 Setup
Cricut machine set up
Cricut Maker Setup


