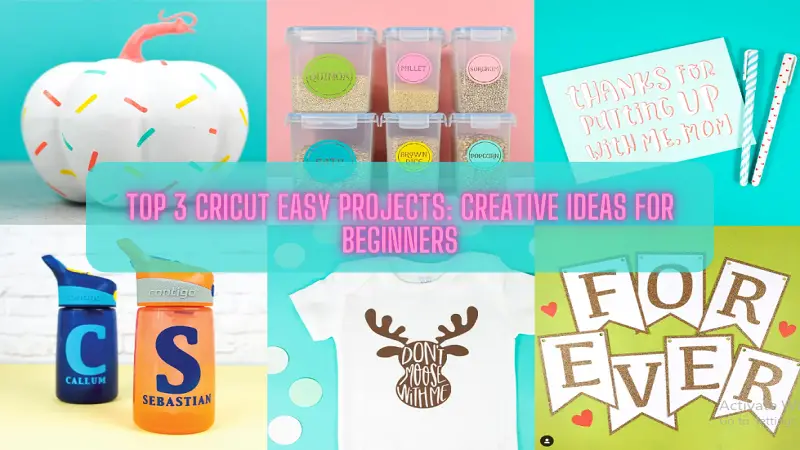
Cricut machines are manufactured for crafters and designers cutting, writing, and scoring. Suppose you are someone who has newly bought this powerful and robust machine. Then you are searching for ideas and projects to start your journey with the Cricut machine. These project ideas are curated especially for beginners like you and help you familiarize yourself with your new machine. These projects can work with any of the Cricut devices you have bought, whether you own a Cricut Joy, Explore, or Maker model. You will find this helpful. So, let's see what the Cricut easy projects are.
read more…Cricut EasyPress 3 Setup
What Tools and Materials Will You Need?
Before starting any project, you should have at least a few tools and supplies to get you started.
- Cutting Mats: Cutting mats are needed for materials unless you have bought Cricut Joy which cuts materials without a mat.
- Cardstock: Cricut offers a great selection of cardstocks to choose from. They are different with textures and patterns; you will even get glittering cardstock.
- Vinyl: Using vinyl offers endless possible ways to create many products.
- Iron-on: If you get your hands on iron-on projects. You will never think of buying another graphic-printed t-shirt.
1. Projects Using Paper
Cricut offers a cloud platform to download pre-designed work. Now, select a simple design you want the Cricut machine to turn your simple paper into a beautiful design.
After downloading the template, place a piece of cardstock on your cutting mat. Then set your Cricut to cardstock setting and let it cut the cardstock. Once the cutting is done, you can remove the cardstock from the mat. And you are done with the first project.
related blog: What are the Best Cricut Smart Materials for Maker 3 & Explore 3?
2. Iron-on Cricut Project
Once you have used iron-on, it will change how you think about crafting. Using iron-on, you can take a simple plain t-shirt from basic to beautiful.
- In the first step, you must again choose a shape and upload it to Design Space.
- After uploading the image or shape that you want Cricut to print, you must load the iron-on onto a cutting mat. (Important note: Place the shiny surface of the iron-on facing down on the mat. Also, select the Mirror Image option on Design Space before the Cricut starts to cut).
- Now, you have to set the Cricut to iron-on and cut.
- Once the cutting is done, remove the cut material from the mat.
- Then place the individual pieces completing the pattern upon your t-shirt.
- Finally, you can use Cricut Easy Press or normal iron for ironing. It is used to iron the pieces onto the t-shirt.
read more…Cricut heat press guide
3. Infusible Ink T-shirt Designs
You will agree after you have done a project using infusible ink. The Infusible Ink is a fun product for a Cricut project.
- You need to select an image. Then add something like a word for customization, click on Images and search for the word.
- Then select the image and click the Insert Images button at the bottom.
- Once you have the image on the canvas, you can select to change the color by using “Paint smear.”
- Then select both images using the clicking and dragging options. Using those options, place a box around the images.
- Now, Click the Slice button to cut the word you have inserted.
- Further, one more layer of the cut image will appear. Then choose to remove the extra sliced pieces. You should have an image with a paint smear having cut-out words.
- Then, using a ruler, you can set the size of your image.
- Select the Mirroring option and click Continue.
- Then select a StandardGrip Mat and place the sheet face against the mat. Now, load the mat so that Cricut can start to cut.
- Next, take off the mat once the cutting is done.
- Later, flip the mat and pull the mat gently away from the sheet. This is to avoid touching the front face.
- Using the scissors or a cutter, you can remove the excess sheet.
- This step is important, i.e., to crack the sheet. To do this, roll it up, and squeeze it until you can hear a crack and snap sound.
- Now, it is time to stick the design to the t-shirt.
- First, keep your mat and place the cardstock on it. Later insert both the mat and cardstock into your shirt.
- Next, place the Ink sheet face down on the t-shirt.
- After that, by using Cricut EasyPress on top of the Ink sheet.
- Take your tweezers and remove the ink sheet.
- Finally, just let the t-shirt sit for a day before wearing or washing it.
read also: Cricut Design Space Update Issues
Conclusion
Cricut machines are user-friendly and powerful machines used for cutting and designing purposes. You might need help to start your project if you are a fresher. So, this blog was catered to help you pick the right materials and things you need before starting. These Cricut easy projects are made for starting your crafting and designing journey.
FAQs
What materials can I use to cut with a Cricut Machine?
Older Cricut models can cut over 100-plus materials. And new models of Cricut are designed to cut over 300 plus different materials! Special mention, with Cricut Joy, you can cut without any mat.
Can I save my Project on Design Space?
Yes, you can save your project in Design Space. The Project Saving option is available in Design Space. It can be installed on Windows, iOS, Android, and Mac devices.
Source: Cricut Easy Projects


