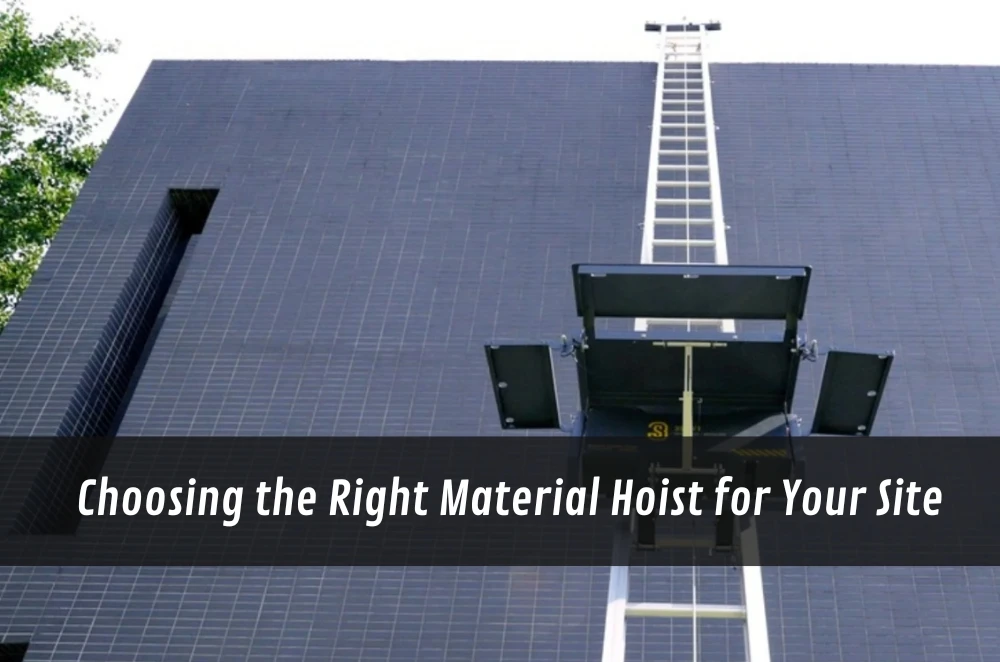
If you’ve ever stared at a pallet on the ground and a slab three storeys up, you’ll know there’s a gap between “we’ll figure it out” and an actual plan. On most Aussie sites, that plan starts with a hoist. If you’re comparing options like duct hoists and material lifts, this guide walks through sizing, setup, licensing, and the small habits that keep crews moving without drama.
What a material hoist actually is (and isn’t)
A materials hoist moves goods vertically. Not people. That distinction changes the hardware, your legal obligations, and how you supervise the work. A personnel & materials hoist is a different class entirely. Decide early which one you need and you’ll avoid the mid-project scramble to “upgrade” (read: re-tender and re-program).
Quick reality check:
- Materials-only hoists are for pallets, gear, and plant—bricks, plasterboard, HVAC components, rebar cages.
- Personnel & materials hoists carry workers as well as loads and involve tighter controls.
- Cranes and MEWPs aren’t substitutes for constant vertical freight. They complement, sure, but they don’t replace.
Compliance you can’t wish away
Licensing sits at the core of hoist work. Each state has its own regulator language, but the spirit is the same: if it’s a hoist, it’s high-risk work. For NSW readers, the regulator’s page linked vian hoist ticket nsw explains the licence classes for materials hoists and personnel & materials hoists, and when a higher class covers a lower one. Keep that link handy for inductions and toolbox talks.
Three habits that save headaches:
- Check the licence class on paper before the first lift. Photograph it; file it.
- Write the rules down. Your SWMS should spell out landing controls, interlocks, and who calls the lift.
- Confirm the ugliest load. Not the average. The ugliest. That’s the benchmark for car size and capacity.
A simple way to choose the right hoist
You don’t need to overengineer the decision; you do need to be methodical.
1) List the real loads.
Not just the “typical pallet.” Write down the max weight, dimensions, and any strange geometry (handles, brackets). If the item rocks on a pallet at ground level, assume it’ll try to walk inside a moving car.
2) Map the landings.
Where are you landing—slab edge, scaffold deck, temporary platform? Each target changes gate interlocks, edge protection, and queueing space. Measure the clear openings, not just the car’s internal dimensions.
3) Check the building interface.
Hoists tie into scaffold and sometimes the structure. Confirm tie points and spacing. Look up for awnings, setbacks, or signage that will fight your mast line. Street-level loading? You’ll need traffic controls that don’t collapse every time a courier van parks on your spot.
4) Capacity with margin.
If your worst-case is 1,050 kg, don’t pick 1,050 kg. Add slack for wet timber, packaging surprises, and human error. Same thinking for car size: long, awkward packages are usually the show-stoppers, not raw weight.
5) Throughput beats bragging rights.
Work out the loads per hour you actually need. A slightly smaller car with quick cycles can outperform a big unit if the landing team keeps it turning over. Align the hoist plan with delivery windows and crane bookings so you’re not double-handling.
Two jobs that taught me (the hard way)
The Fitzroy HVAC squeeze.
We had fan coils that weren’t heavy but were annoyingly long. On paper, the standard car cleared it by a whisker. In reality, the pallet overhang didn’t. We unpacked at ground, moved units on a low dolly, and swapped to a longer car variant the supplier had in fleet. No heroics—just an early phone call and a tape measure saved a weekend of rework.
The Parramatta brick marathon.
Everyone wanted a personnel & materials hoist “for flexibility.” The price tag wasn’t pretty. We went materials-only with a higher duty rating, staged pallets across levels, and tightened landing controls. The brickies stopped queuing, the PM stopped glaring at prelims, and the hoist faded into the background—exactly where you want it.
Safety controls that actually stick
You’ll see lots of glossy checklists. These few actions do the heavy lifting:
- Landing discipline: Proper, interlocked gates. No chain-and-star-picket improvisations.
- Load stability: Strap tall loads into pallet cages; keep the centre of gravity low.
- Housekeeping: Broom the car floor and landings every break. Offcuts slide under load and become projectiles.
- Exclusion zones: Mark and defend them. If pedestrian flow crosses your load path, you need a different plan.
- Weather watch: Wind and rain change friction and braking distances. Have thresholds and stick to them.
- Radios with a script: “Hoist ready?” “Level 3 clear?” Then you move. Not before.
When a hoist isn’t the only answer
Sometimes the best vertical plan is a team effort.
- Cranes: Great for big, infrequent lifts. Bad for drip-feed logistics.
- MEWPs (scissor/boom): Perfect for access and light materials at height; not a freight solution.
- Beam/duct lifters: Gold for final placement of units after the hoist does the heavy moving. If you’re going deeper, park an internal cross-link to beam lifter hire so readers can compare methods without leaving the host site.
For readers who want a broader primer on methods and gear, you can also add a neutral reference on building construction materials and lifting equipment. Aim for a non-vendor overview, so it stays educational.
Planning the installation and first lifts
Here’s a lean checklist I’ve used on projects where the site was tight and the neighbours twitchy:
- Confirm licences and roles (operator, spotter, supervisor). Keep copies on site.
- Lock in tie positions with scaffolders; get a drawing that shows every tie and landing gate.
- Verify the worst-case load fits through the door opening with real packaging, not just spec-sheet dimensions.
- Set the calling rules: who calls the car, who opens the gates, and how loads are staged at each level.
- Rehearse at ground the ugliest load—strap it, move it, stop mid-travel, resume. Find the snag now, not at Level 8.
- Brief daily on wind thresholds, housekeeping, and exclusion zones. Short, boring, consistent.
Budget and program: the unsexy advantages
In tenders, hoists look like line items. In delivery, they’re time machines. A dedicated vertical path:
- Removes a heap of double-handling.
- Gives trades predictable access windows.
- Reduces damage because the car is controlled, dry, and repeatable.
- Helps you scale: as levels finish, you can shorten travel or relocate the unit if the scaffold plan allows.
If you call that out in prelims—throughput assumptions, delivery windows, reduction in crane time—you don’t just meet the spec; you de-risk the timeline.
Final thoughts
The “right” material hoist is rarely the flashiest model; it’s the one matched to your ugliest load, your landing setup, and your crew’s rhythm. Decide early whether you need materials-only or personnel & materials, verify licence classes, and build margin into capacity and car size. Keep landing discipline tight, keep the car turning over, and let the CH Hoists fade into the background. That’s the goal: a boring, reliable vertical conveyor that makes everything else look easy.


Sign in to leave a comment.